4 Cluster Administration
To access your Cluster Administration features, log into the Web Portal on the server. The description in this guide presumes that you are signed in as the Master Administrator (aka., Cluster Administrator, Server Administrator). Some of the options listed may not be available if you are logged in with different permissions (e.g. Delegated Administrator). In this document the Triofox will also be referred to as simply, Cluster Server.
Tip
The Web Portal URL is the server’s DNS name, the IP Address or local host if you are on the server console.
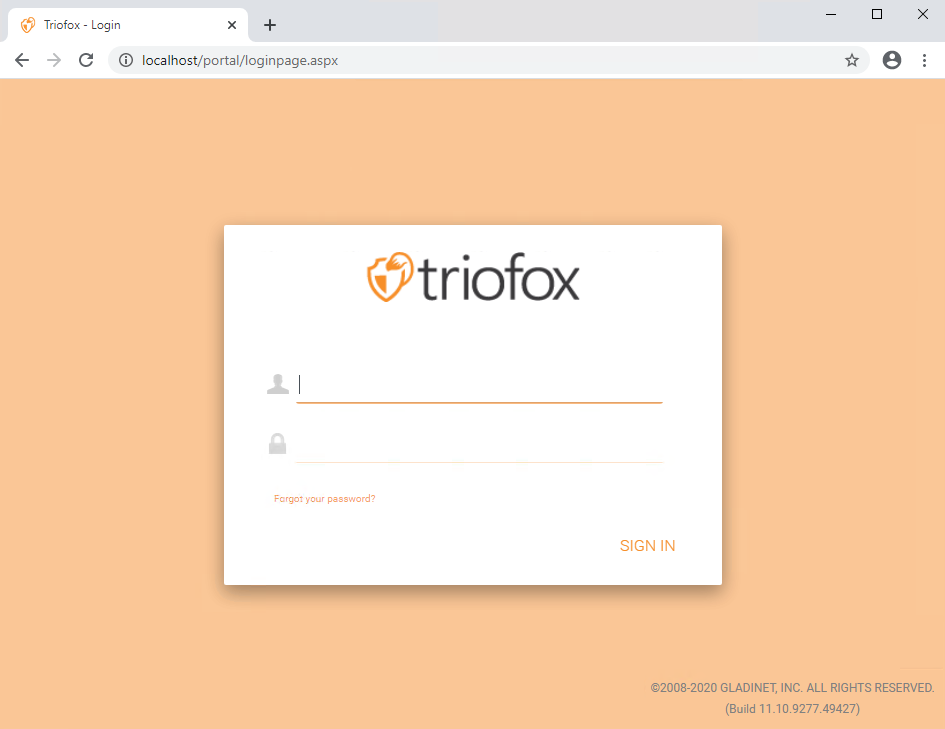
LOGIN SCREEN
Note
At the bottom of the Login screen, there is version information, which will be useful to see which version you have installed.
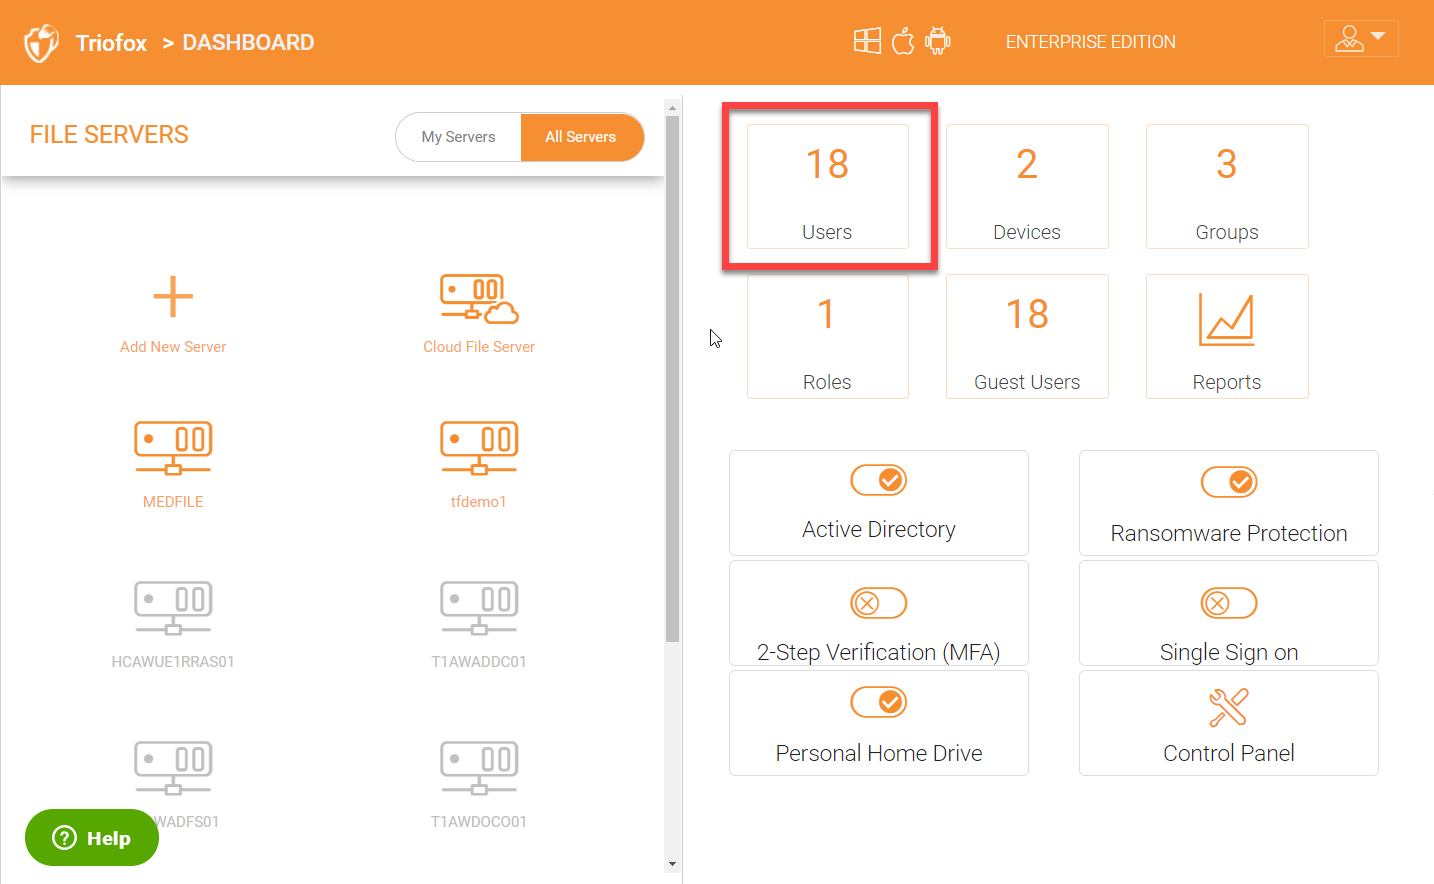
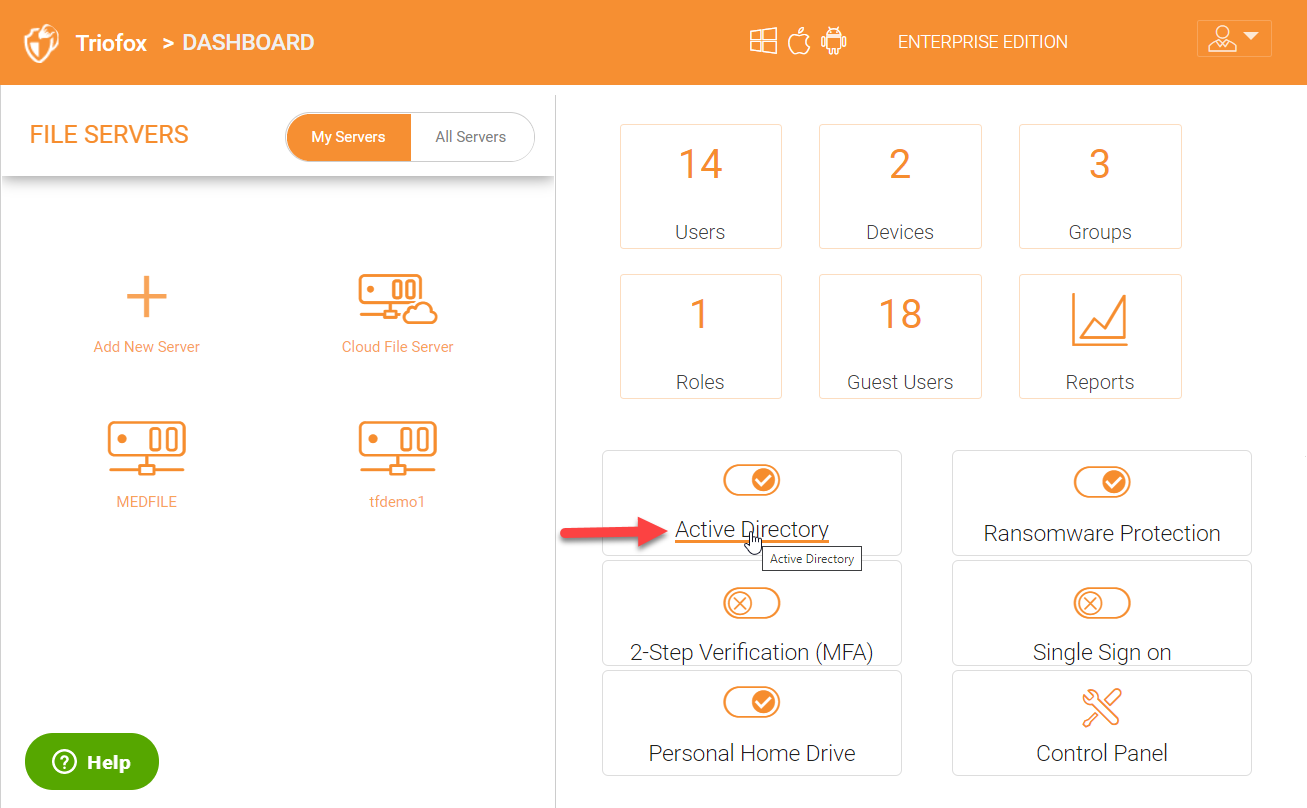
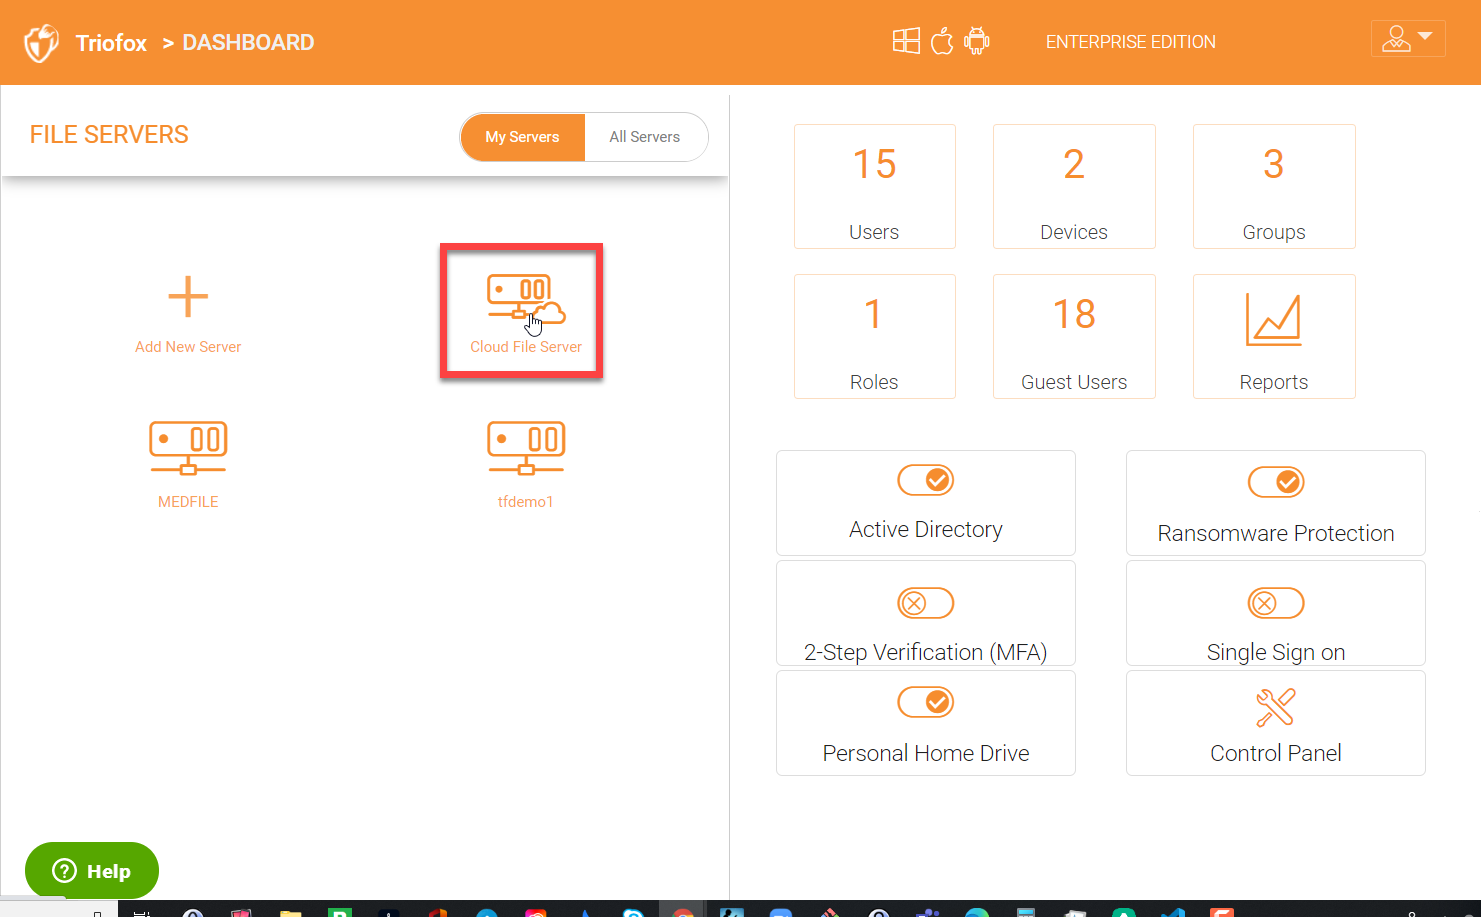
CLUSTER ADMINISTRATOR DASHBOARD
The following graphic shows the the Administrator Dashboard and its sub sections. Please refer to it as you read this guide to determine how to access and configure various features. After logging in, you will see the Cluster Administrator Dashboard.
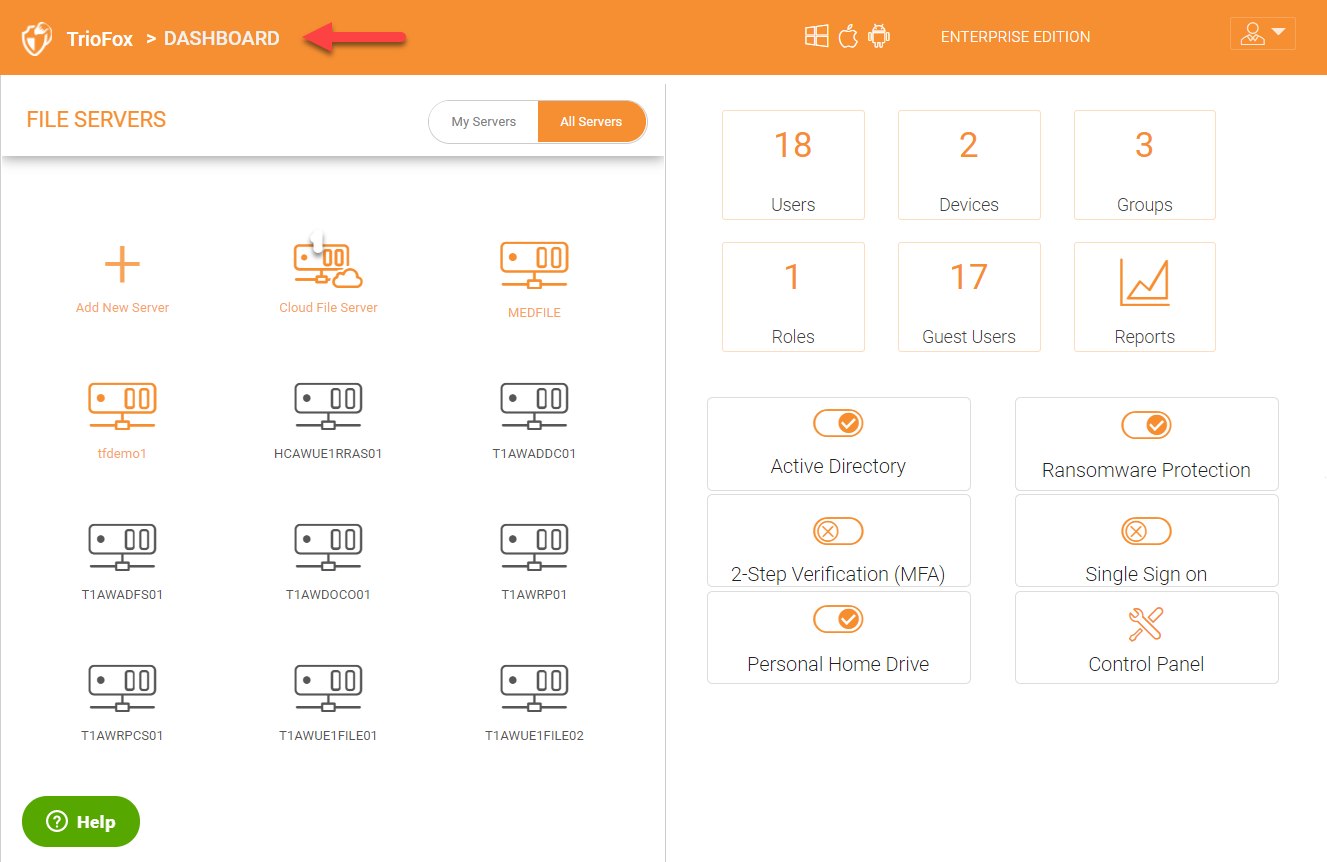
ALL SERVERS VIEW
After you are logged in, you will see all the servers in your environment, including the Triofox server and any other servers joined to the same domain as the configured Active Directory environment.
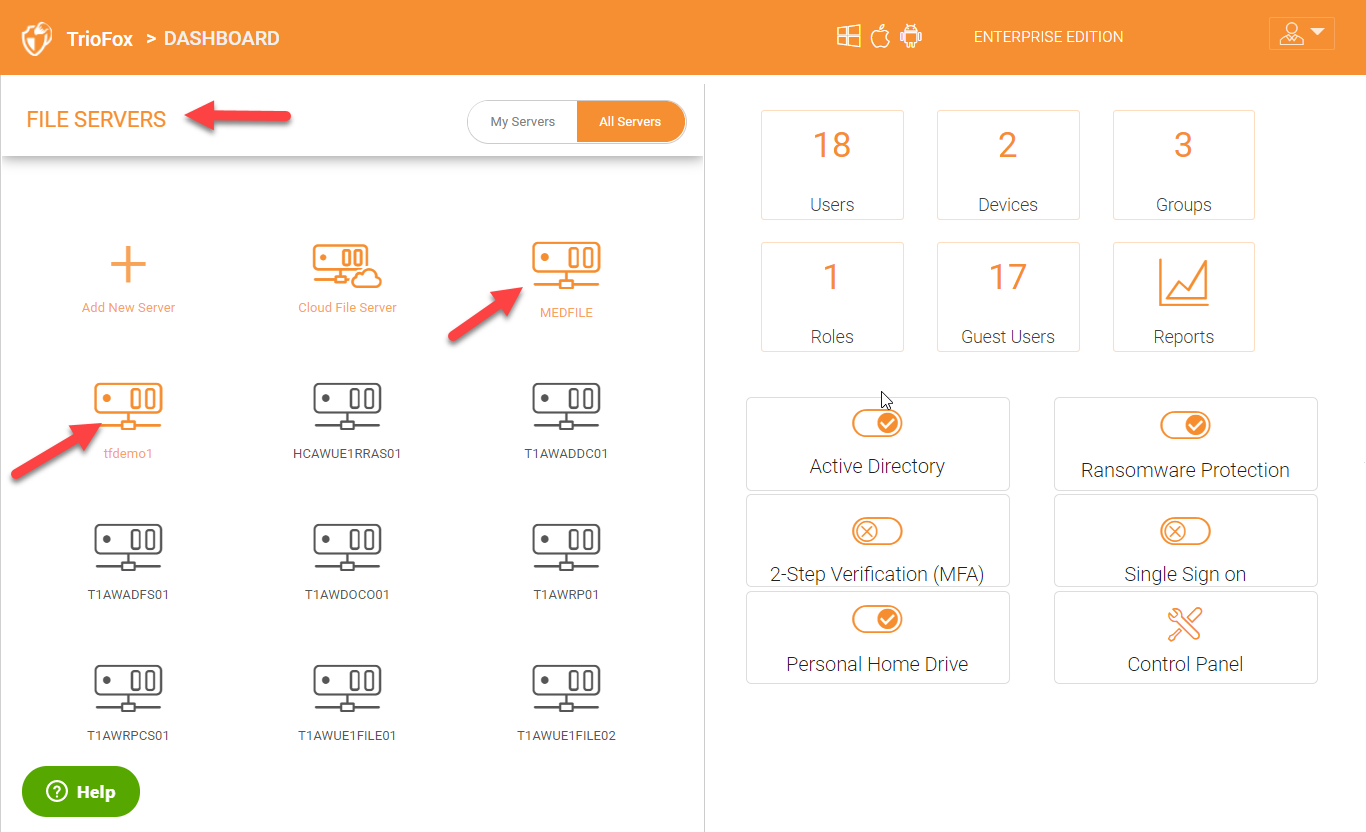
You can click on the file server(s) that you need to mobilize and enable secure remote access to.
4.1 File Servers
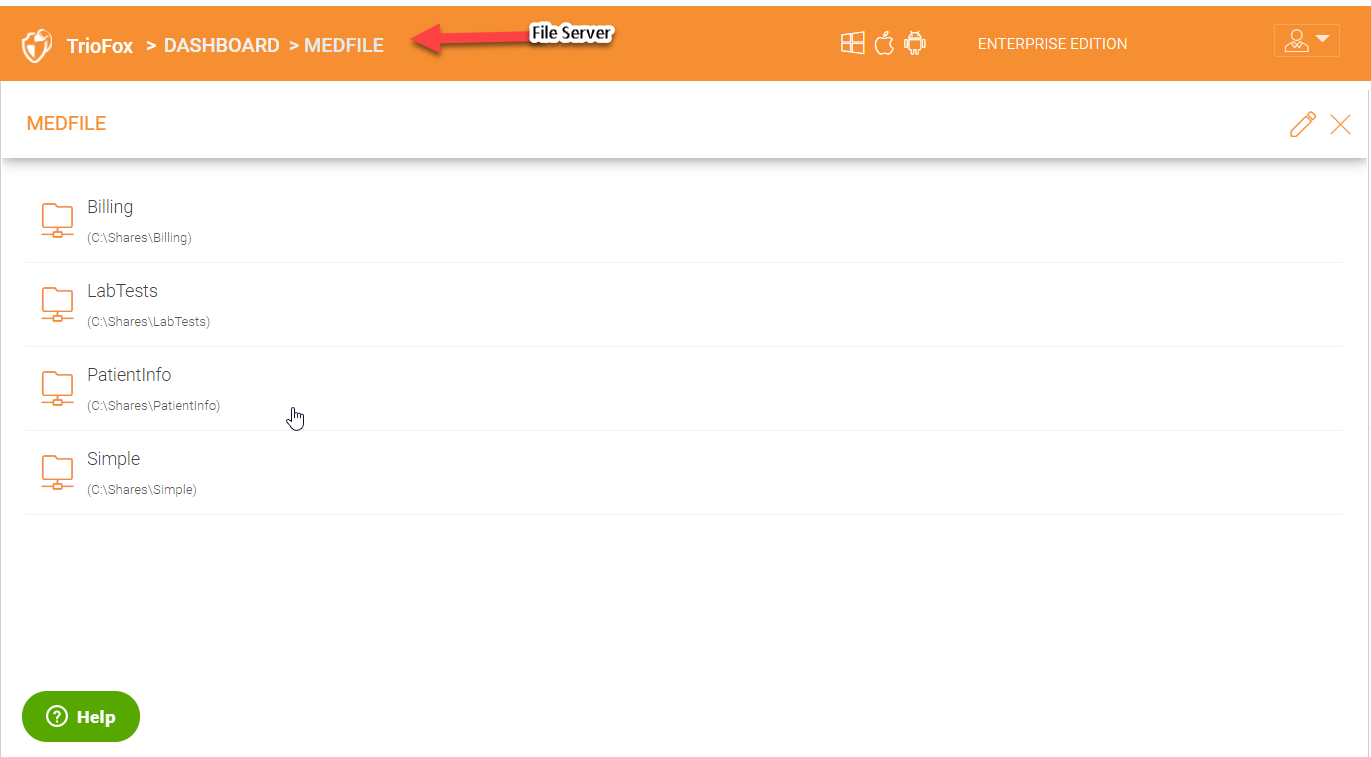
CHOOSE FILE SERVER(S)
Click the file server(s) that your users need to access from home or remote locations. It will list all the shares on that file server as show below:
Choose share(s) from the list of displayed shares:
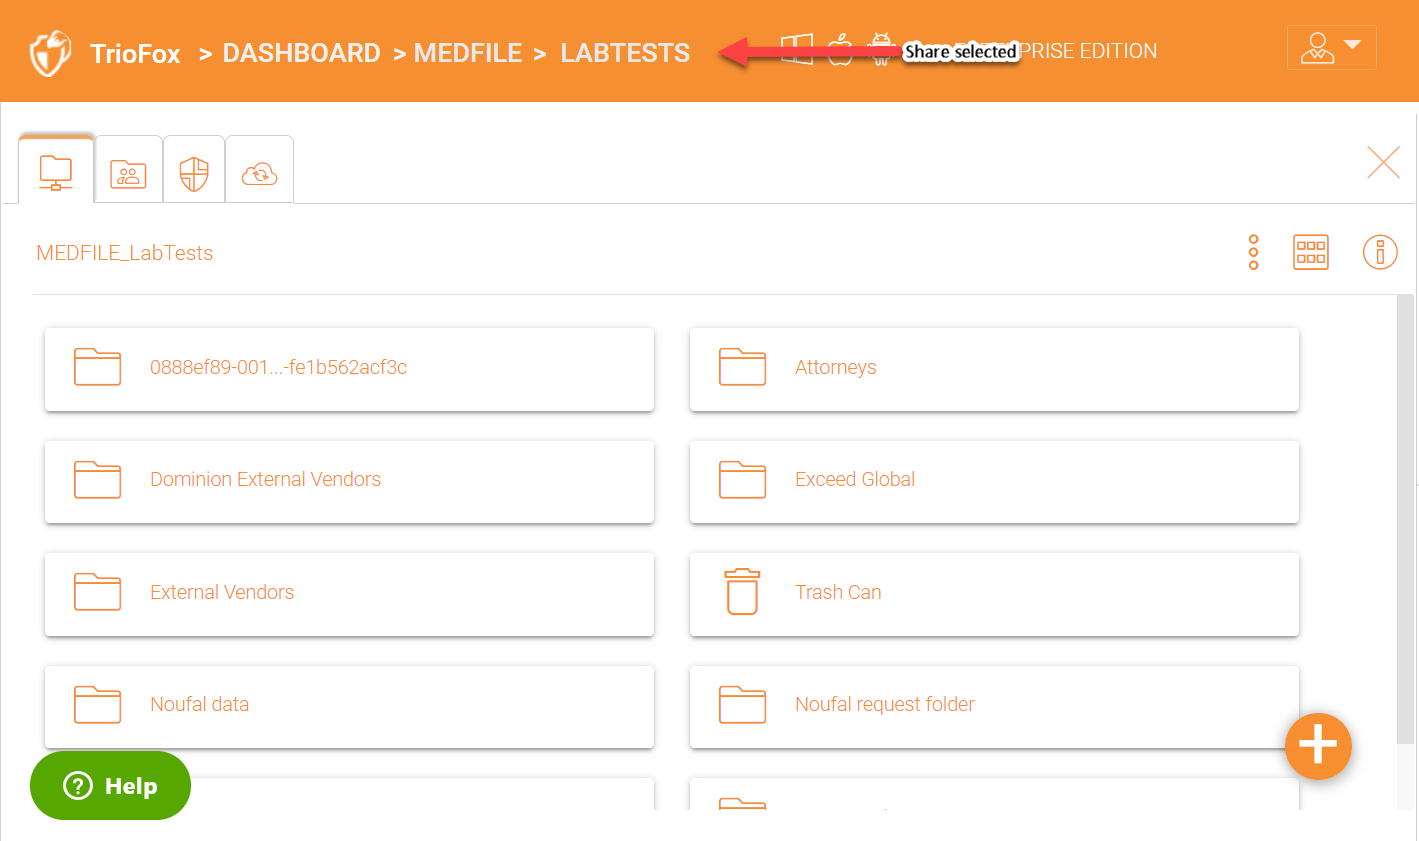
FILE SERVER SHARE OPTIONS
You have many options available to configure different settings for the file server shares you have chosen for remote access.
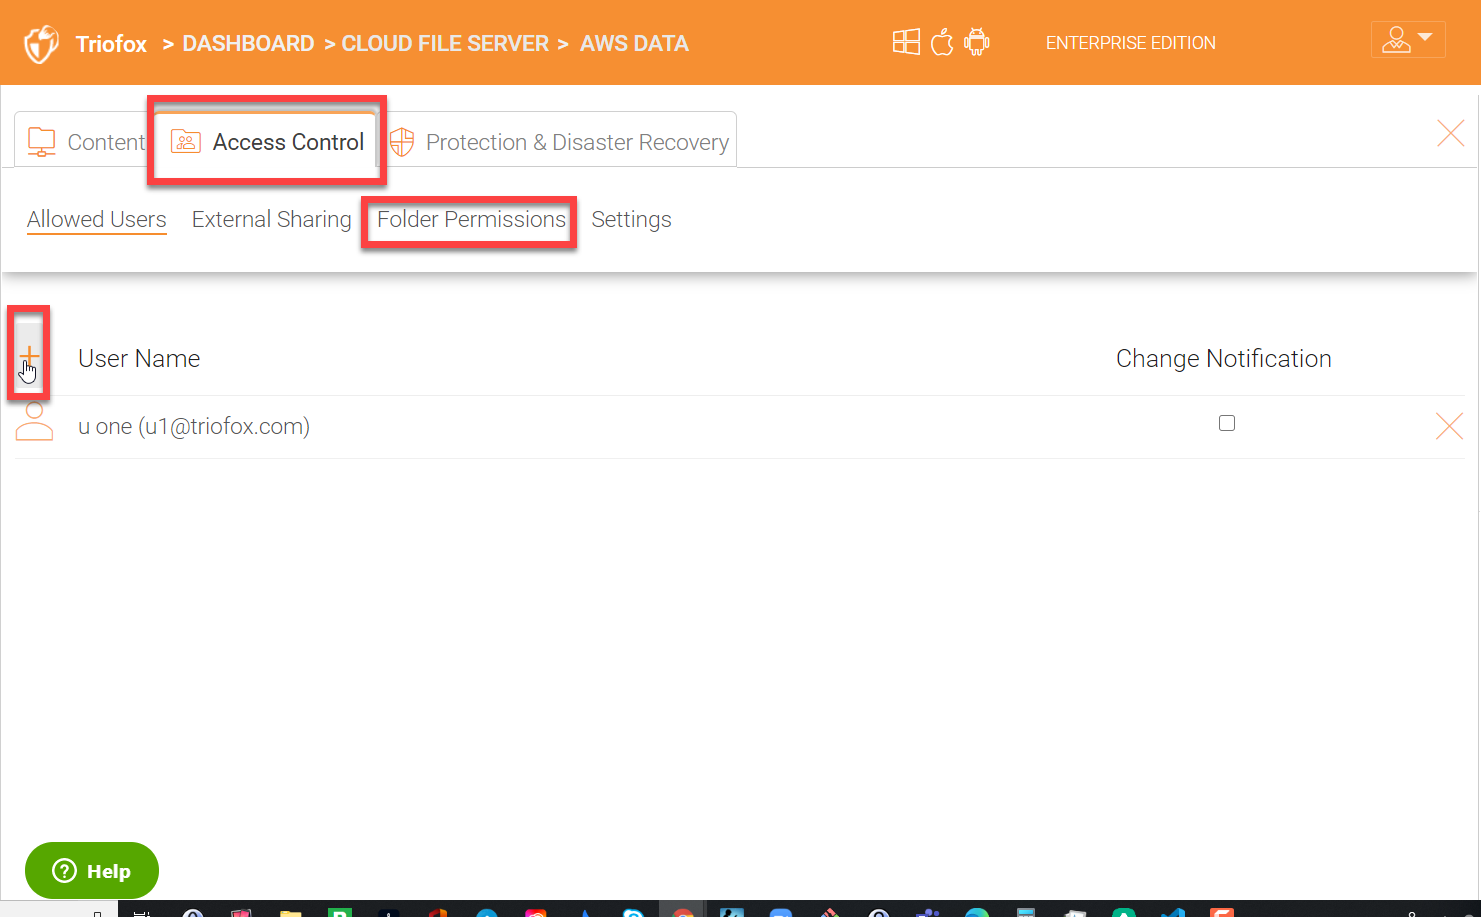
ACCESS CONTROL
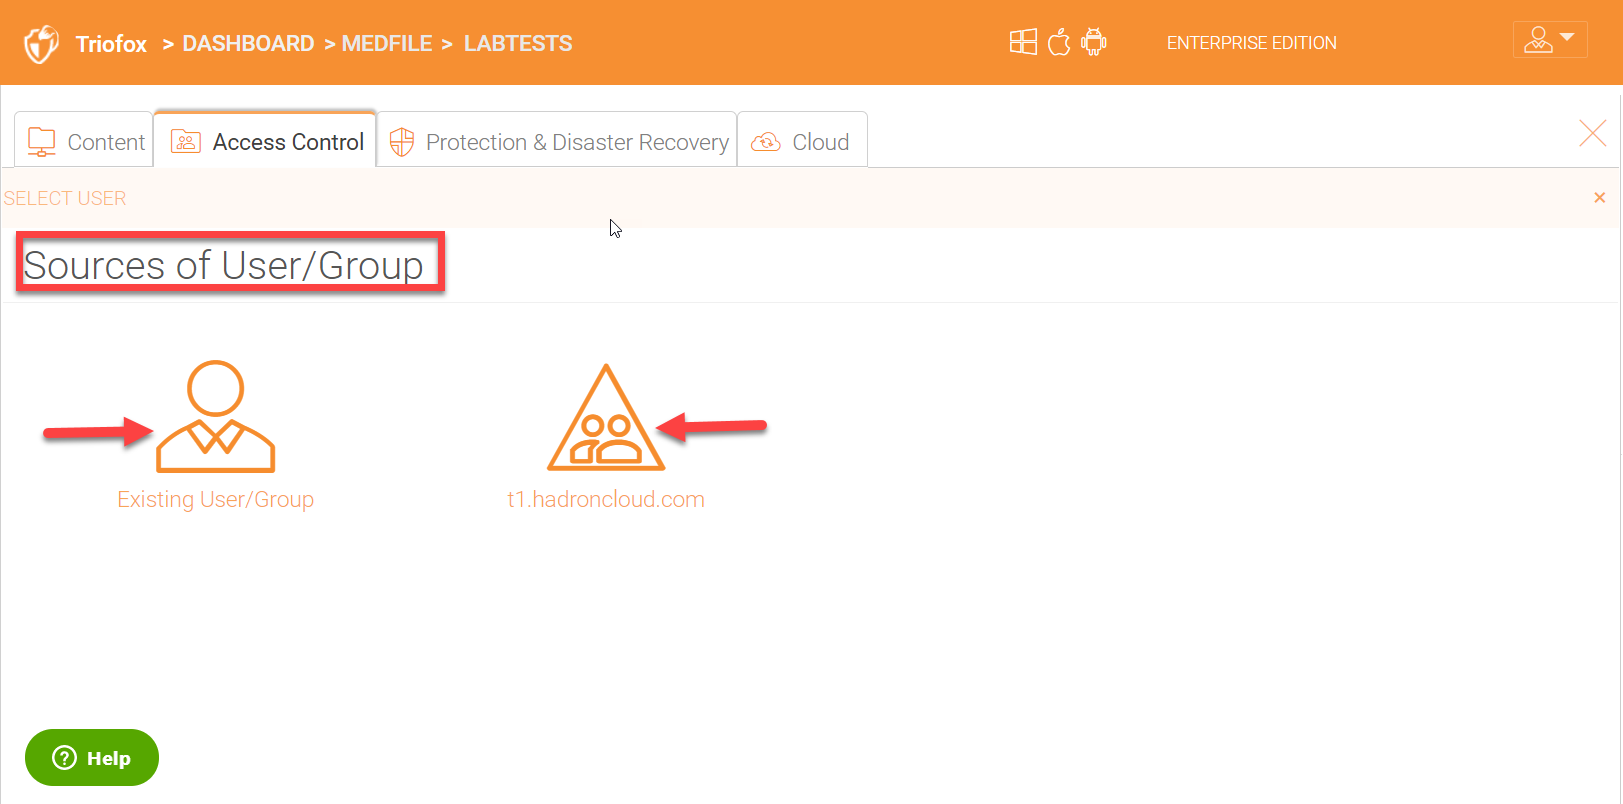
In order to give access to users from home and remote locations, add groups (for example, Active Direcotory Security Groups) or individual users who need access.
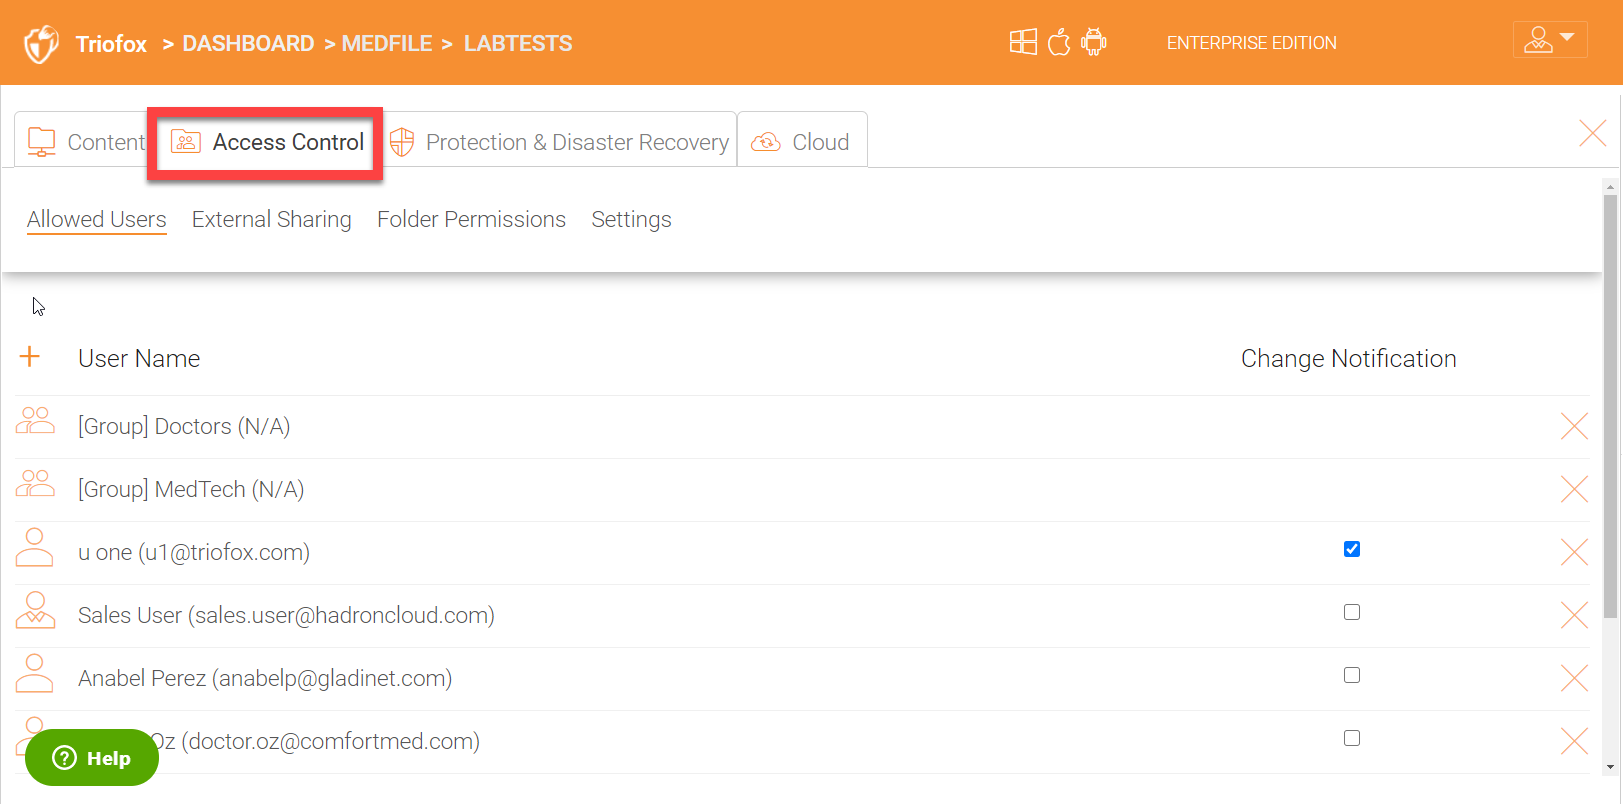
Allowed Users
Click the + icon to select users or groups.
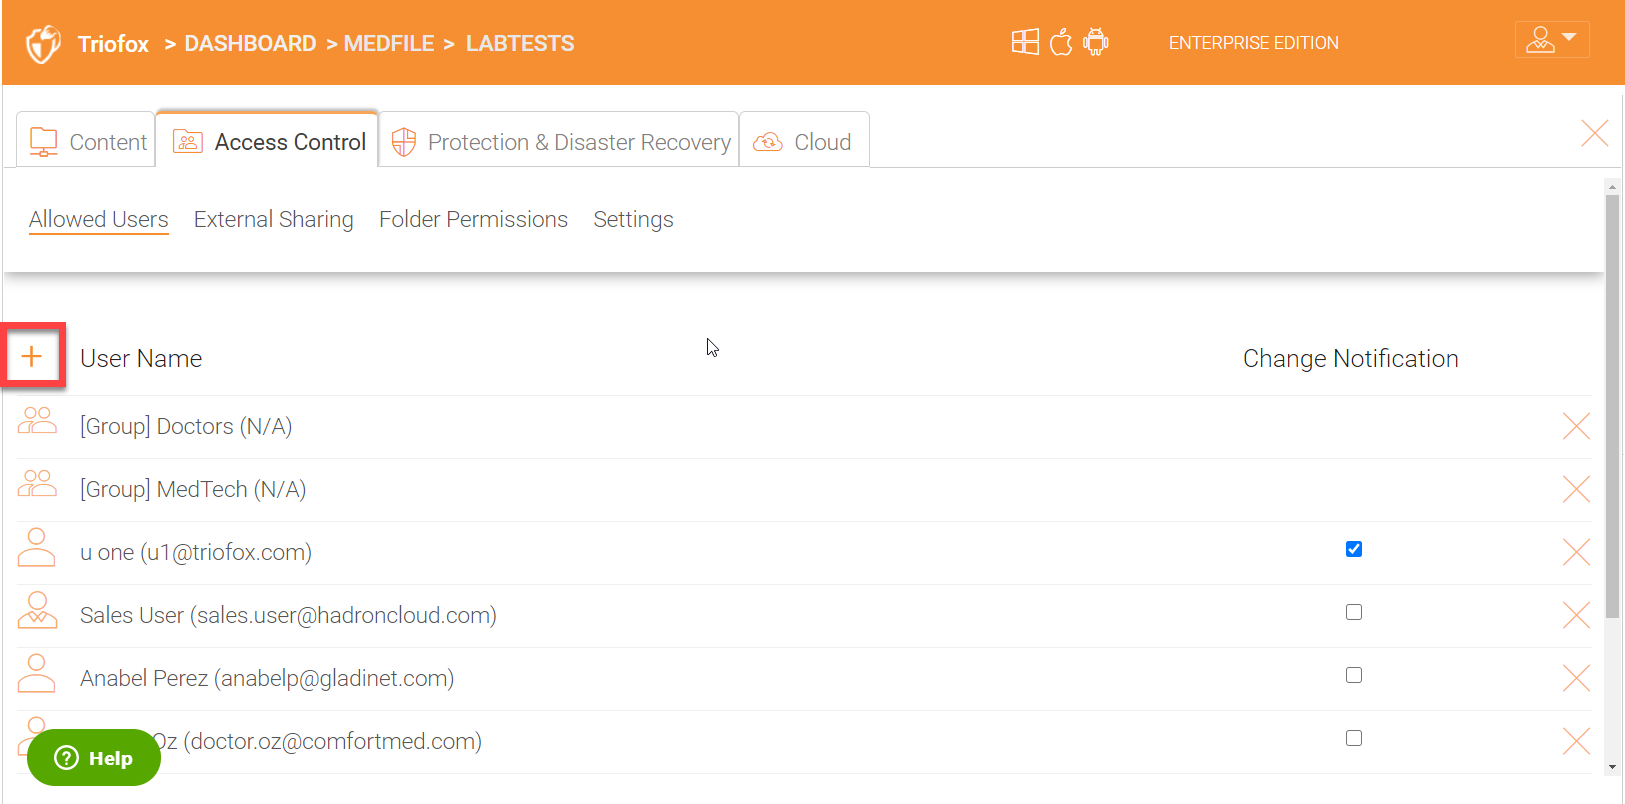
You can select users or groups either by clicking on Existing User/Group option or by browsing to your Active Directory domain if you have already integrated your active directory environment.
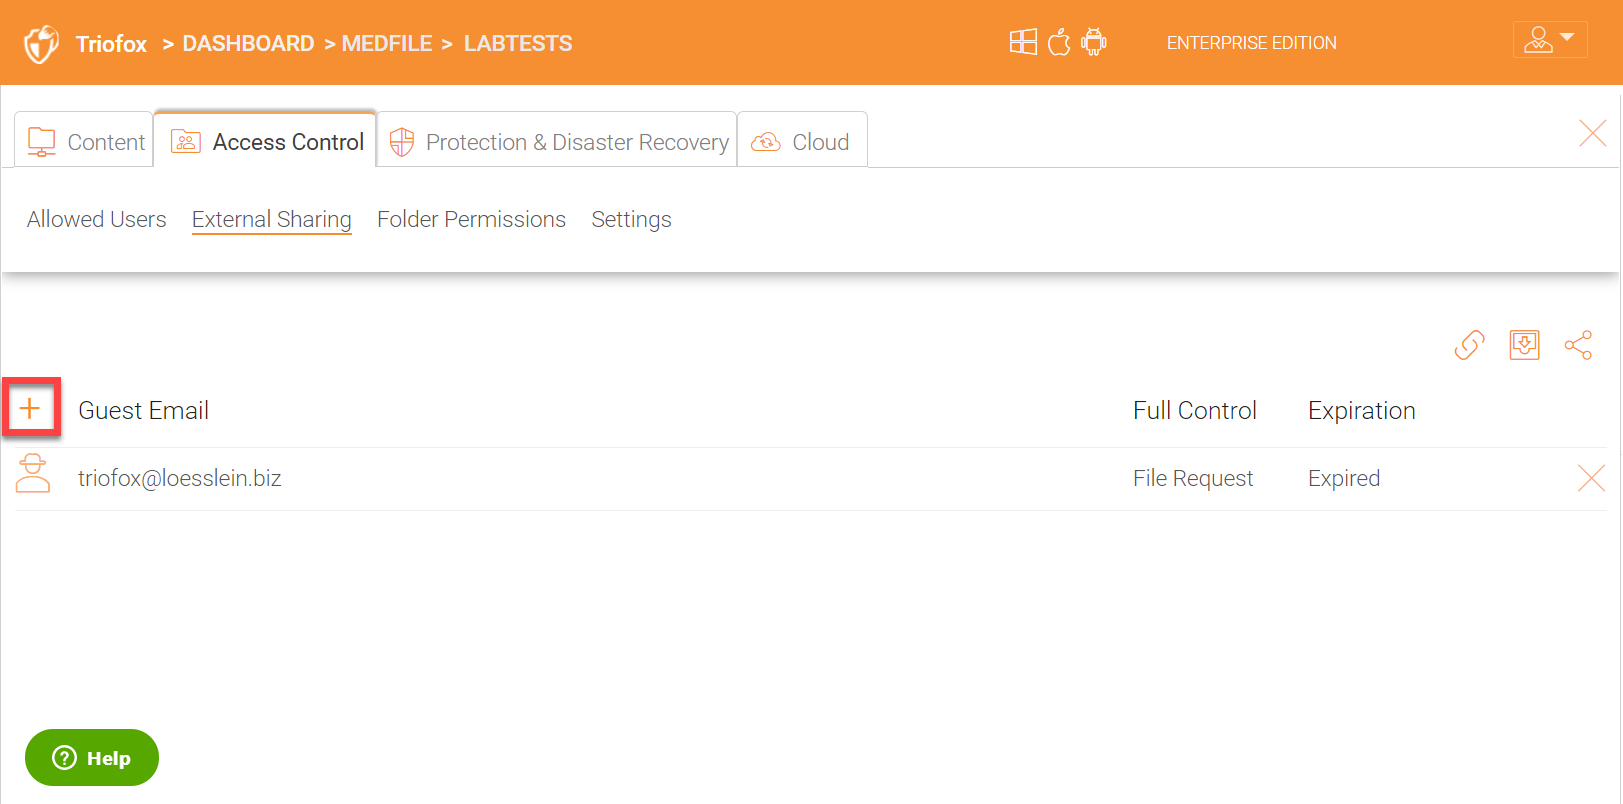
External Sharing
Under external sharing tab for the share, you can invite guest users to this share. Guest users have read and write permissions to the share. For every licensed user, you can create three free guest user accounts.
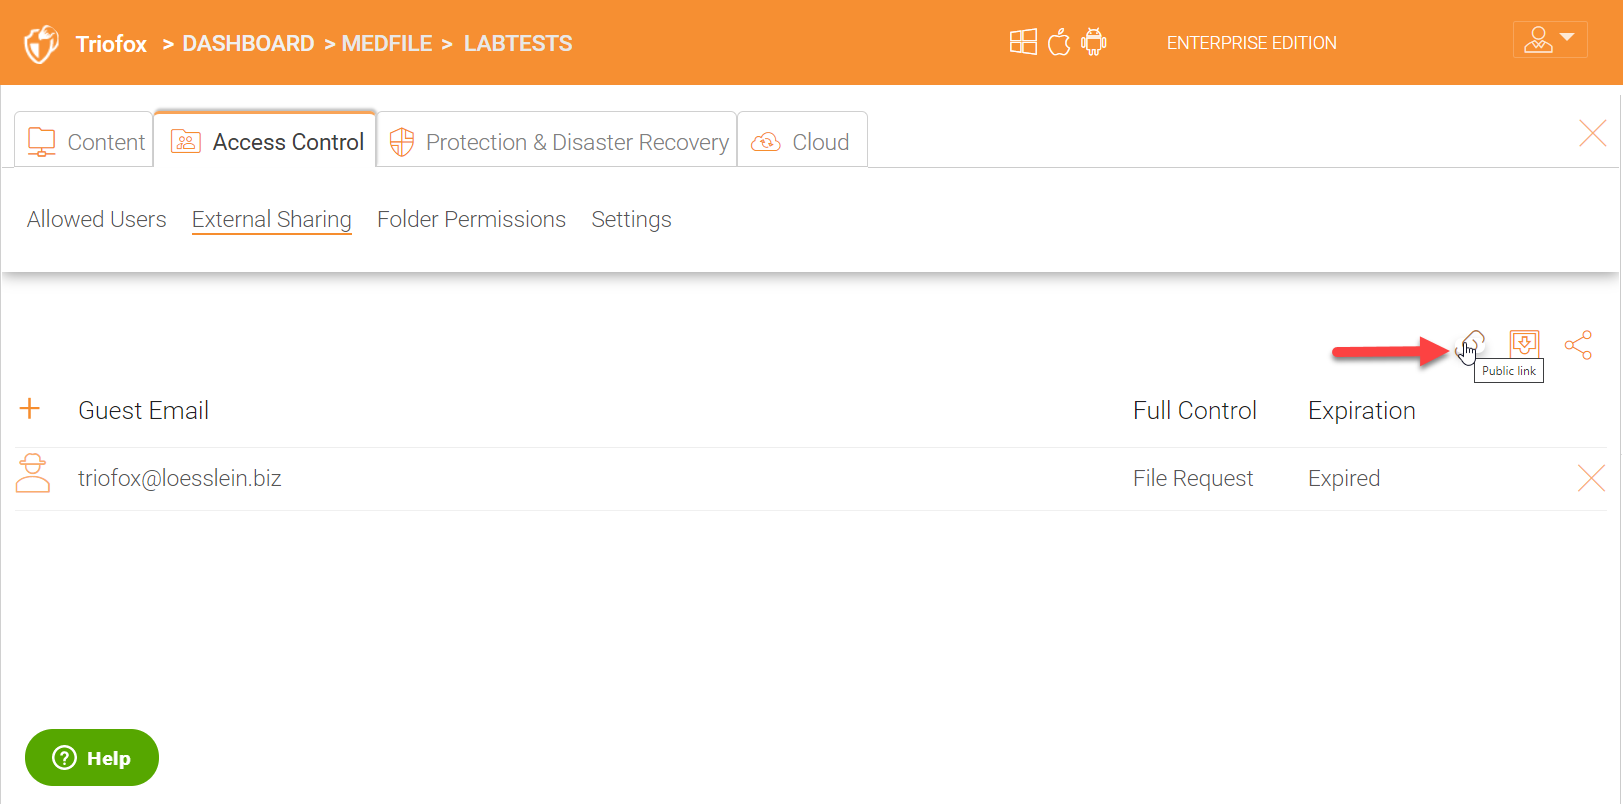
Public Link(s)
You can also generate a public link which you can paste it in an email for distribution if desired.
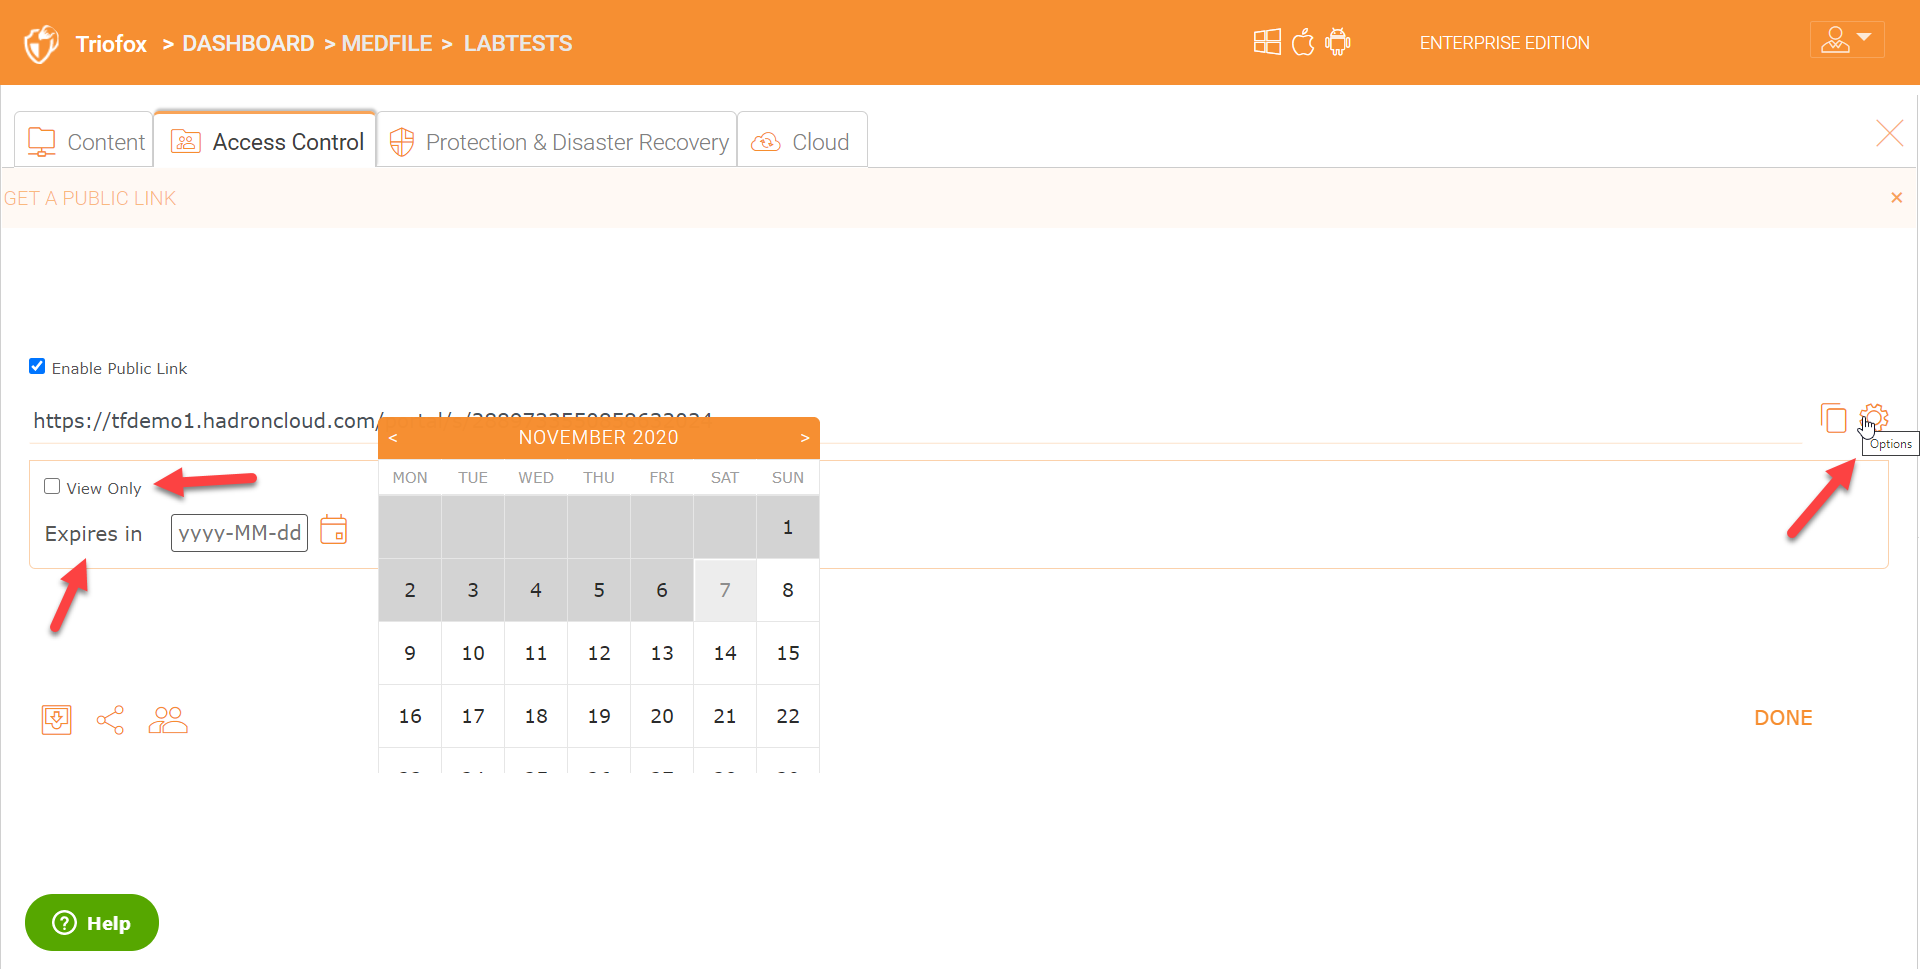
For public links, you can click on the options gear icon to specify expiration and also make it ‘View Only’ in which case users will not be able to download the content. They can only view it inside the browser.
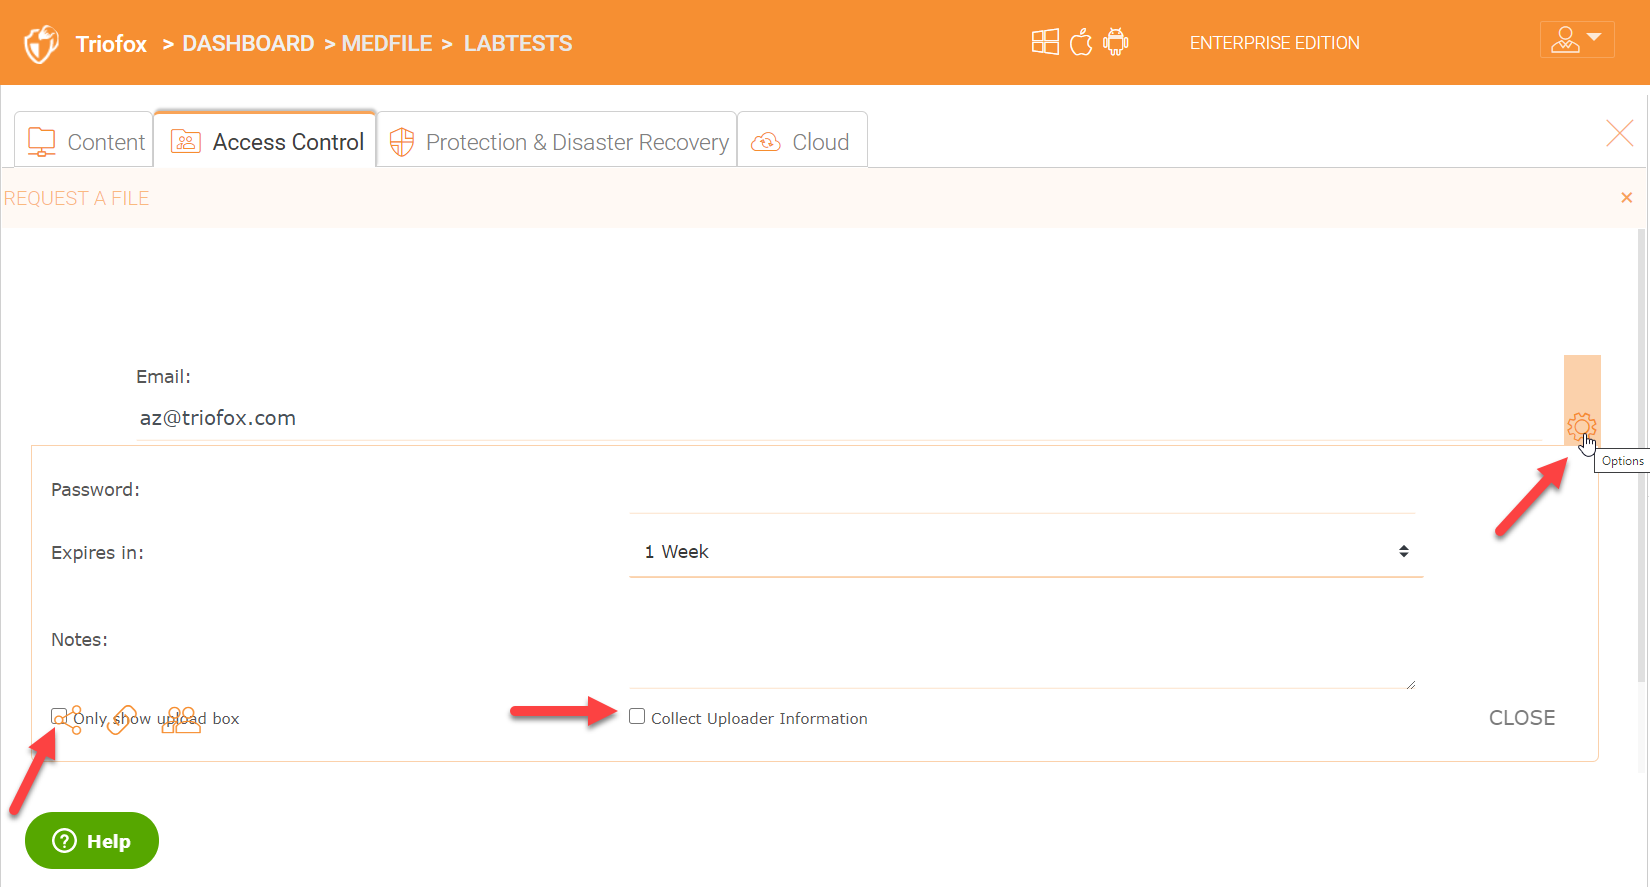
Request a File
If there is a need to to just request files into a folder from external users who are not company employees, you can choose the ‘Request a File’ icon. This feature is great if the users just need to receive files into a folder from external non-company employees. Request a file from external users is free and unlimited.
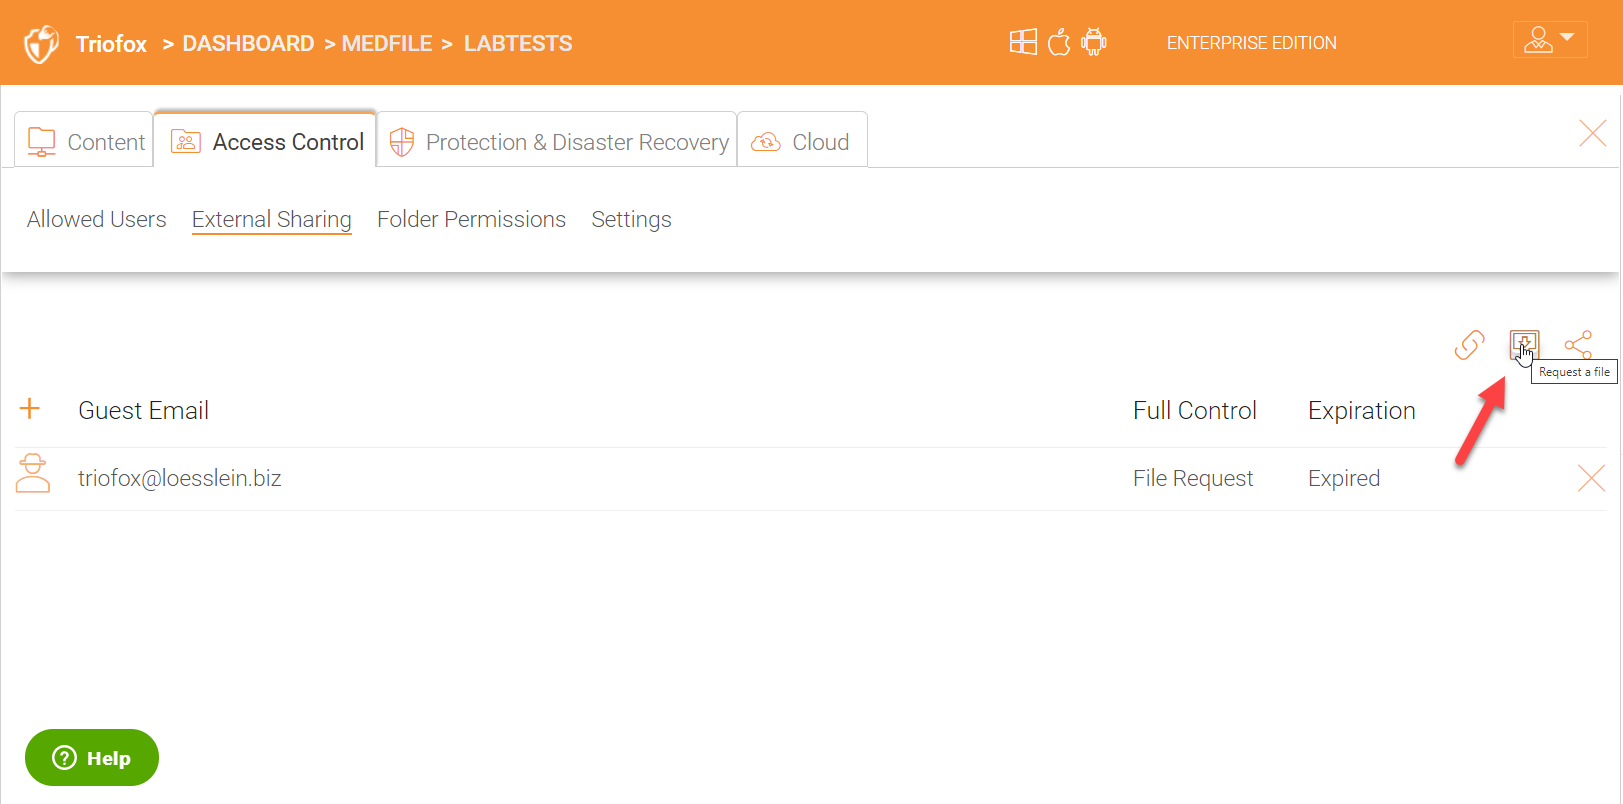
When requesting files, you can also password protect the secure public link and also specify an expiration time. It is a good practice to password protect all public links and also let them automatically expire upon completion of tasks. You can also add some notes in the notes section to let the user know the intended purpose. The other two options are ‘Only show upload box’ which will only allow users to upload files into the link shared with them and ‘Collect Uploader Information’ which will force the recepients to also provide their names and company information before they are allowed to upload anything into the request folder link.
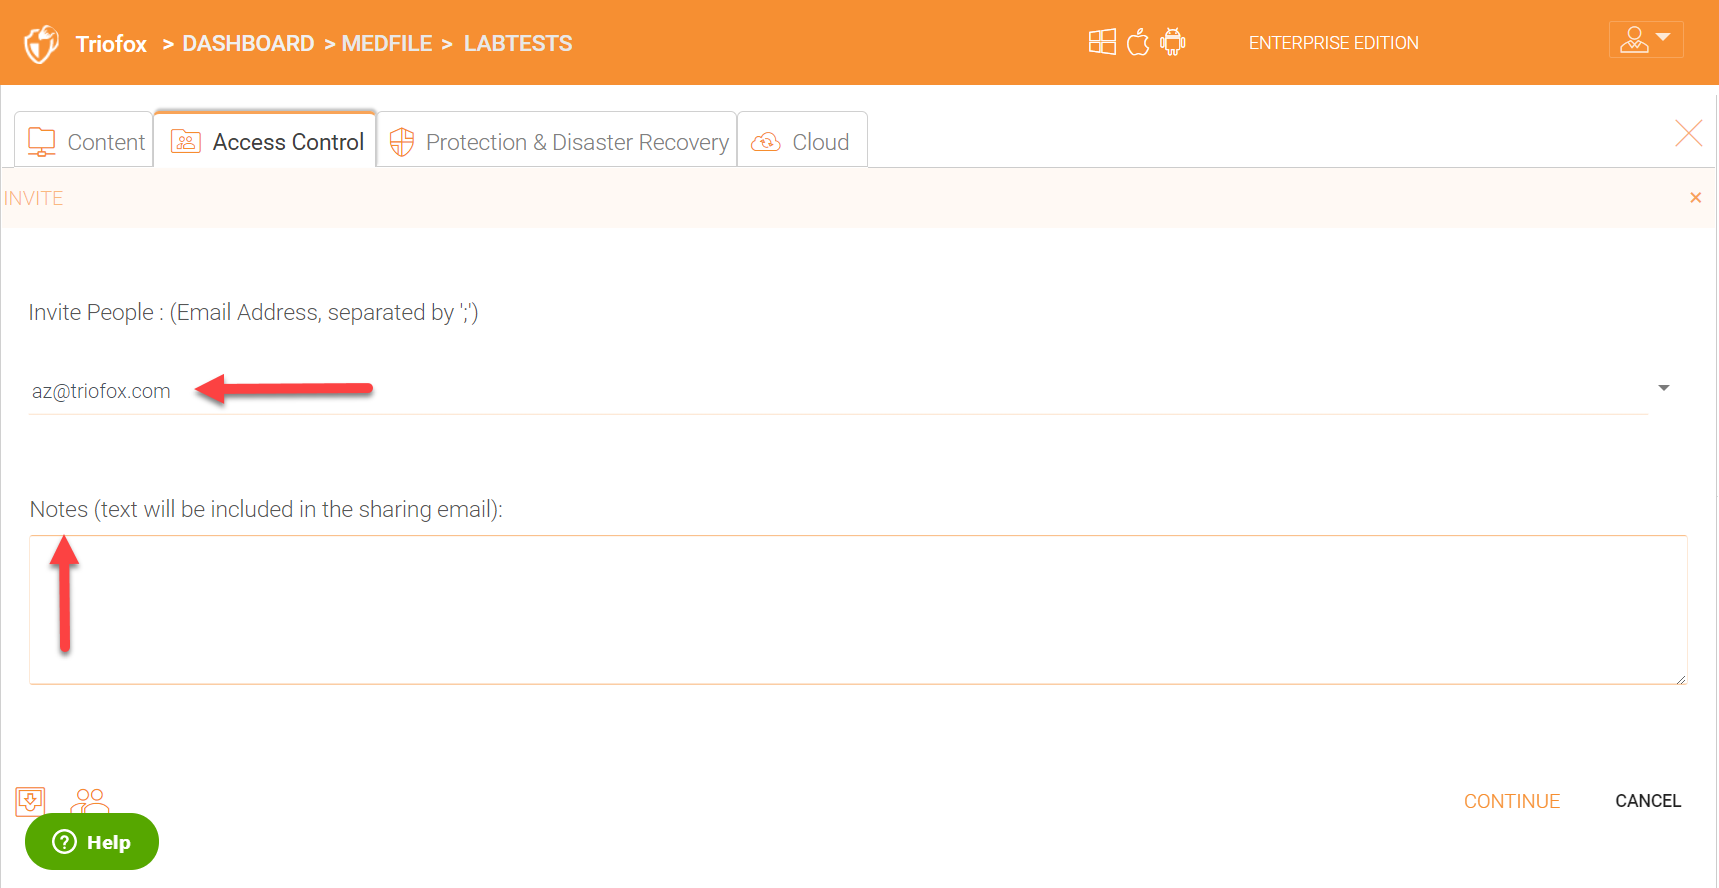
Share (Invite)
You can also just share (invite) users to any share/folder also using the ‘Invite’ option.

You can share the folder with a single or multiple users and also add some notes in the ‘Notes’ section.
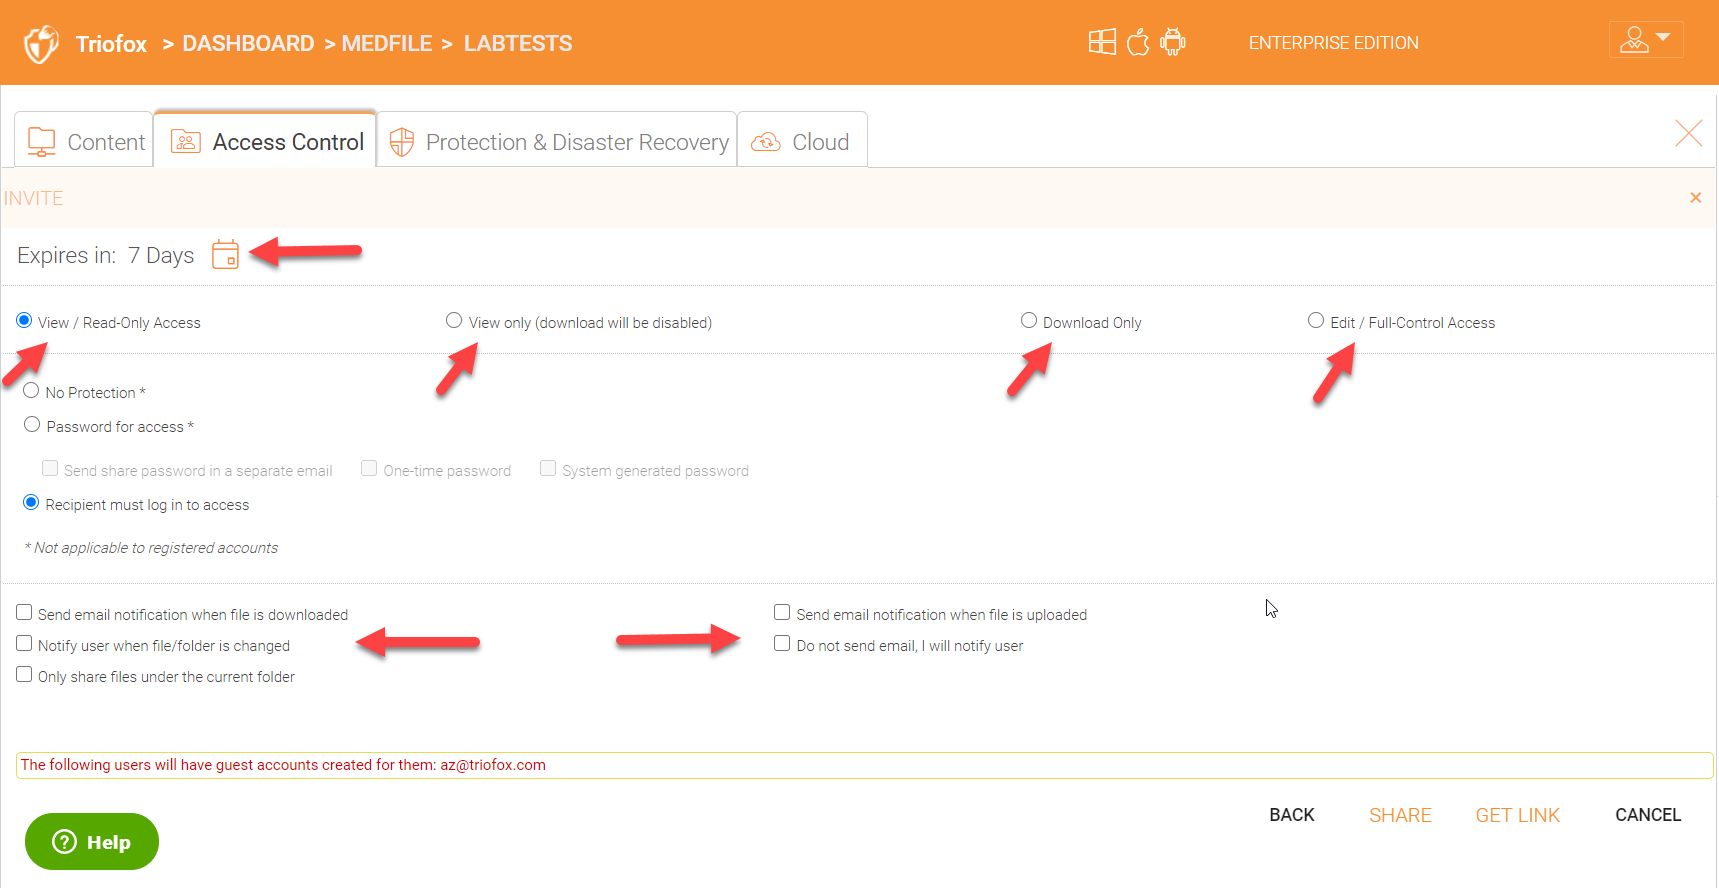
Some other options when sharing folders are shown in the screenshot below. For example, you can select an expiration time, make the share view/read only, view only, download only, or give the user full read and write permissions. You can also choose to password protect the share and subsribe to different notifications.
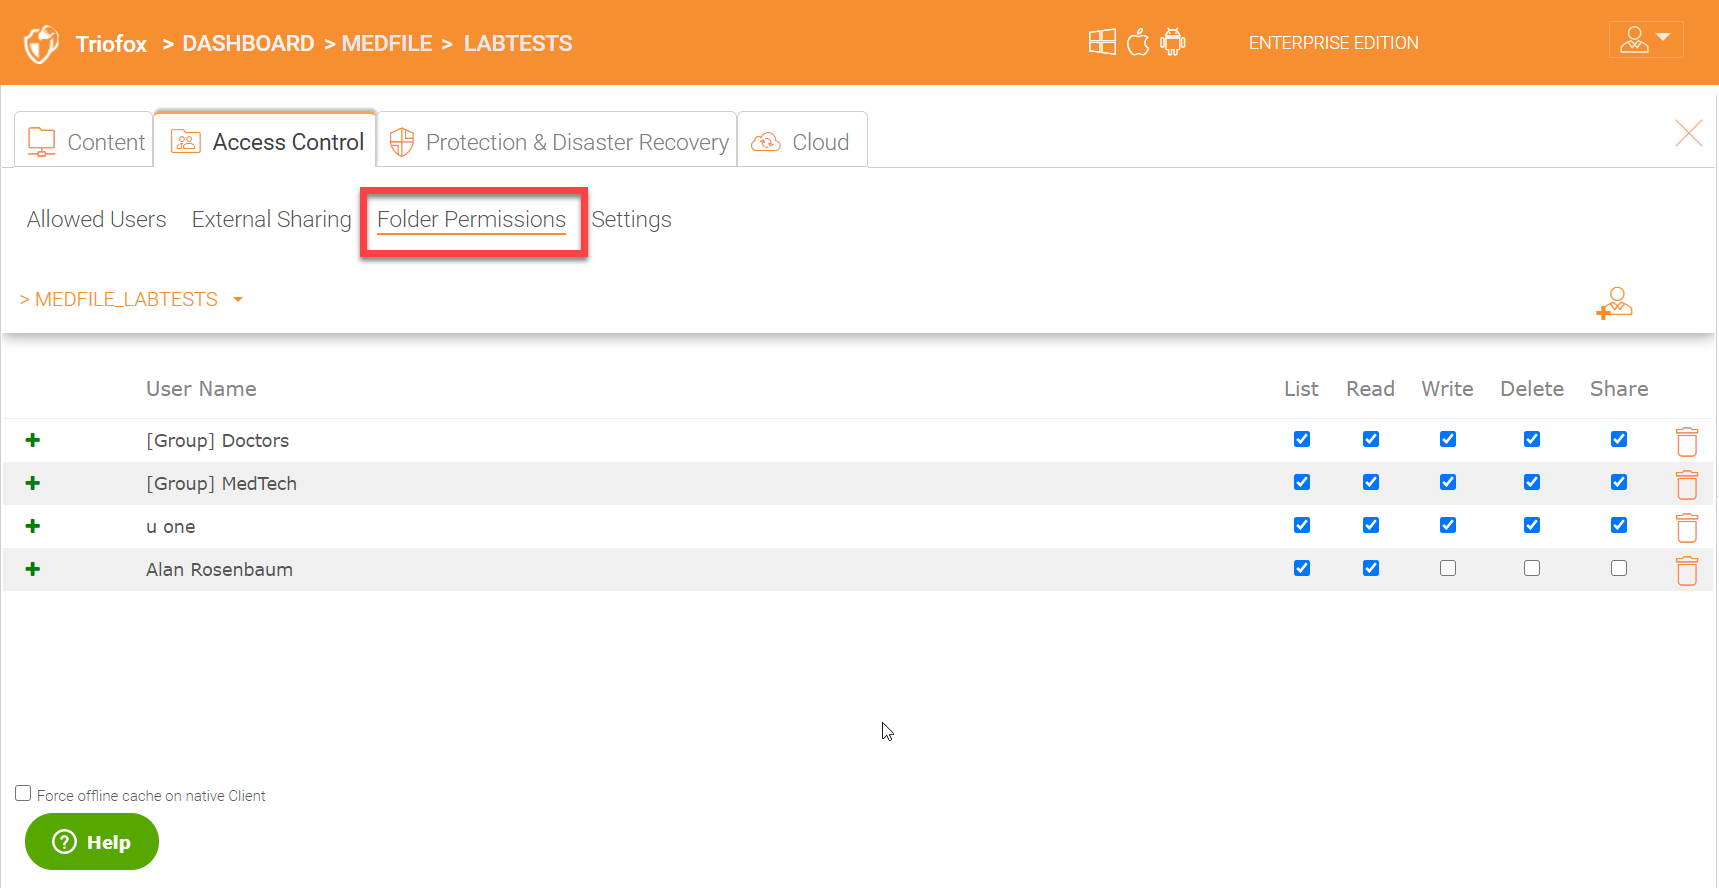
Folder Permissions
Under folder permission you can define more granular permissions. Mostly you don’t need to specify anything here for a file server share which already has security (NTFS) permissions assigned for the share. Triofox will read the security permissions directly from the share. You can specify granular permissions for normal folders if desired which are not joined to any Active Directory domain.
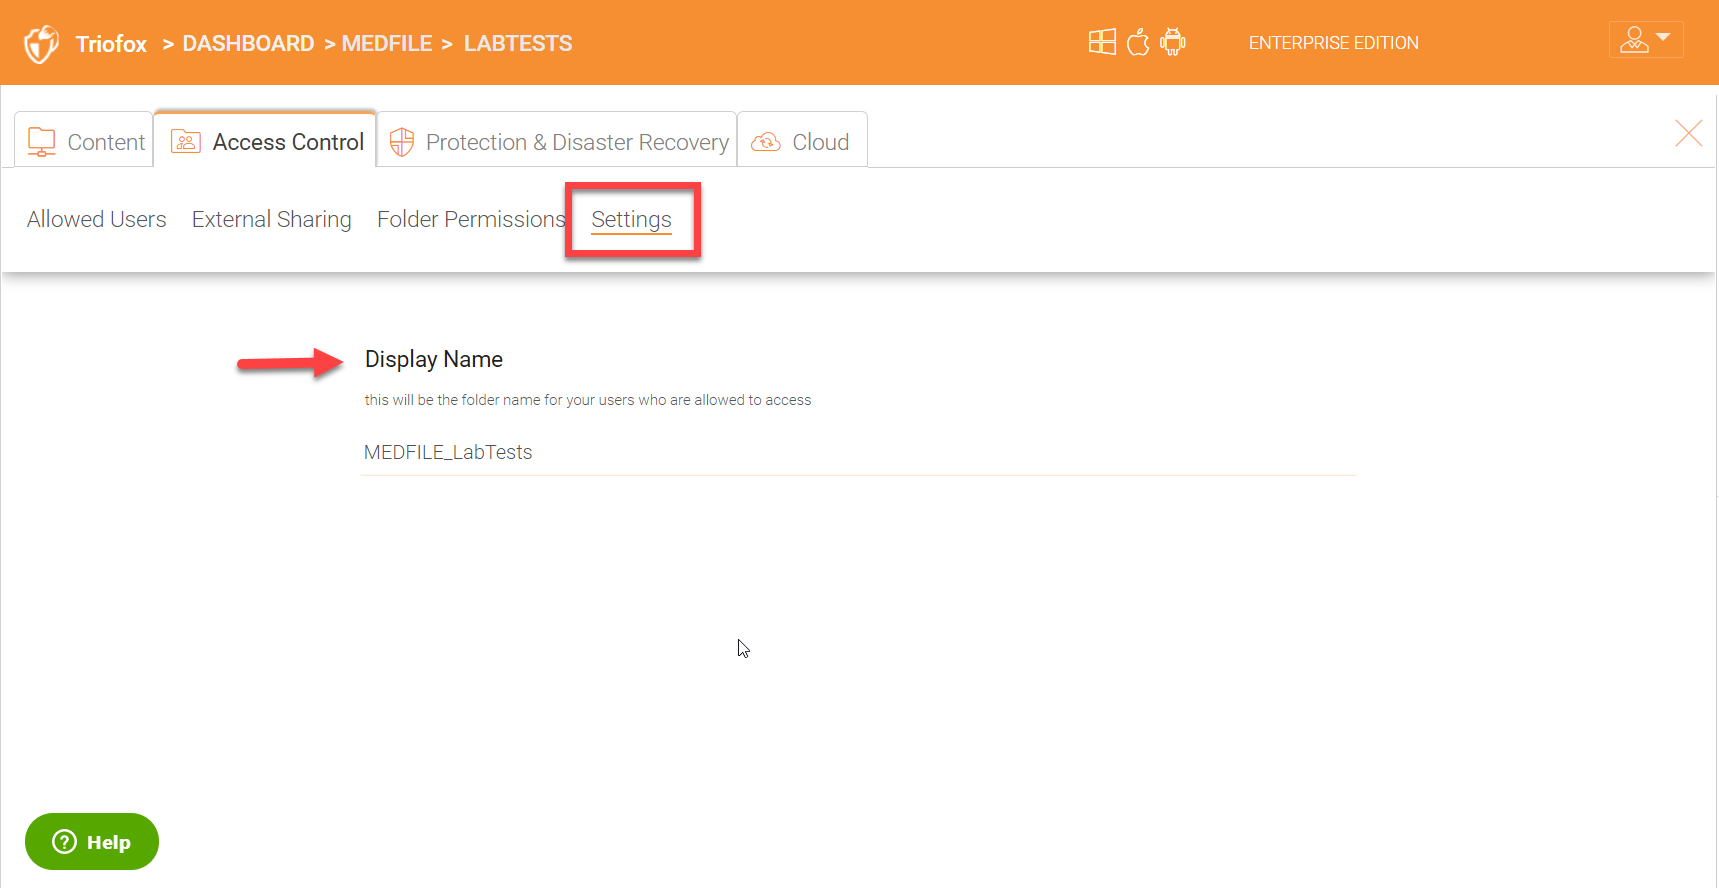
Settings
You can change the display name for the share under the ‘Settings’ tab.
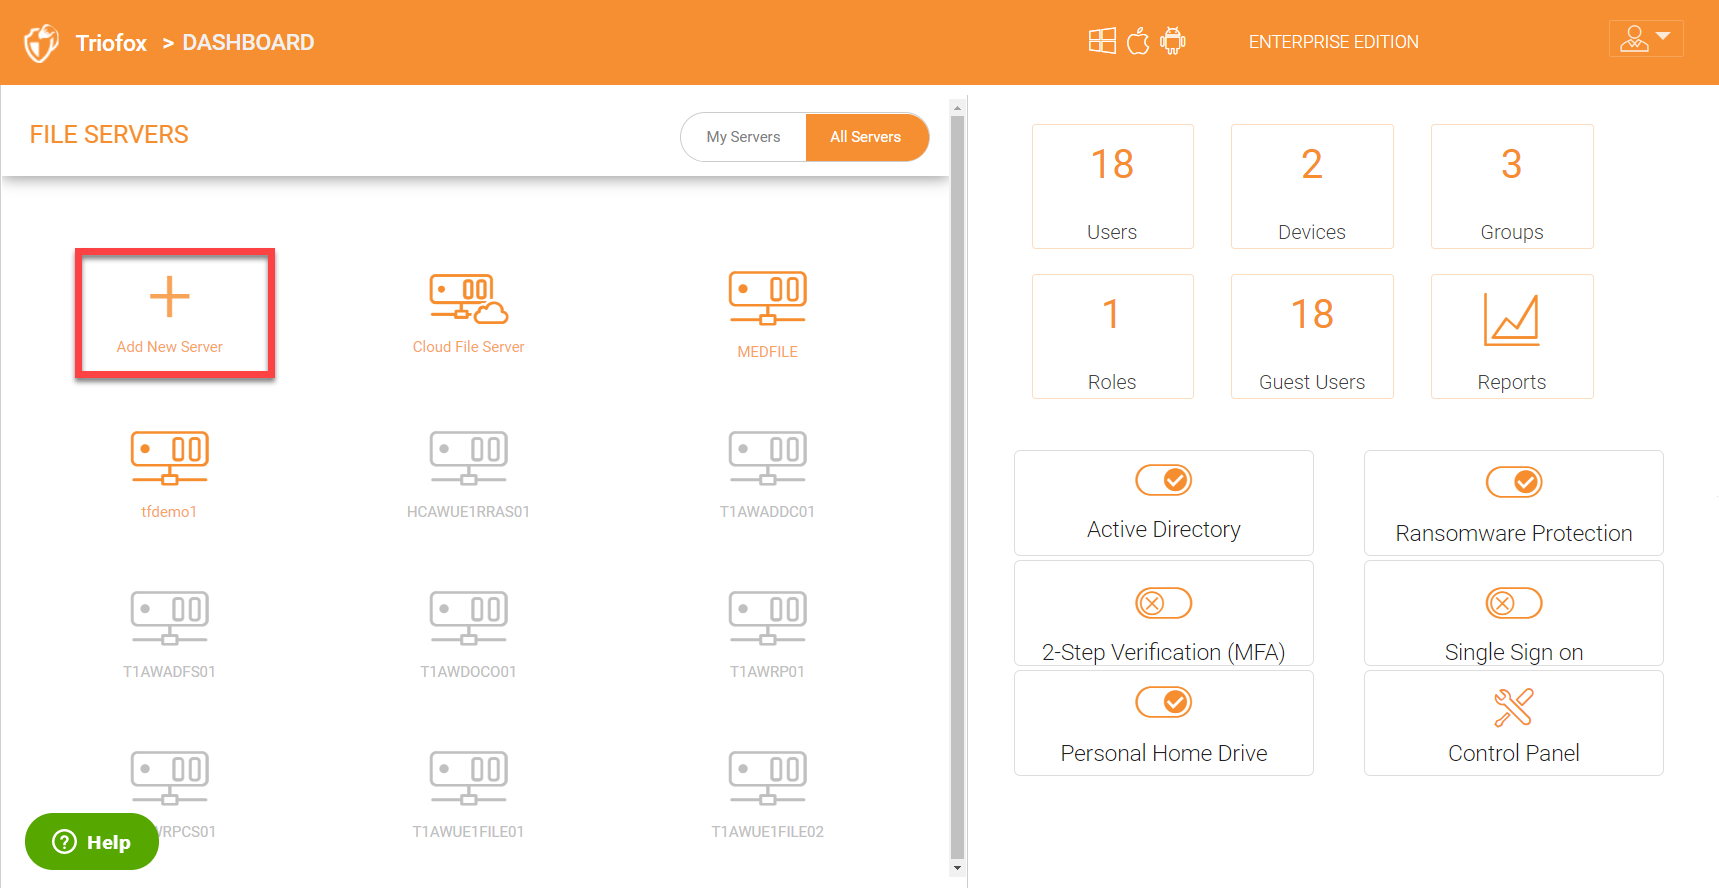
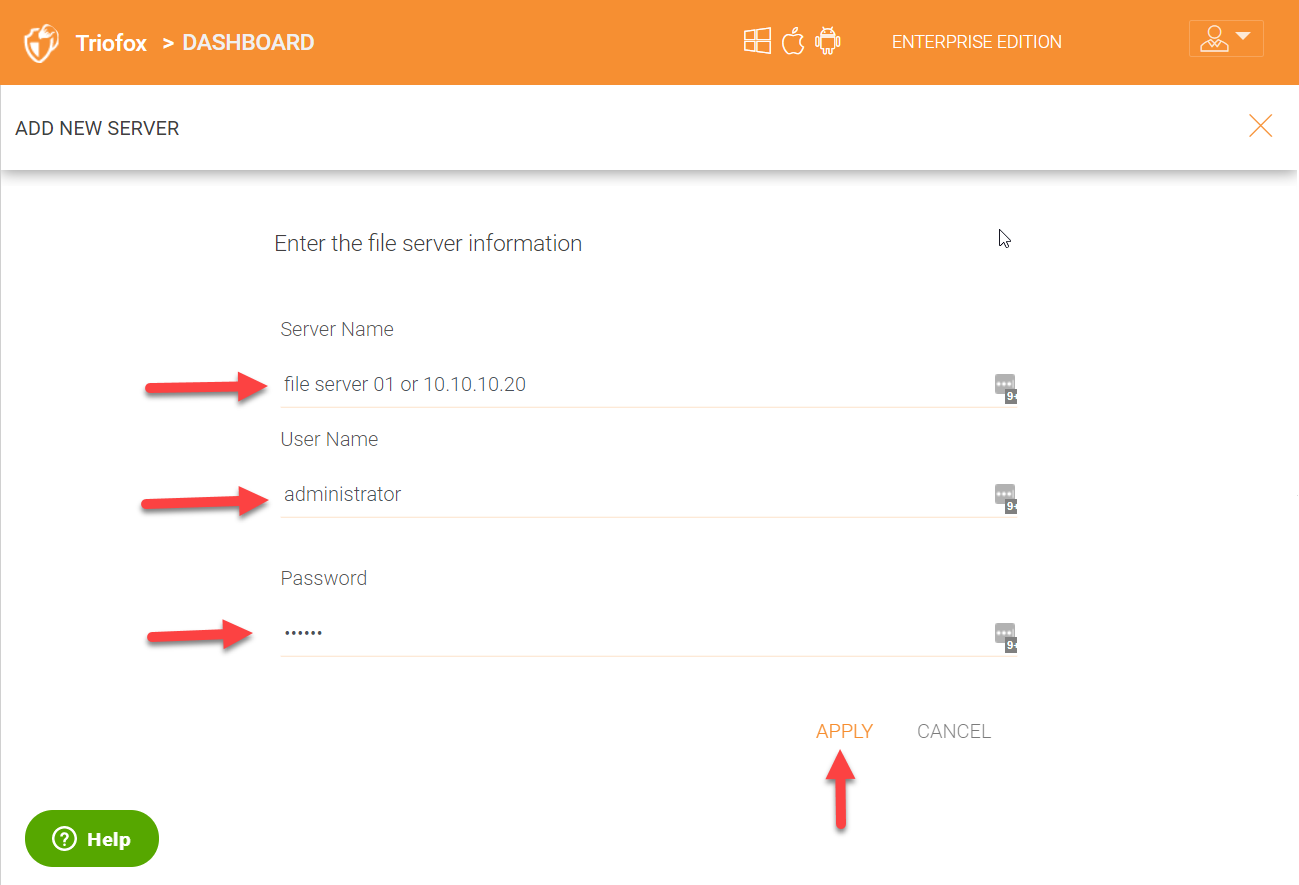
ADDING SERVERS OR NAS DEVICES MANUALLY
If for any reason, your file servers are not discovered automatically after Active Directory integrations, then you can add them manually. You can also add your folders on NAS devices using the ‘Add New Server’ option on the dashboard.
Once you click on the ‘Add New Server’ selection, you will be taken to a page as show below where you can either add server manually or scan again to discover your file servers.
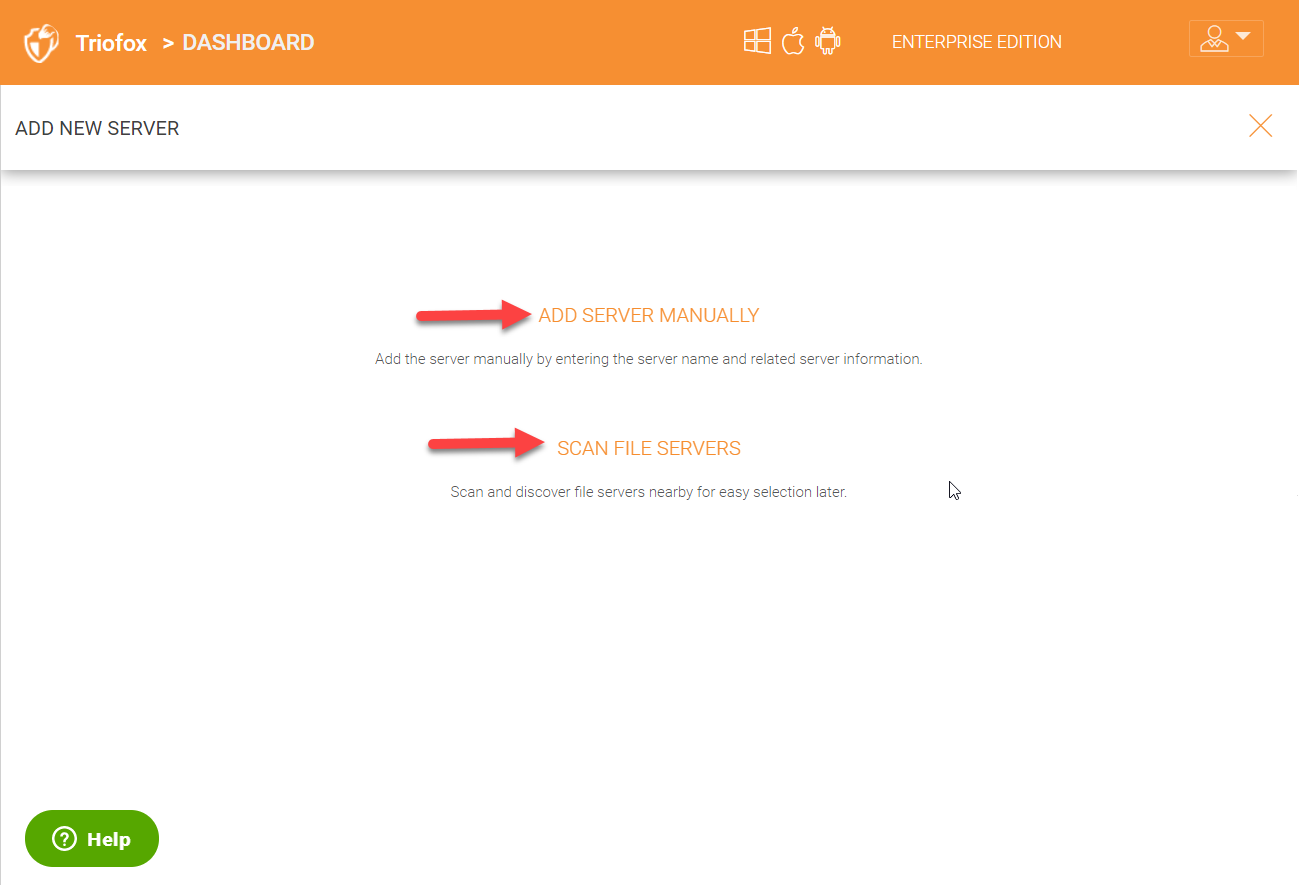
Clicking the ‘Add New Server’ option will take you to a screen where you can add your server name and user account which has access to that server. For NAS folders, you can just put in the IP address of the NAS device and user credentials. Once connected it will list all the available shares on the file server or the NAS device.
4.2 User Manager
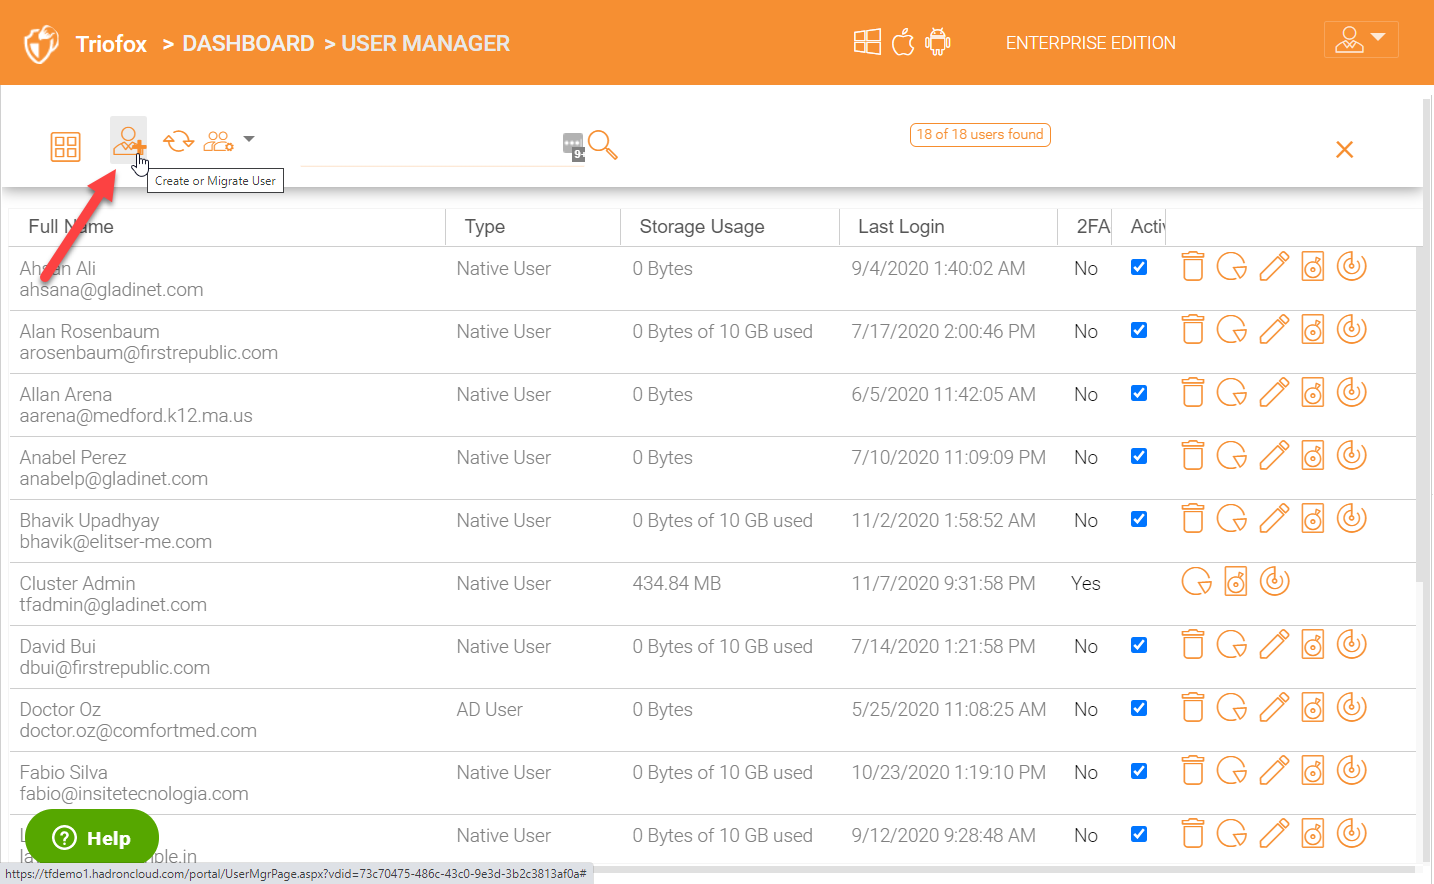
In the right panel on your cluster admin dashboard, you will see ‘Users’ plugin to manage all your users.
Click the ‘User’ plugin to get into the ‘User Manager’ panel.
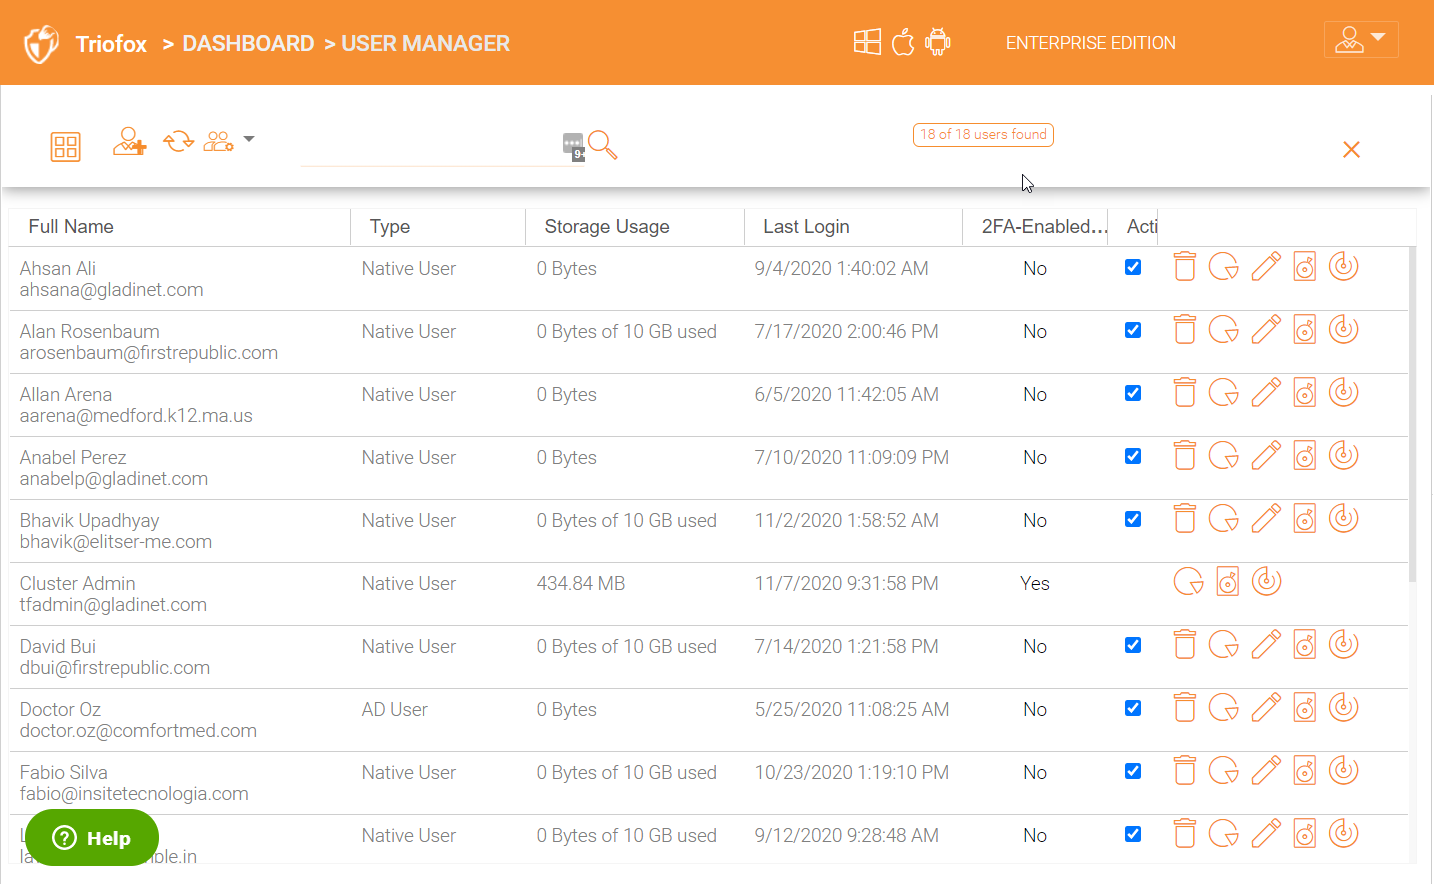
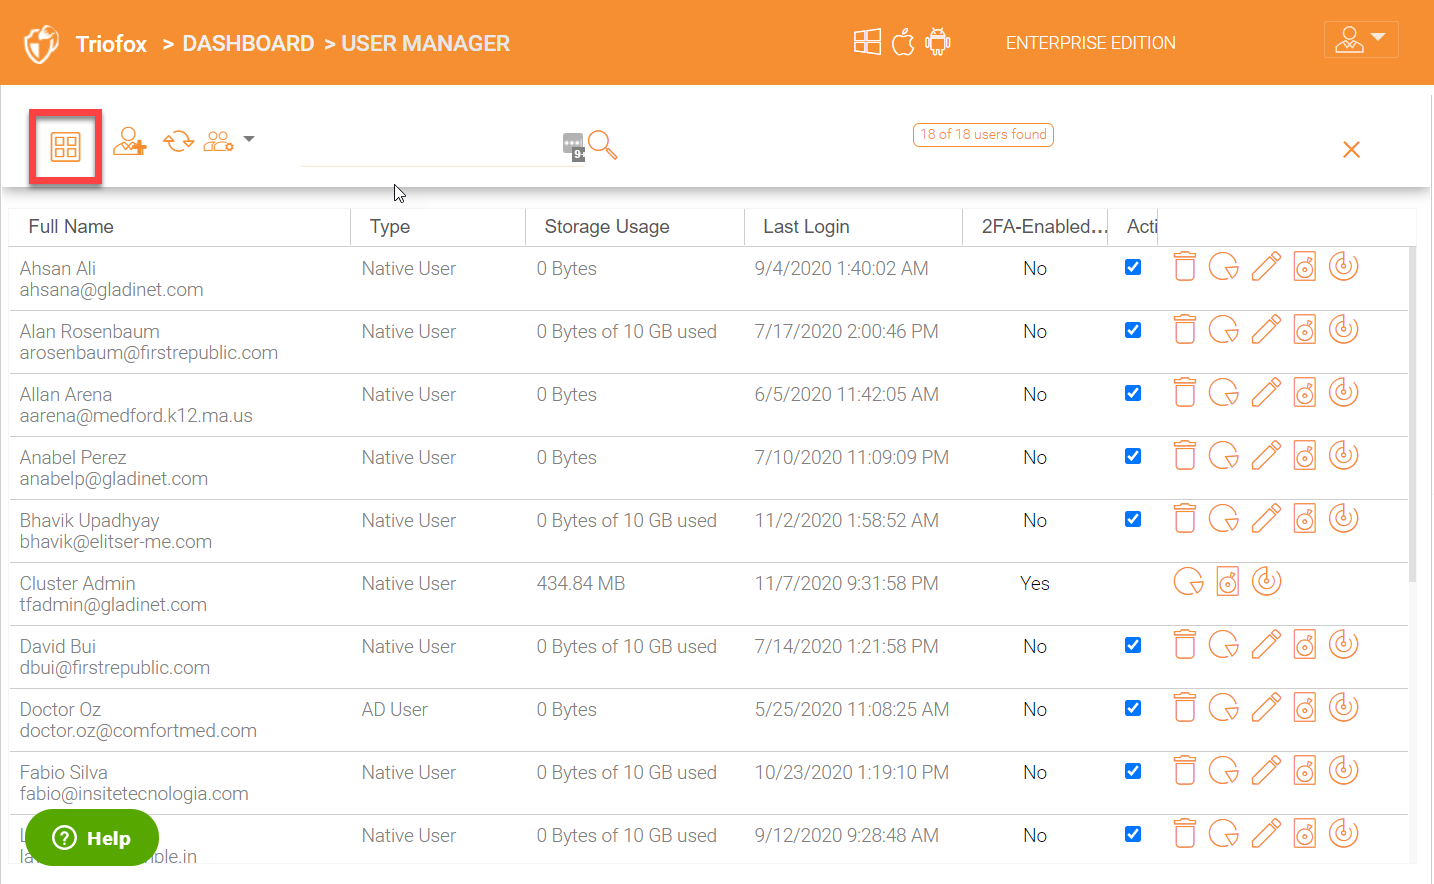
In the ‘User Manager’ panel, you can toggle the view to detail list or icon view by clicking on the view icon as show below:
You can also create a new user or migrate an existing user from your Active Directory domain by choosing the ‘Create or Migrate User’ icon.
You can also click the ‘Refresh’ icon to get an updated users list.
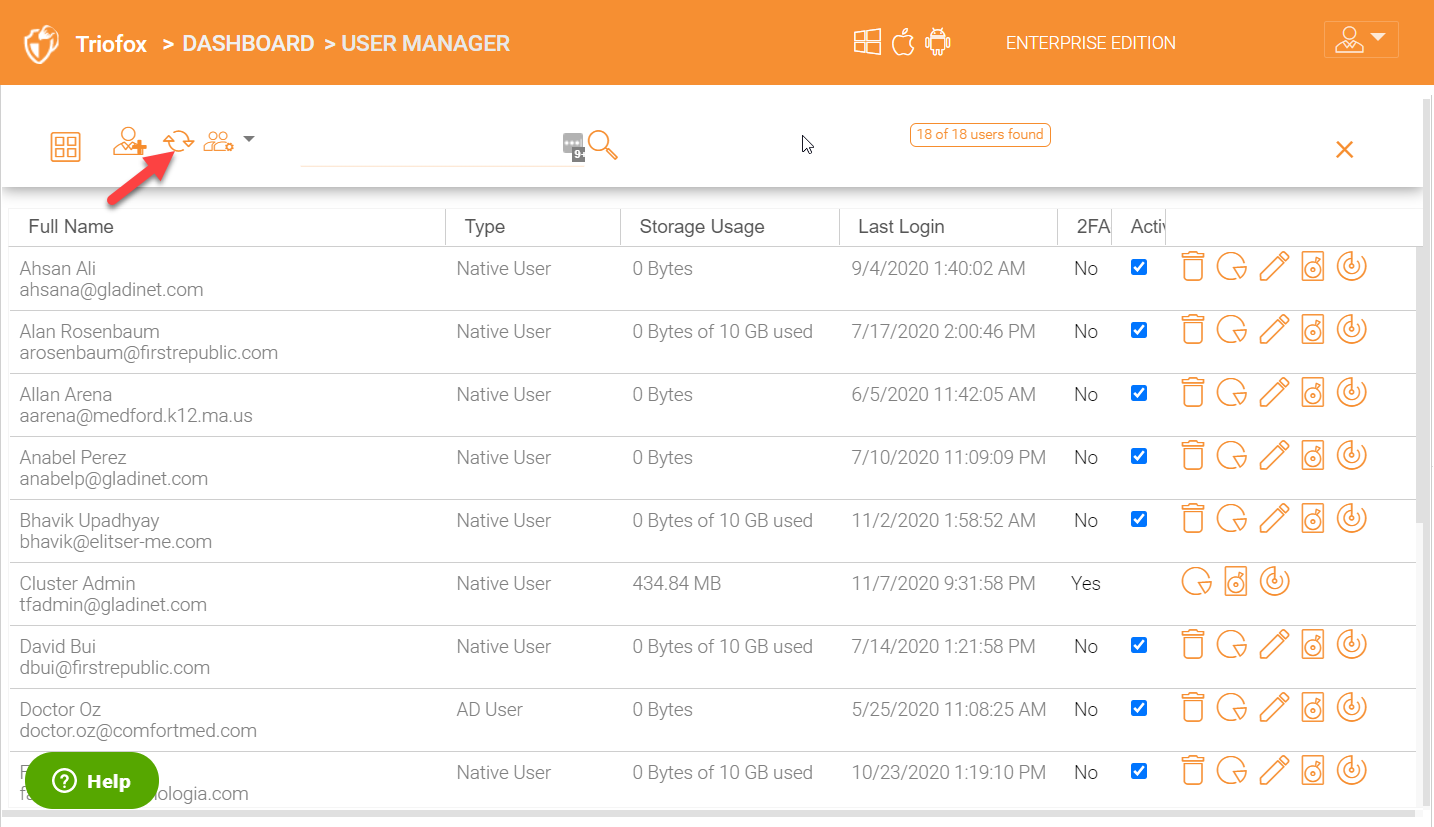
You have another icon which will allow you to ‘Export Users’ from ‘User Manager’, see all the disabled users, show users who have 2-FA enabled etc.

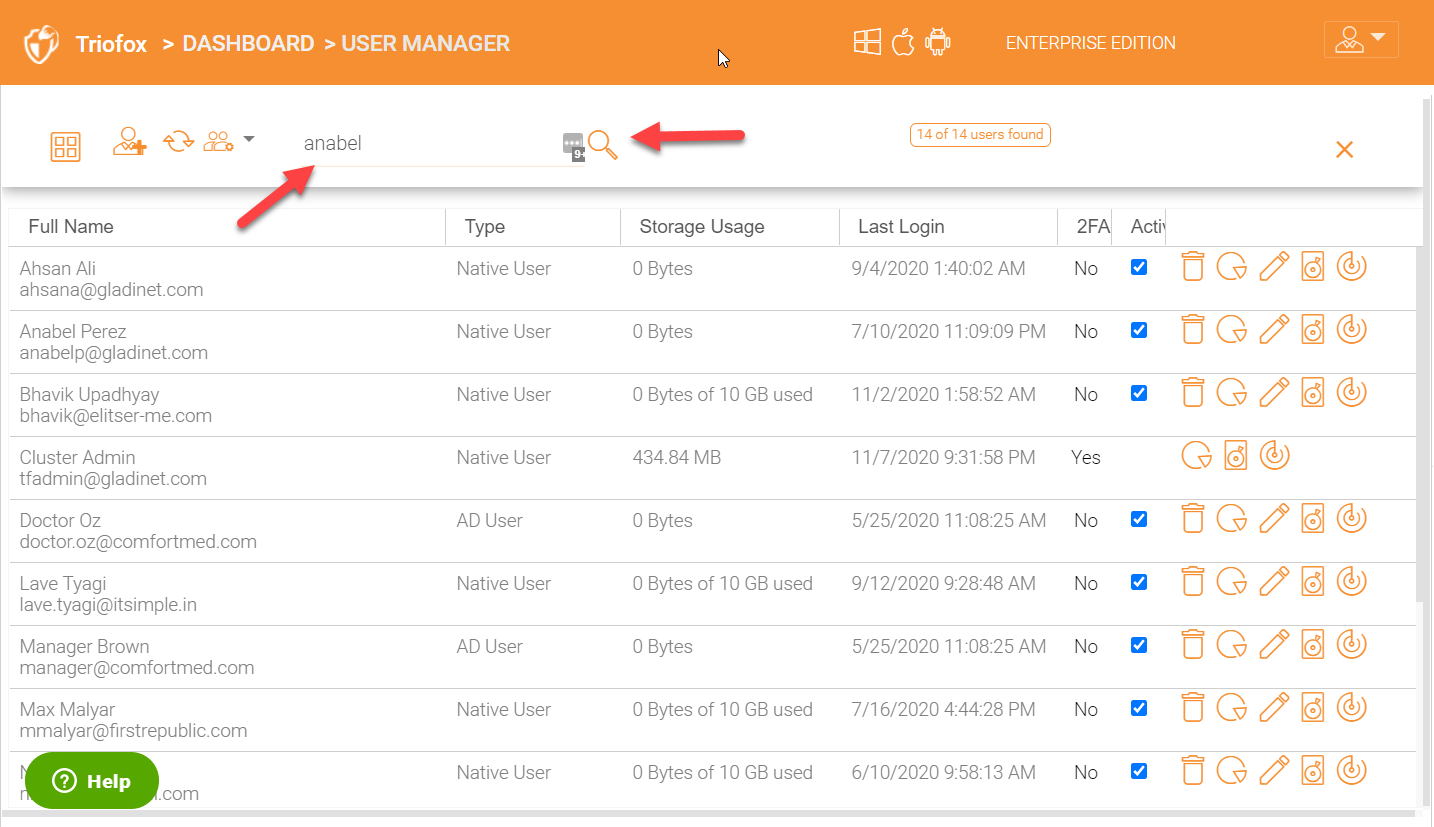
You can also use the search field to search for any user account.
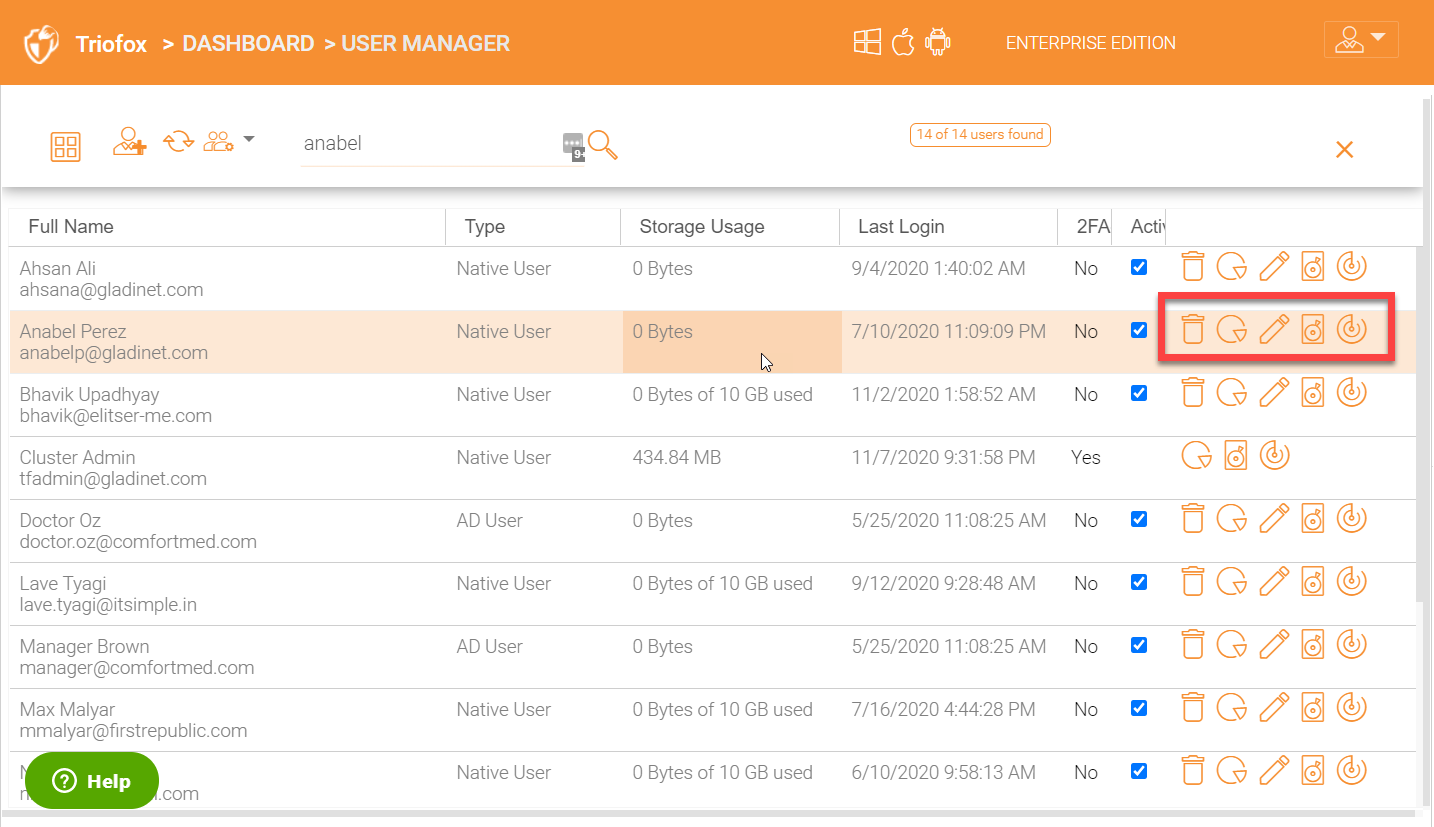
You also have more selections for each user on the right for example, delete a user, storage usage details for a user, edit and other options.
4.3 Device Manager
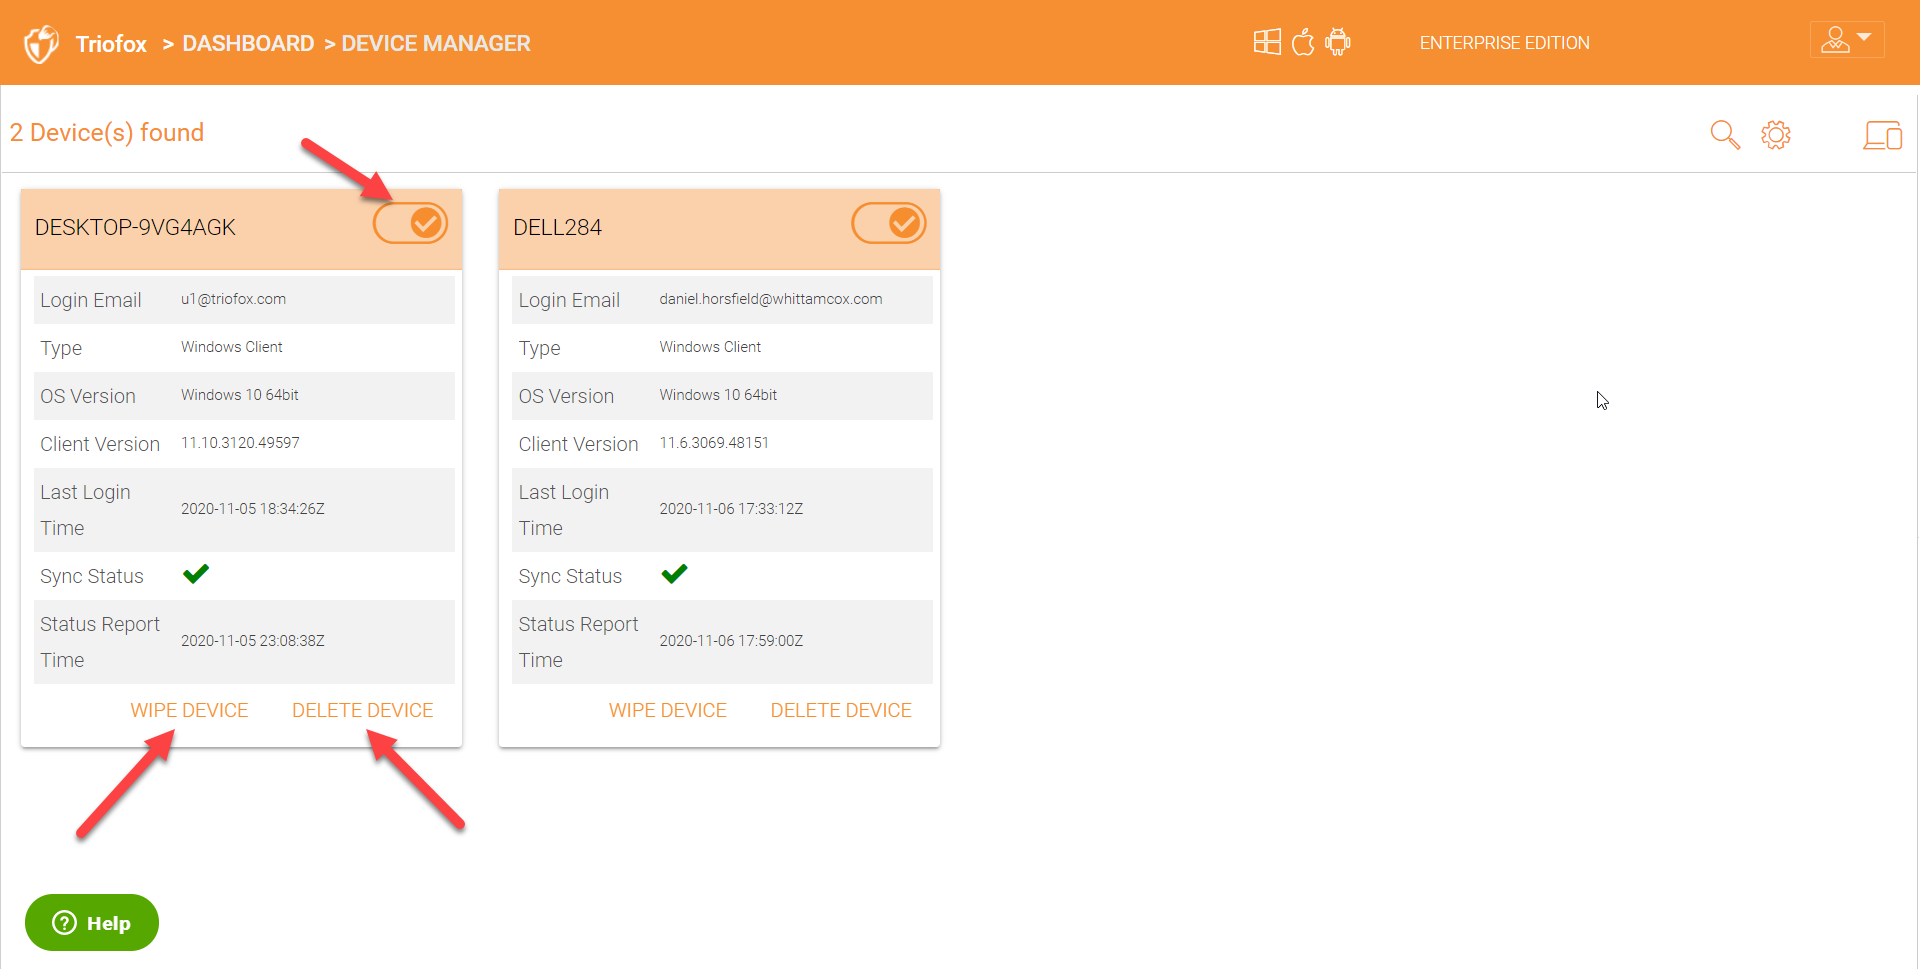
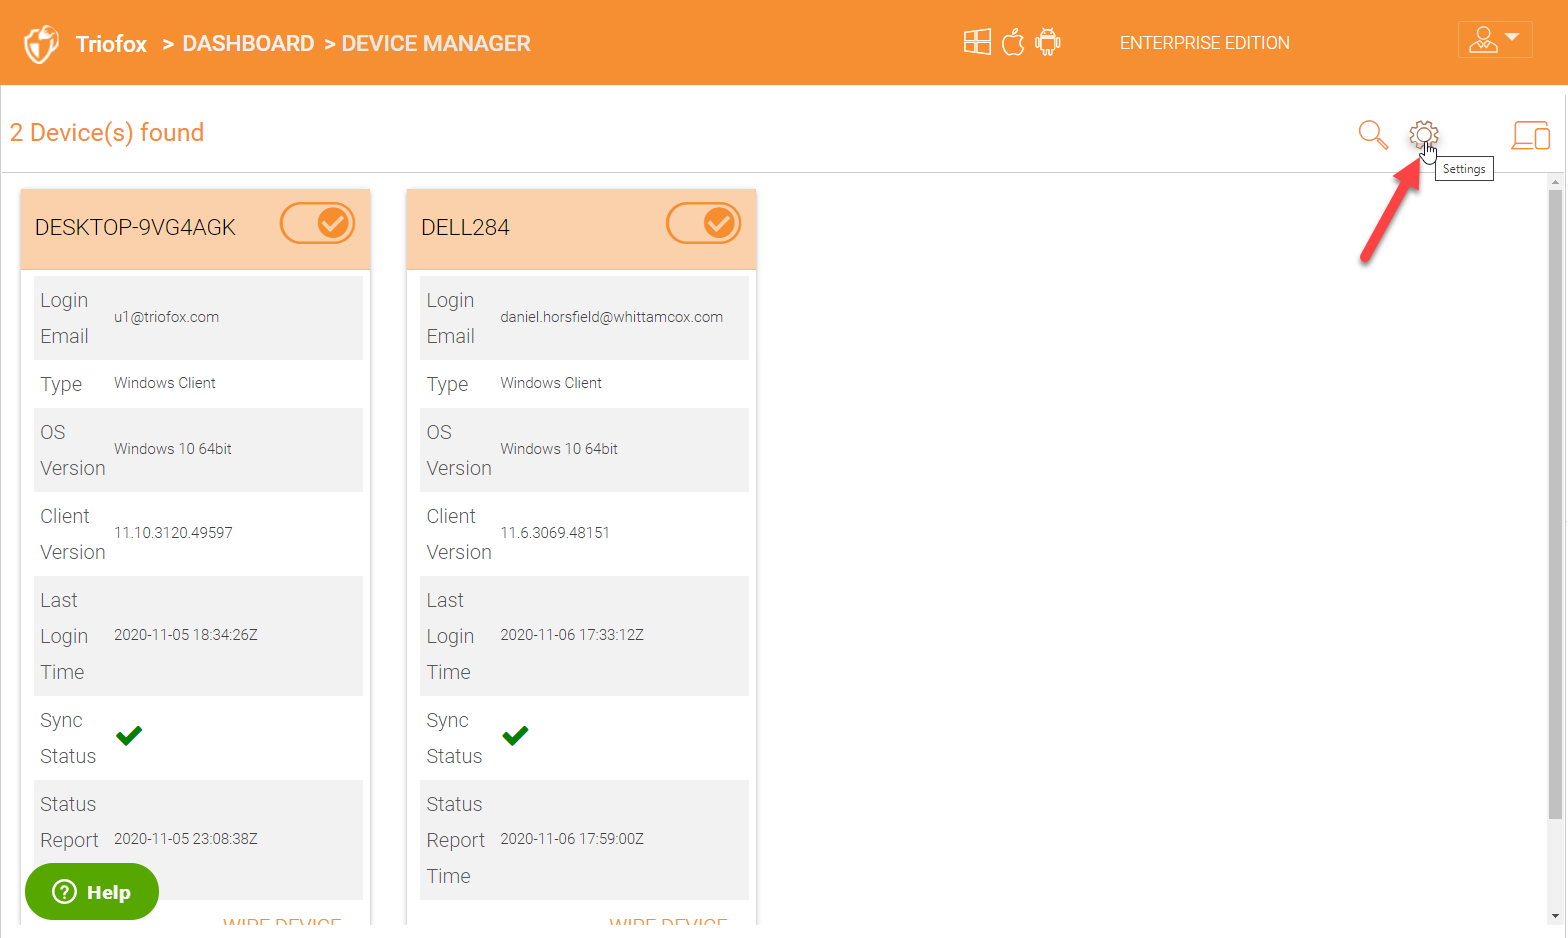
As a cluster admin, you can also monitor all the devices which have been connected to your environment to access the data under ‘Device Manager’. The ‘Devices’ plugin is in the right panel as shown in the screenshot below:
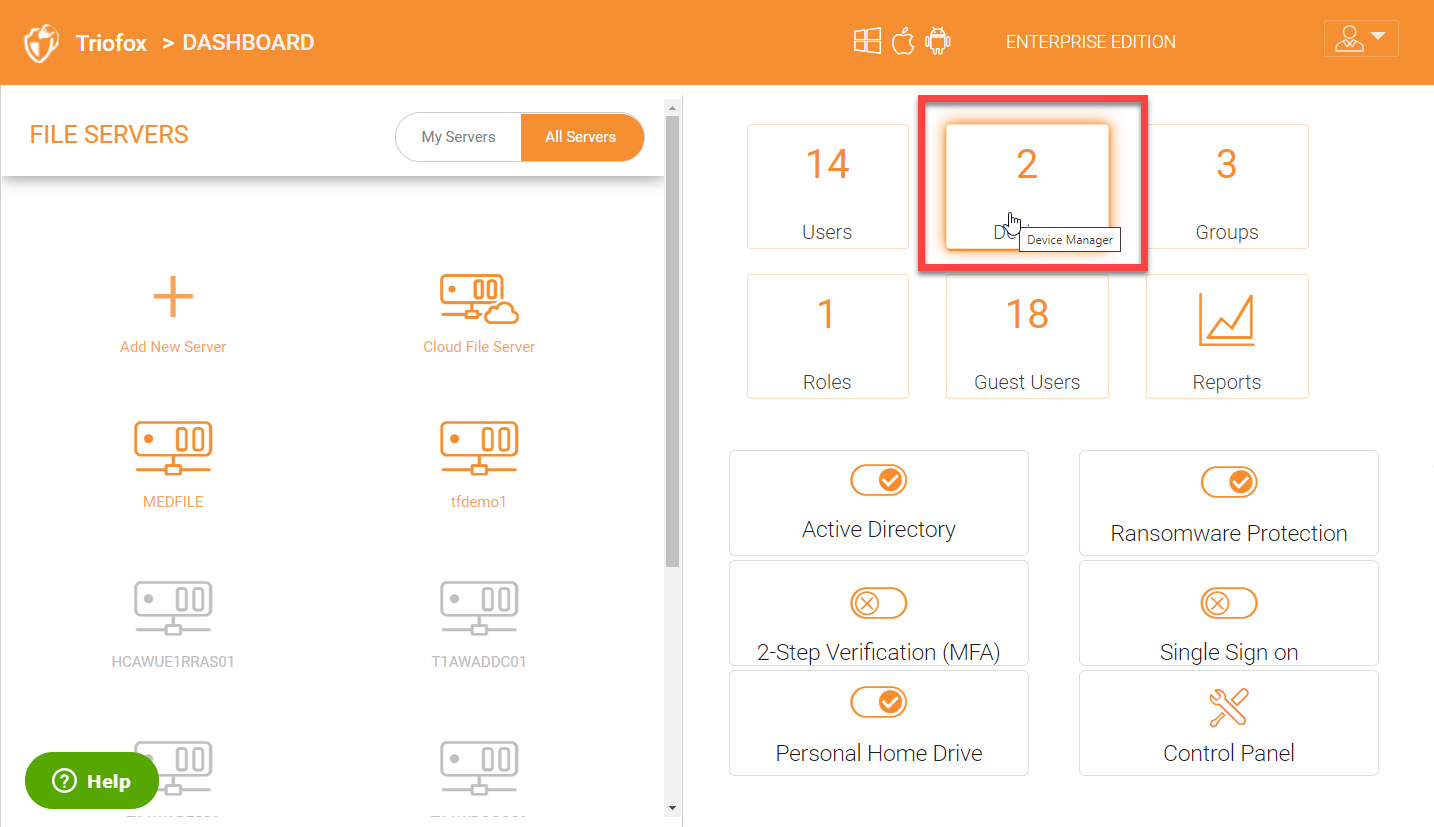
Click the ‘Devices’ plugin in the right panel to get into the ‘Device Manager’.
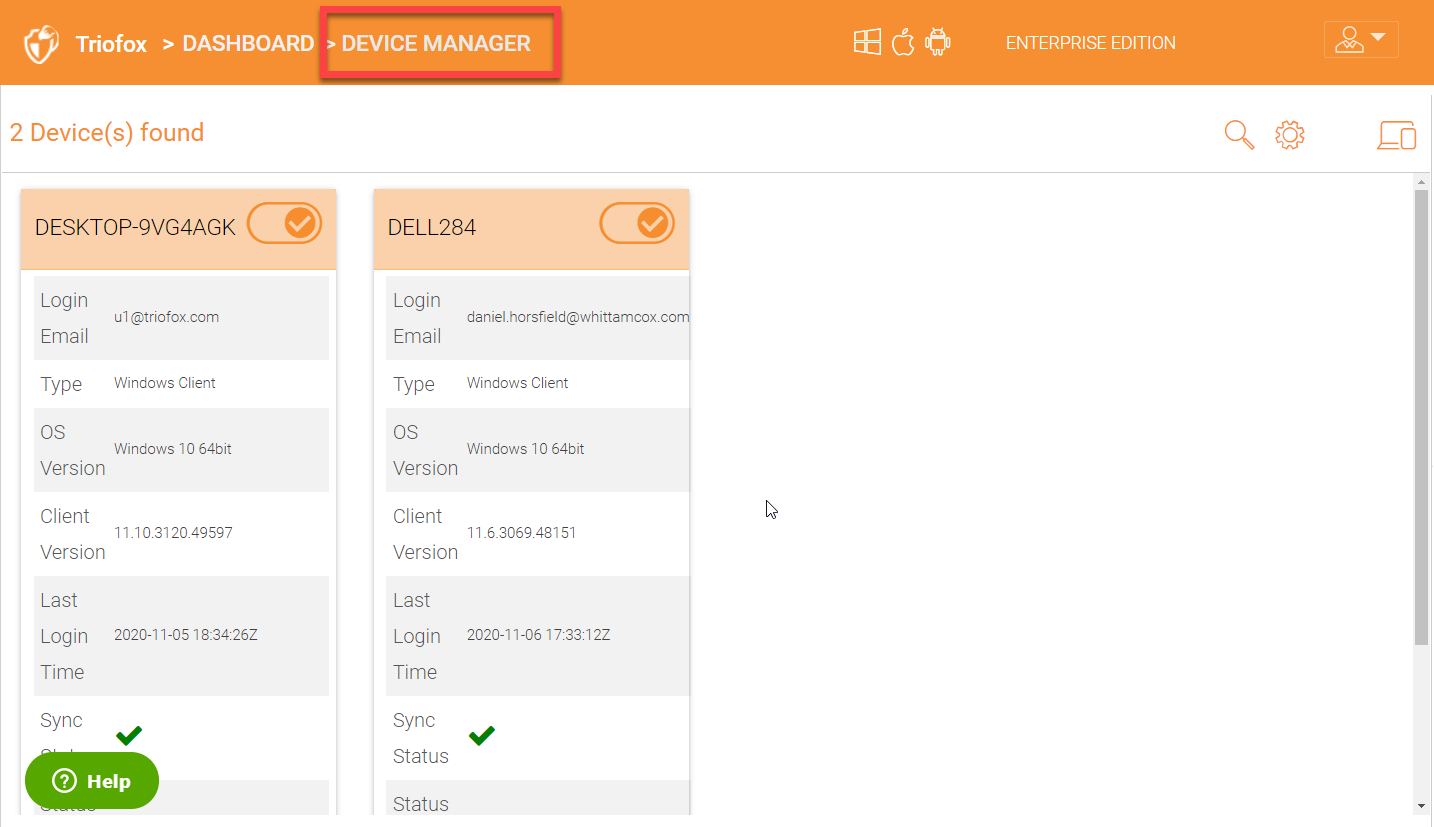
Under ‘Device Manager’, you will see all the devices connected and found as shown in the screenshot below:
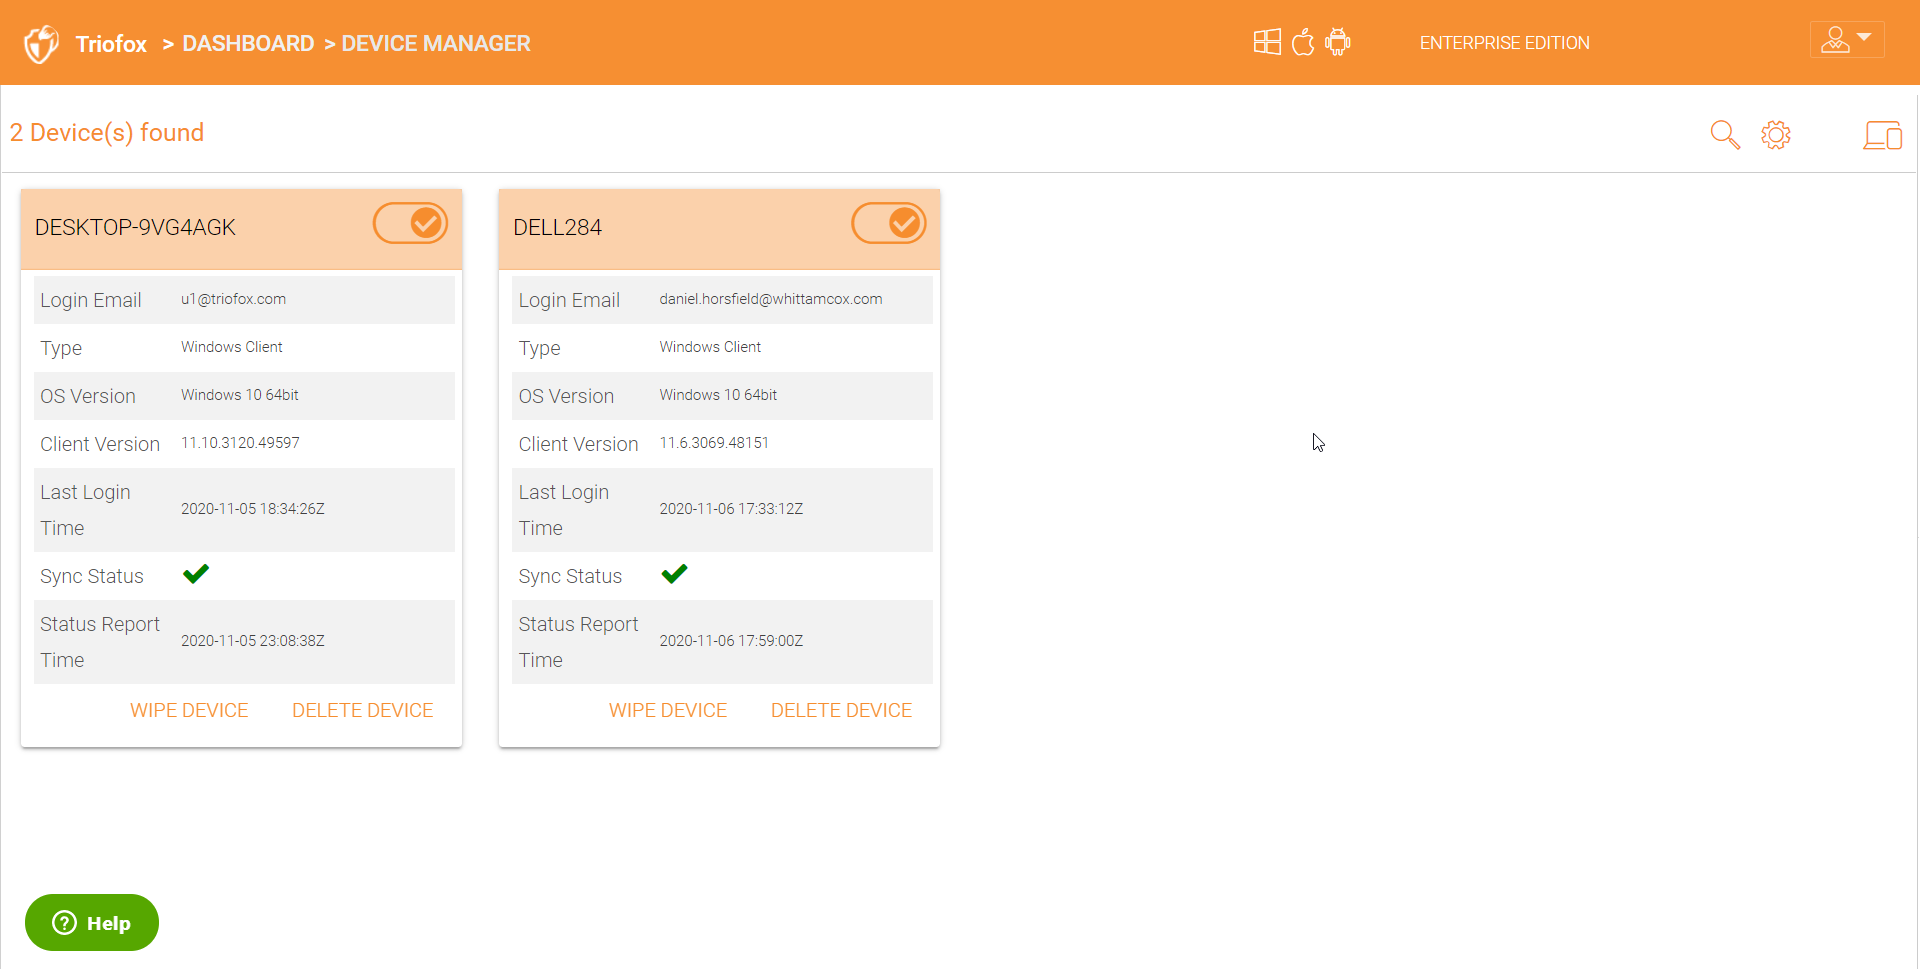
You can remotely wipe the data from a device or you can delete the device. These two features play a critical role to ensure that the admin has full control and visibility on all the devices that are in use. You can also disable a device using the on and off toggle button in the upper right on each device.
Settings
There are more options available under settings for advanced device access controls. Click the ‘Settings’ icon to get into the page.
The options under ‘Device Settings’ are listed below:
Require approval for device access - When a user attempts to log in from a new device via native client applications, the connection will be rejected until the cluster admin approves the new device.
Require Approval for device access from external networks - When a user attempts to log in from a new device via native client applications from external networks, the connection will be rejected until the cluster admin approves the new device.
Enable auto-installation of the Outlook Plugin - To enable auto-install of Microsoft Outlook plugin for users.
Create shortcut in documents library - When enabled, the windows client will create a shortcut to the mapped drive in the documents library.
Create shortcut on Desktop - When enabled, the windows client will create a shortcut to the mapped drive on the desktop.
You can also download the clients from the ‘Device Manager’ page if desired.
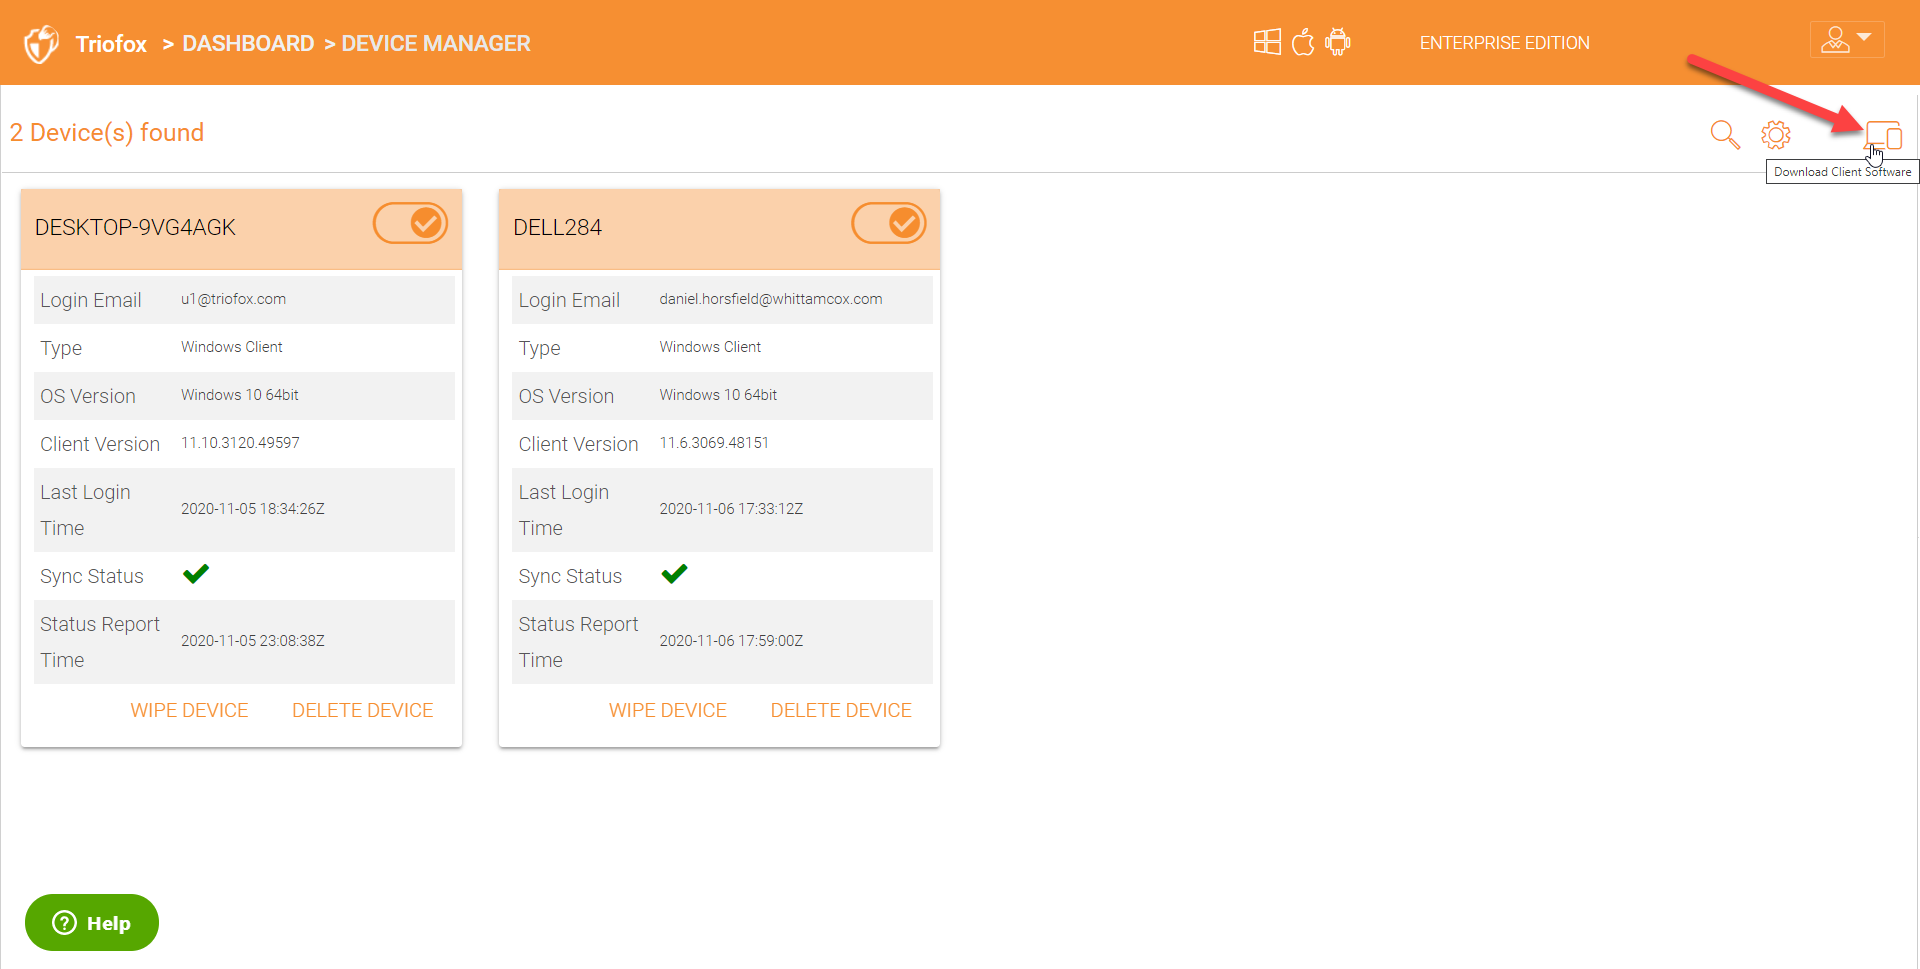
The client downloads page lists all the clients available for downloads.

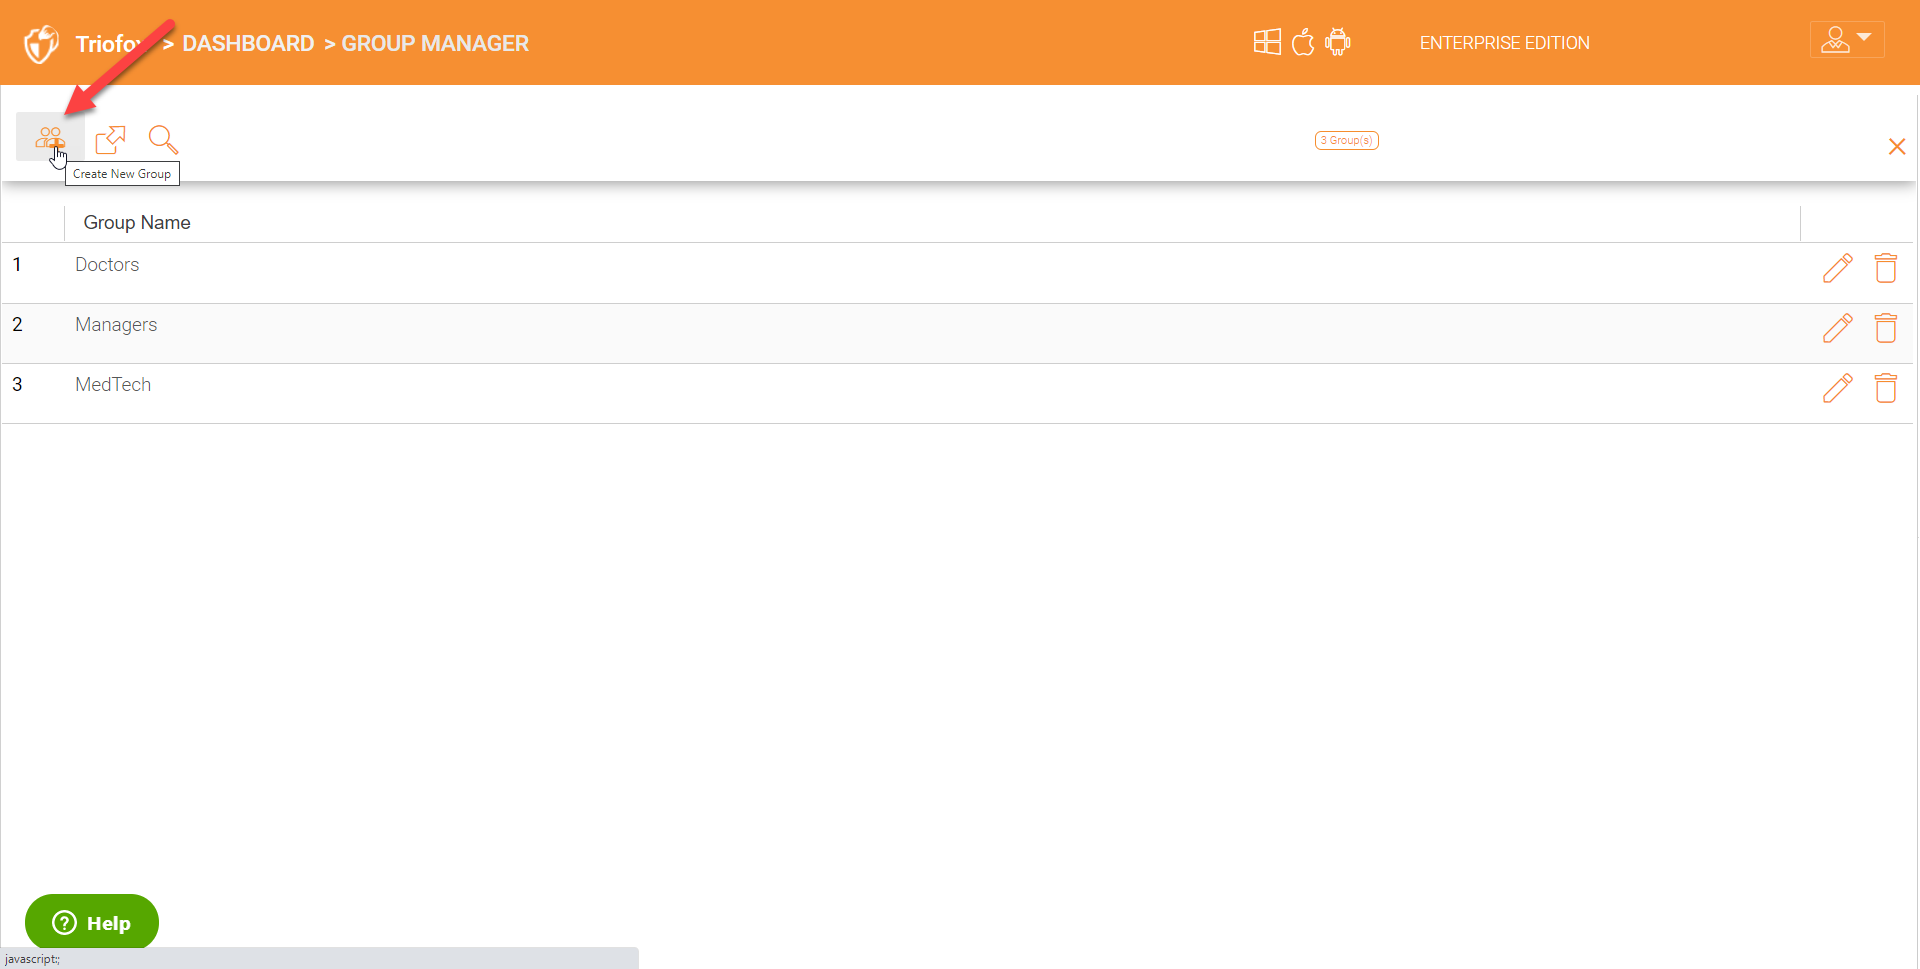
4.4 Group Manager
As a cluster admin, you can also manage groups native as well as Active Directory groups under ‘Group Manager’.
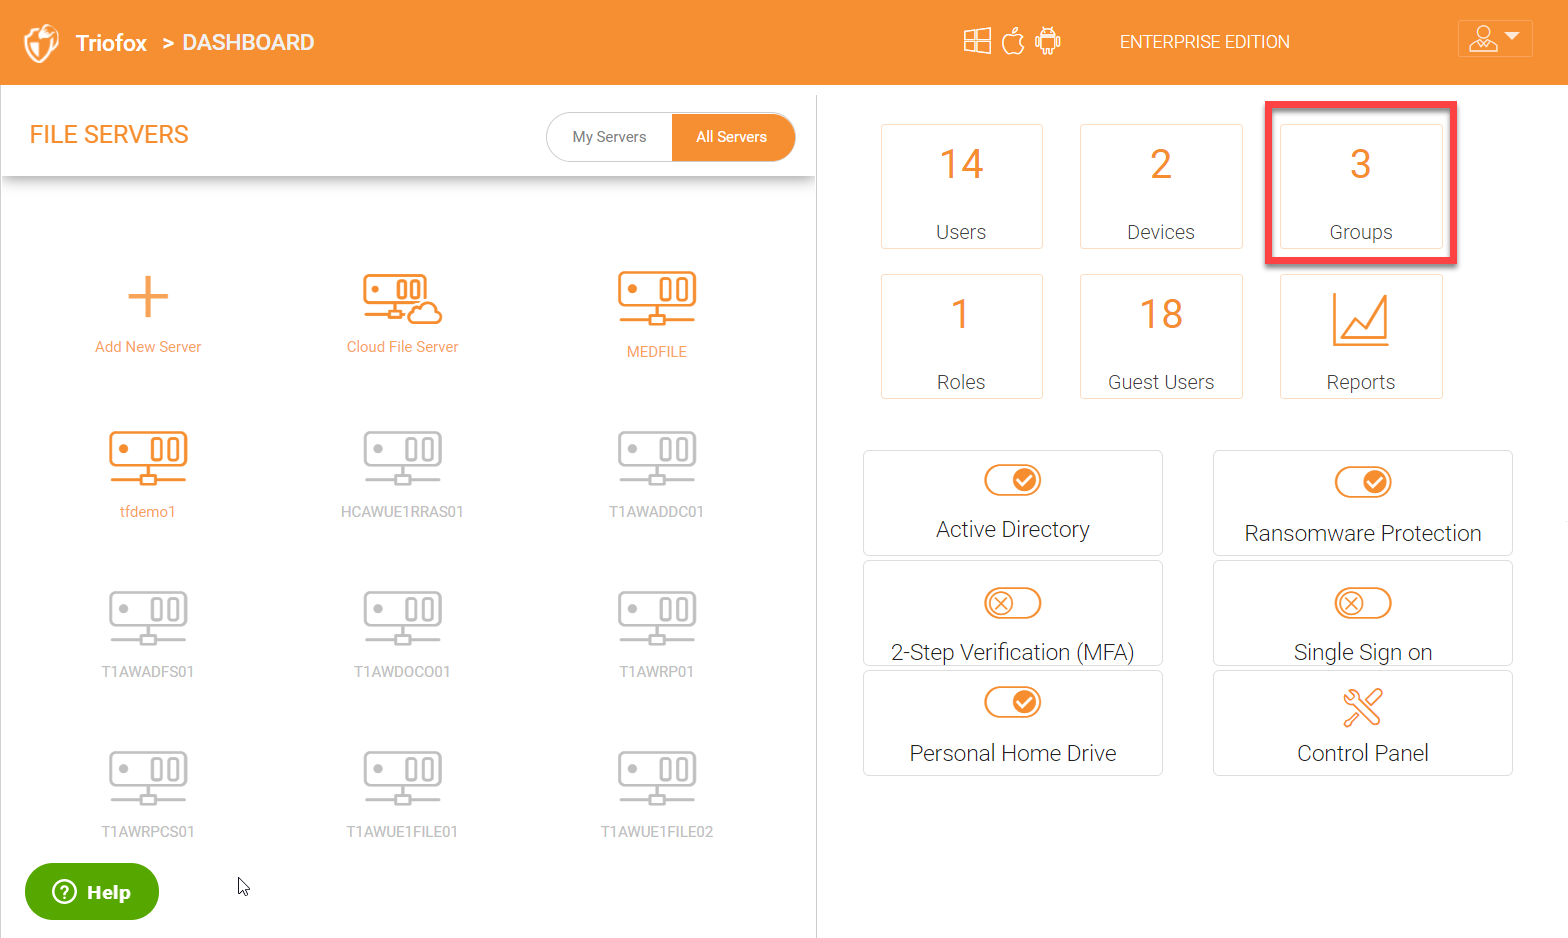
Click ‘Groups’ in the right panel to get into the ‘Group Manager’ page.
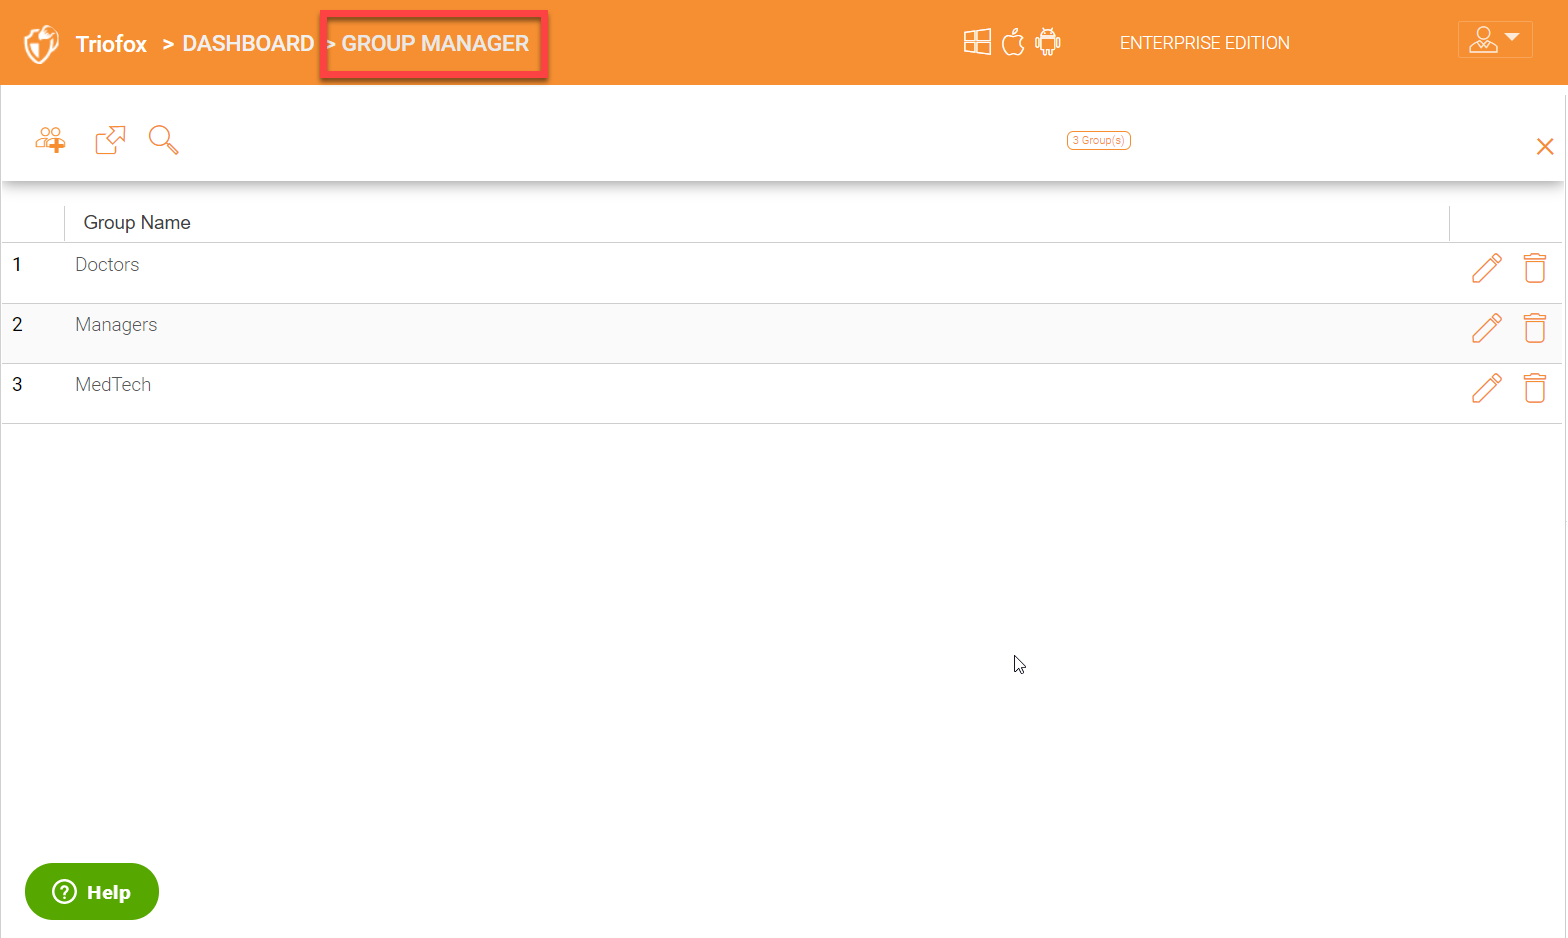
Once inside ‘Group Manager’, you will see a list of groups already created or added. In order to see the users in a group, click the pencil icon on the right for the group.

It will give you a list of all the users in that group.
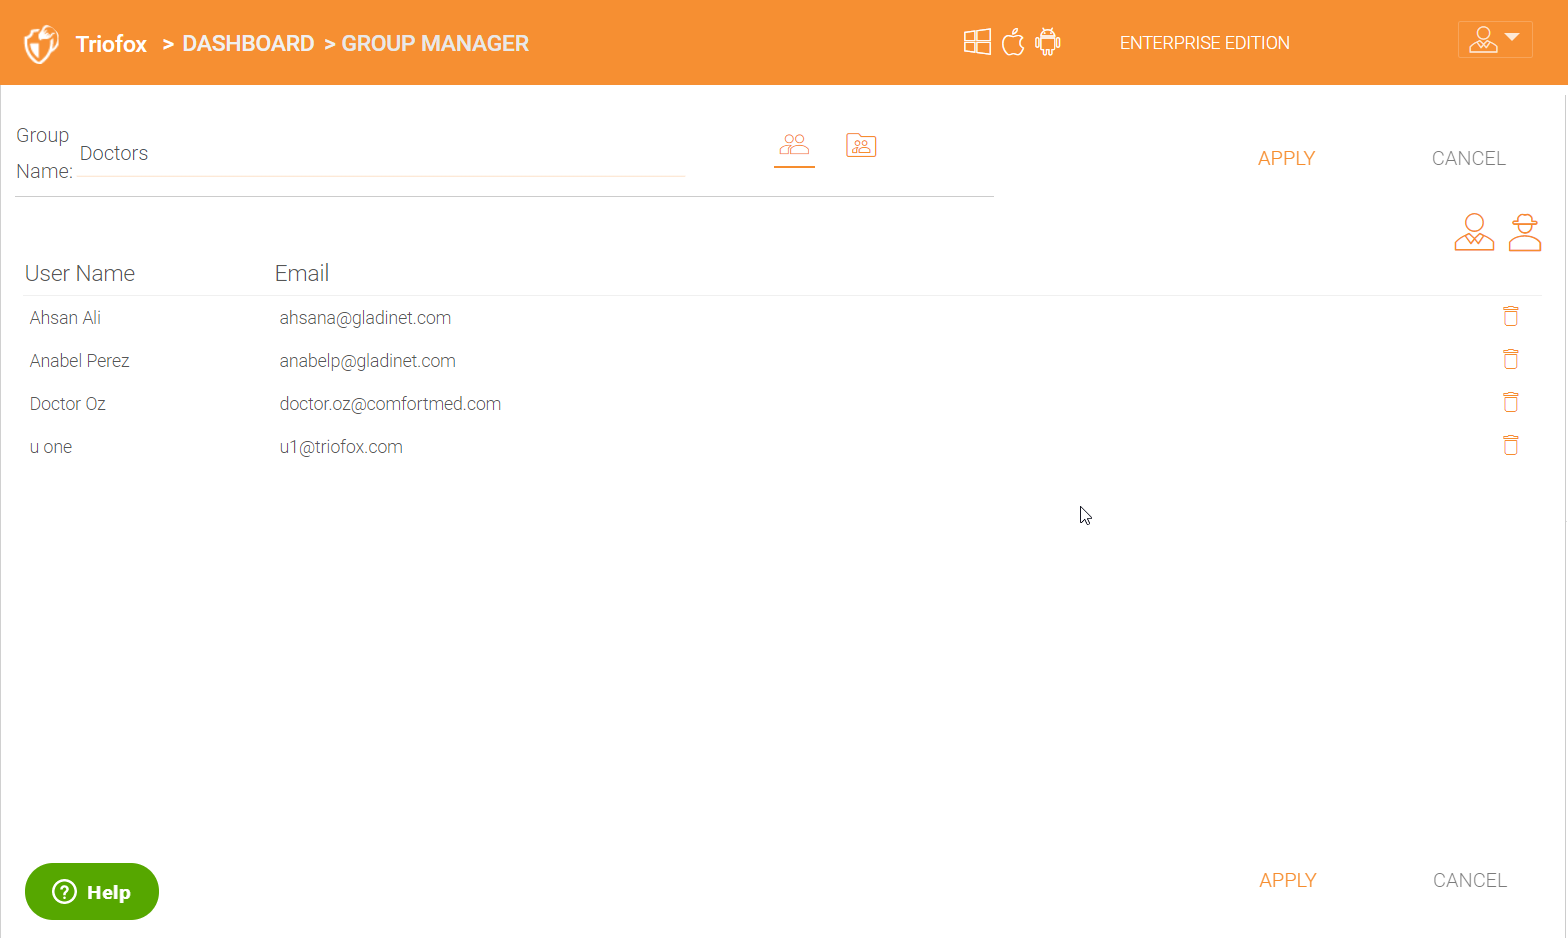
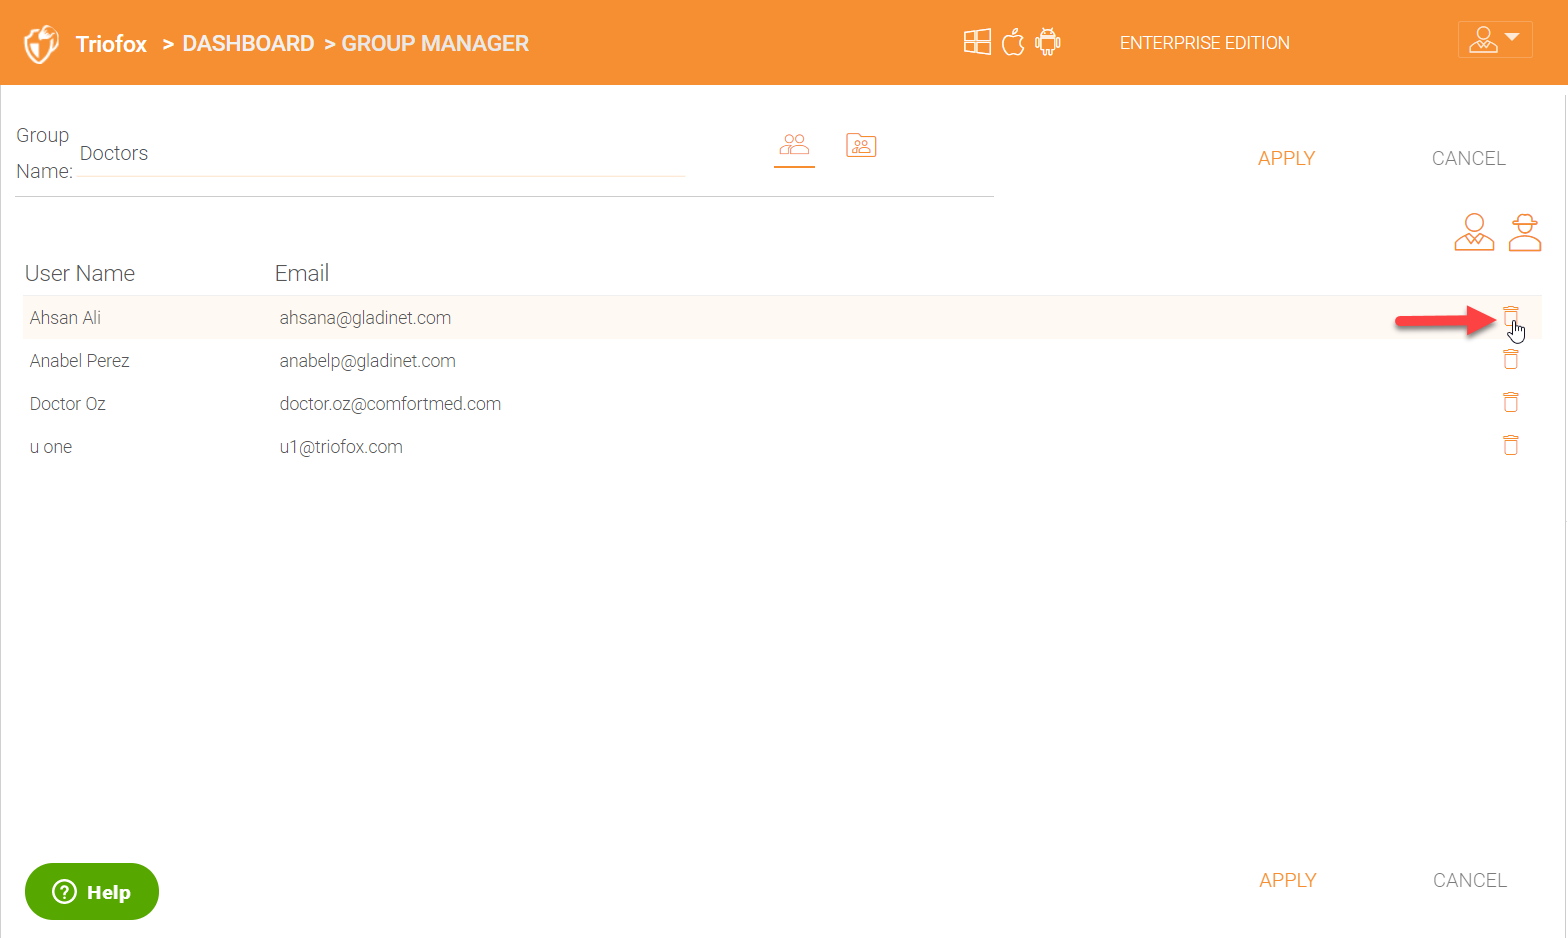
You can delete any user(s) inside a group by click on the delete bucket icon on the right next to the user(s).
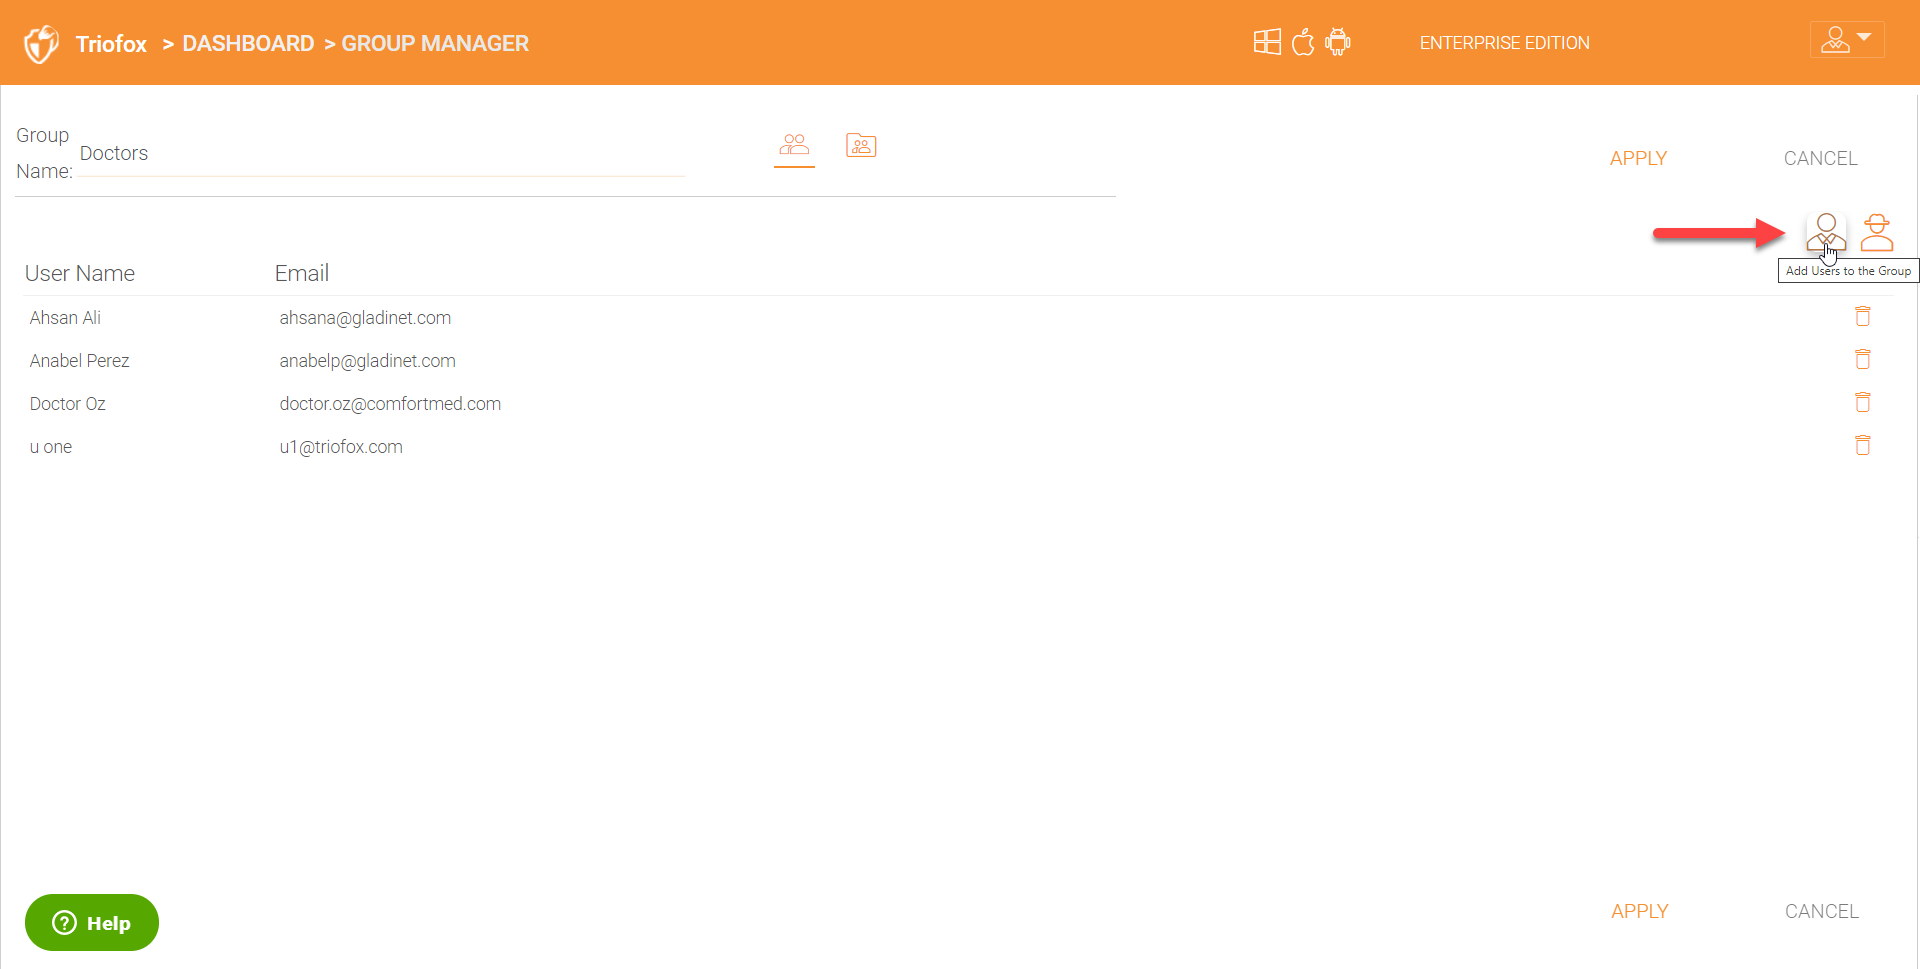
You can also add more user to the group by clicking on the ‘Add users to the group’ icon on the right.
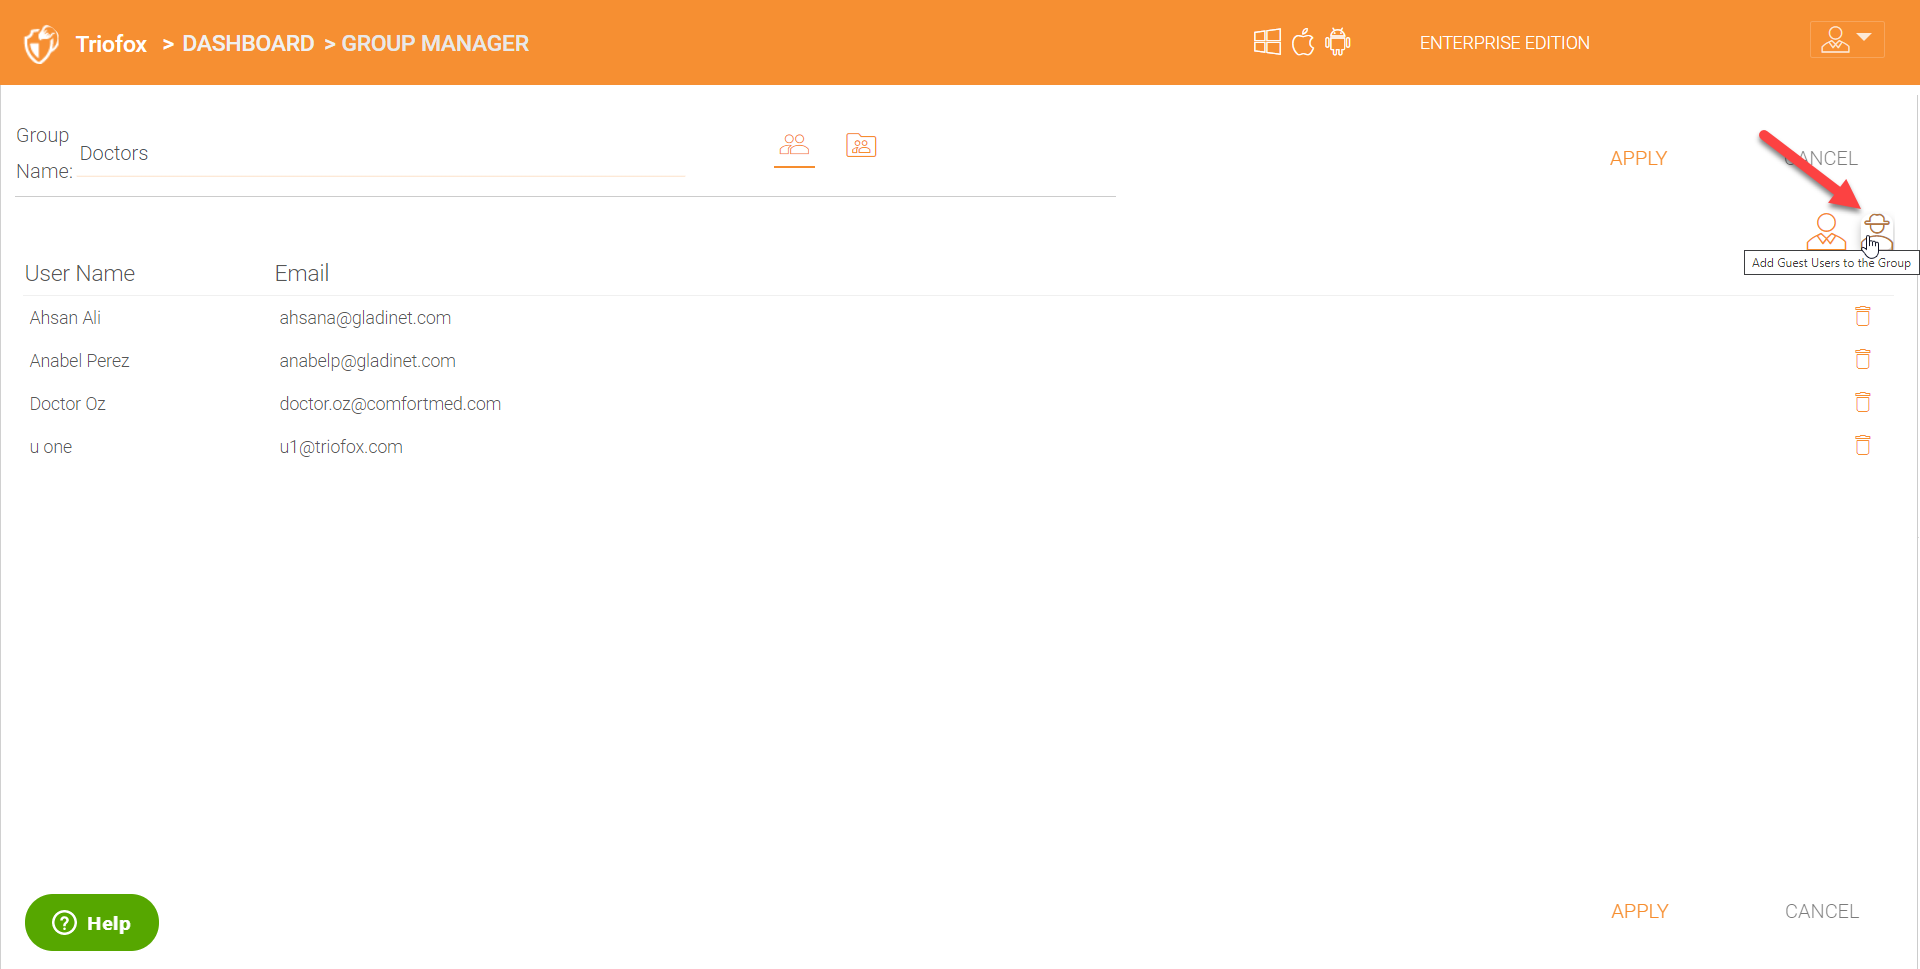
If there is a need to add any guest users to a specific group, you can do so by clicking ‘Add Guest Users to the group’ icon on the right.
In order to create a new group, click the ‘Create New Group’ icon in the upper left.
You can download all the groups as a .csv. file using the ‘Download as a CSV file’ icon.
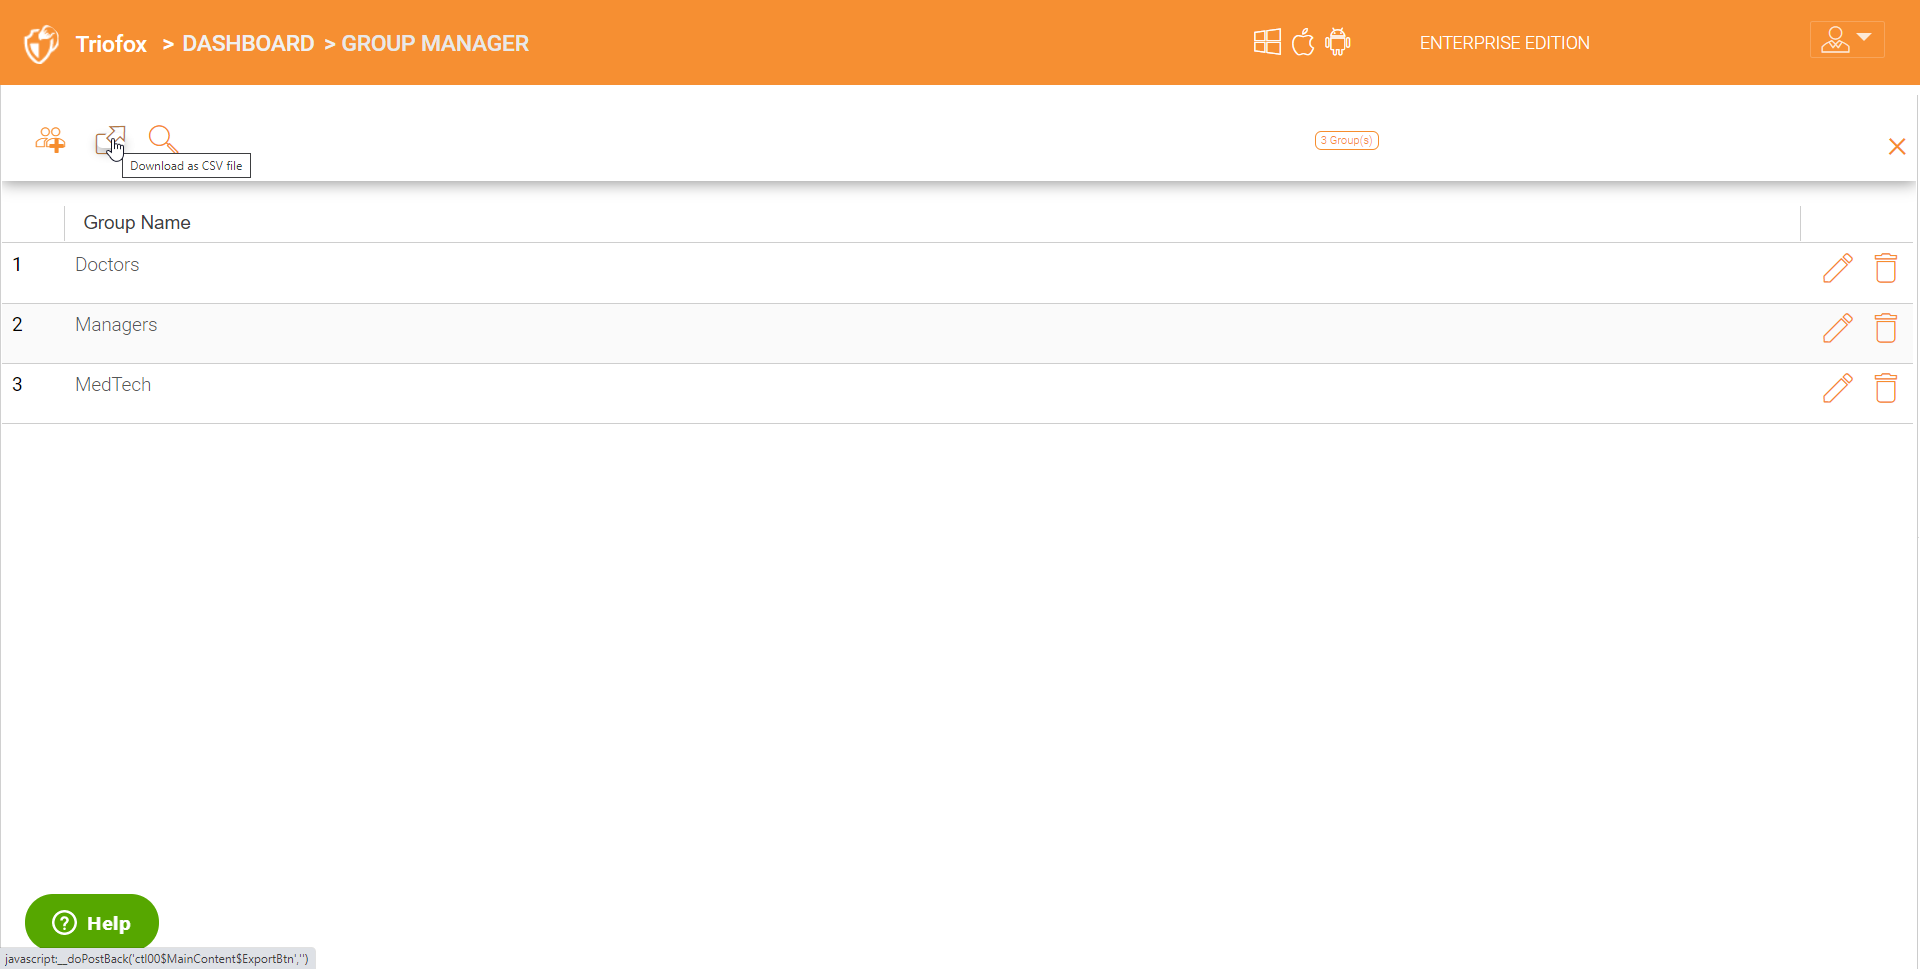
Use the search icon to search for any groups. Searching is important if an organization has many groups and would just like to query a specific group quickly.

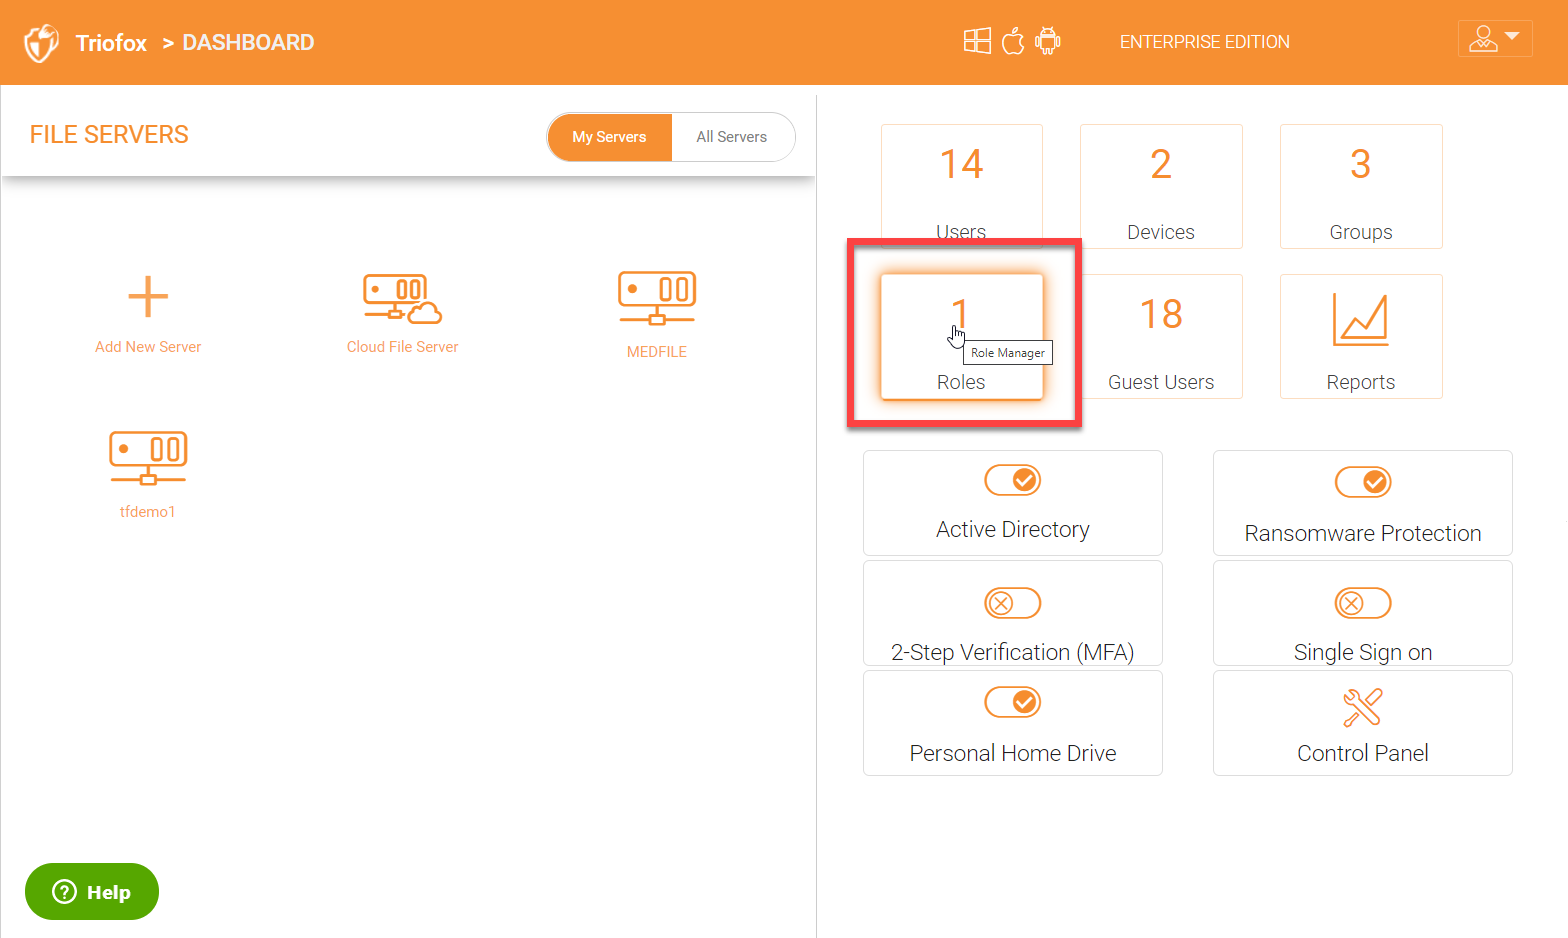
4.5 Role Manager
Role Manager is used to delegate administration controls to other members in the team and locking down the environment. For example, if you need to disable external sharing for a specific user or a group, you can create a role for that purpose. There are many lock down settings which can be enabled under roles. In order to get into the ‘Role Manager’, click on the ‘Roles’ icon in the right panel in cluster admin dashboard.
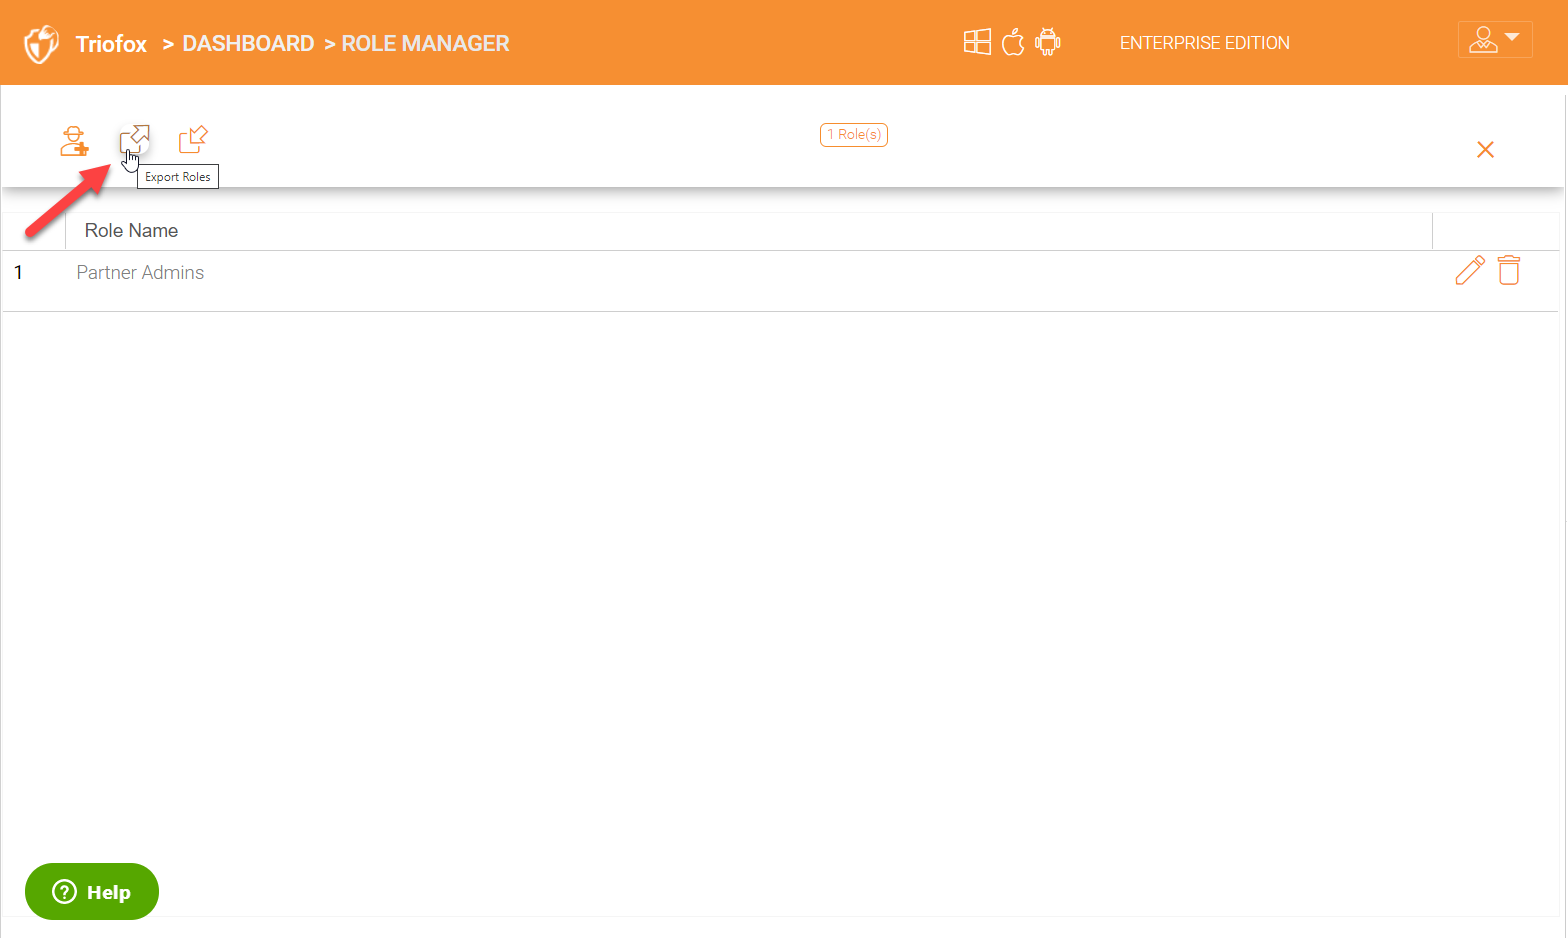
Once inside ‘Role Manager’, you can see a list of existing roles if already created or create a new role.
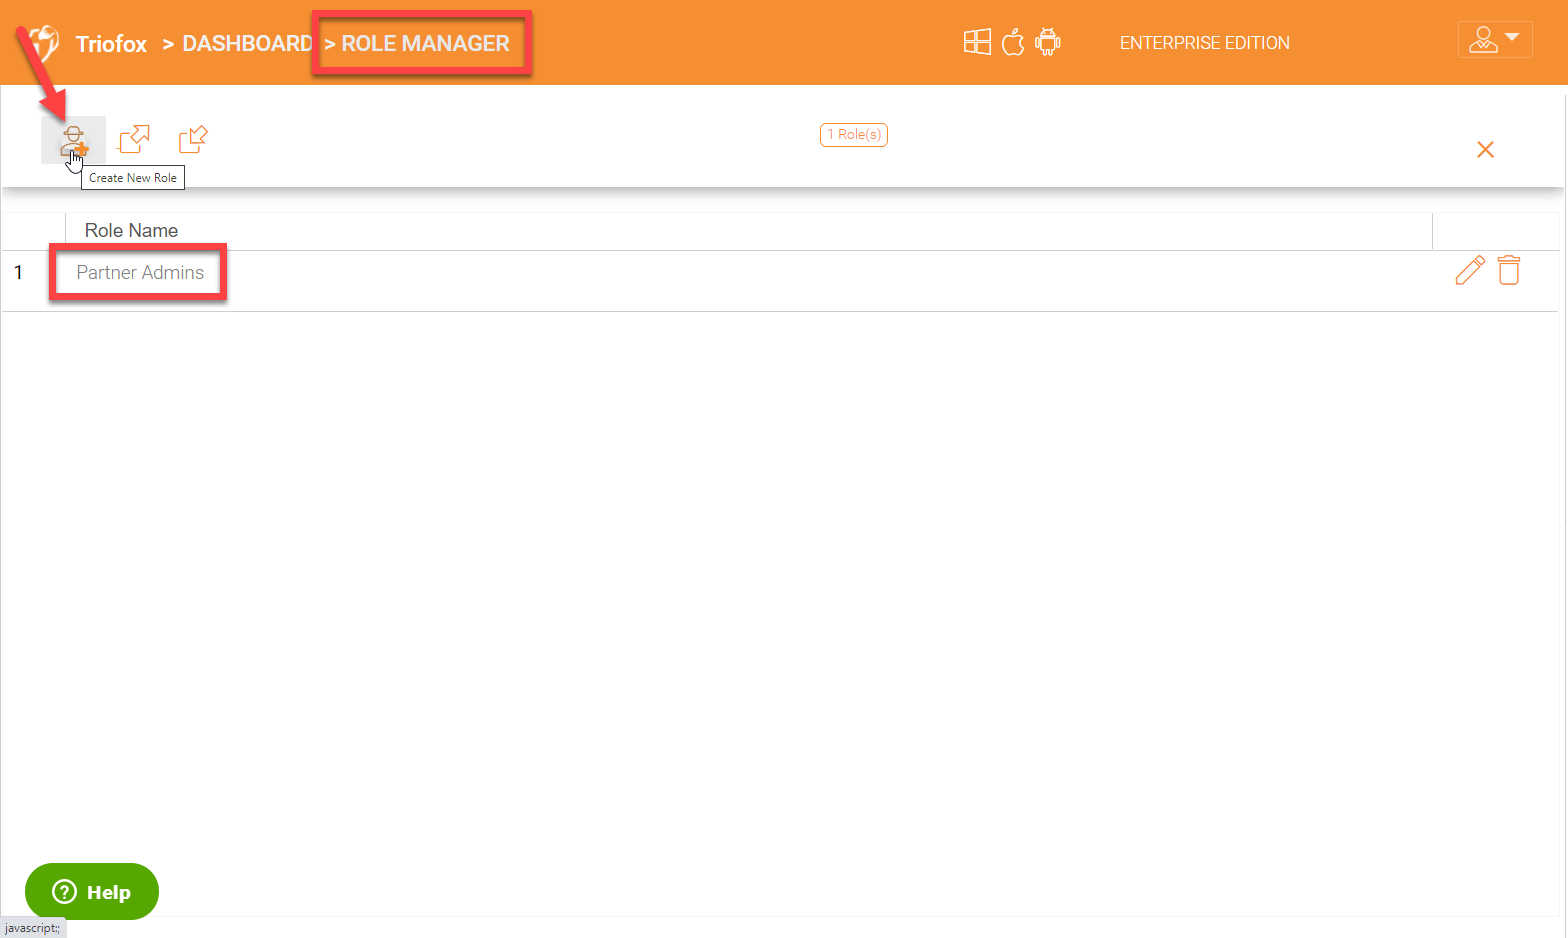
You can also export roles by using the ‘Export Roles’ icon.
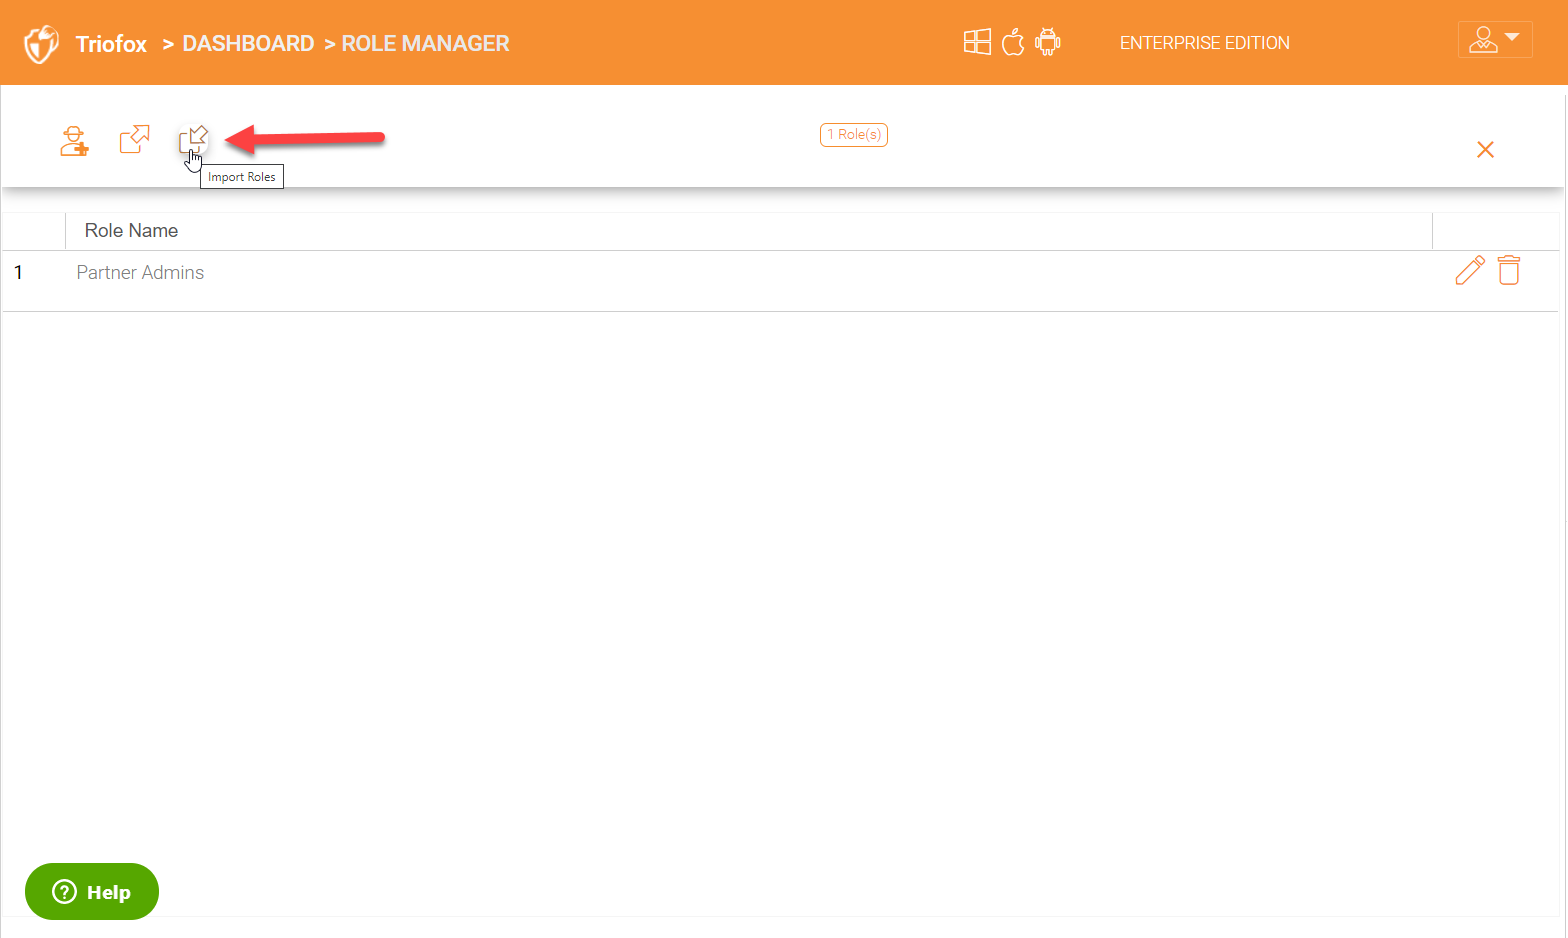
You can also import roles using the ‘Import Roles’ icon.
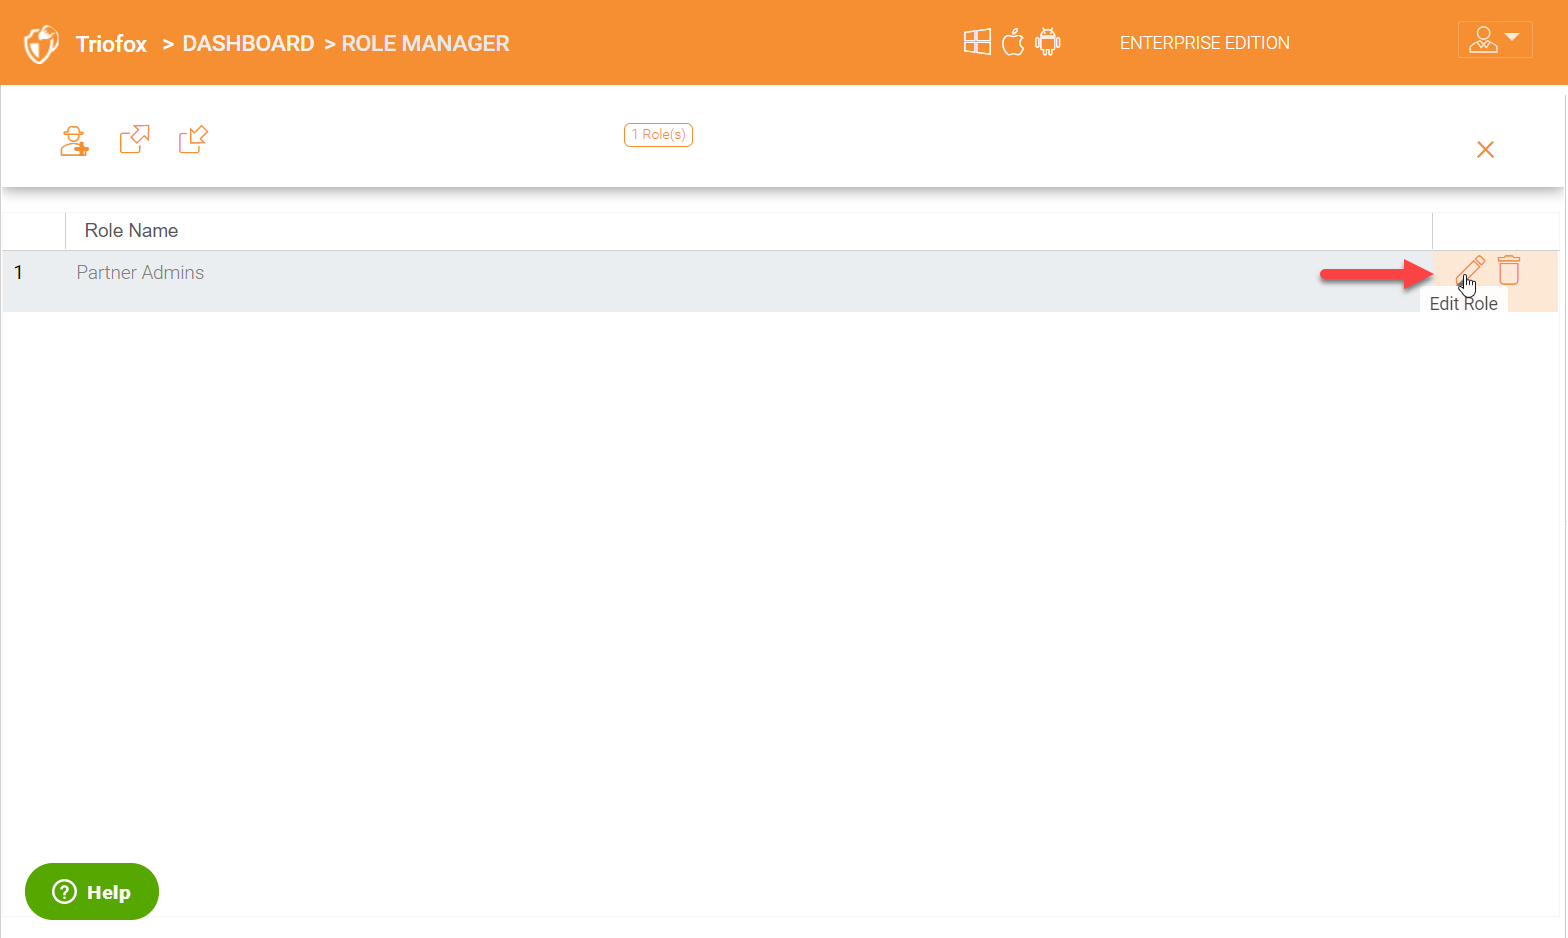
In order to edit a role, use the pencil icon on the right for a specific role.
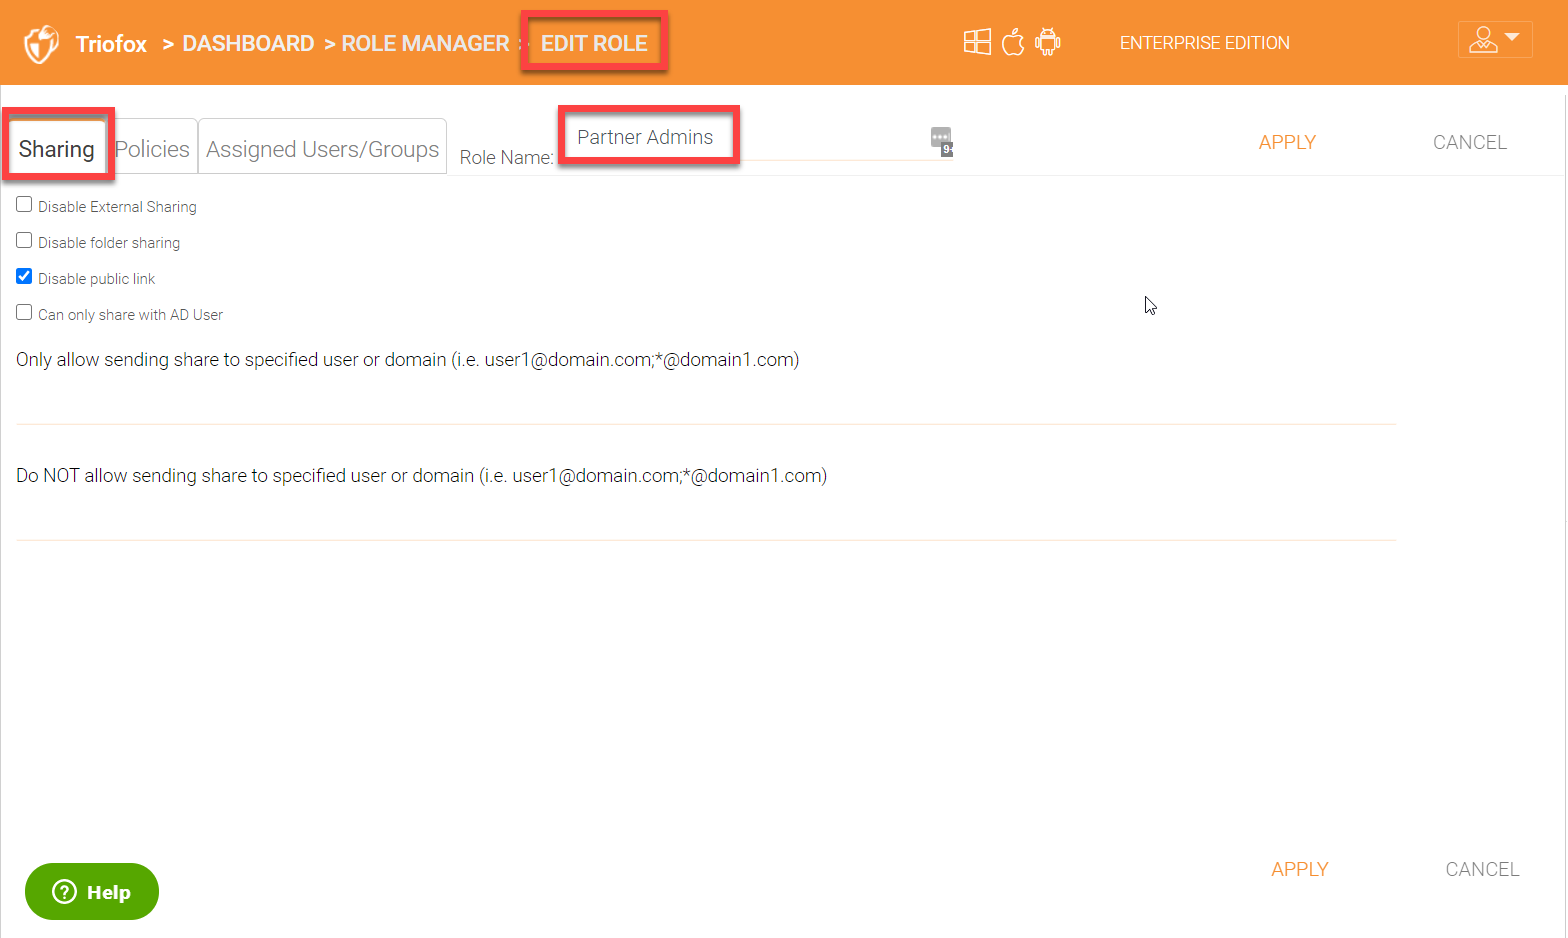
Sharing Tab
Under the sharing tab for a role, you have some settings that can be enabled to control sharing options on the company data.
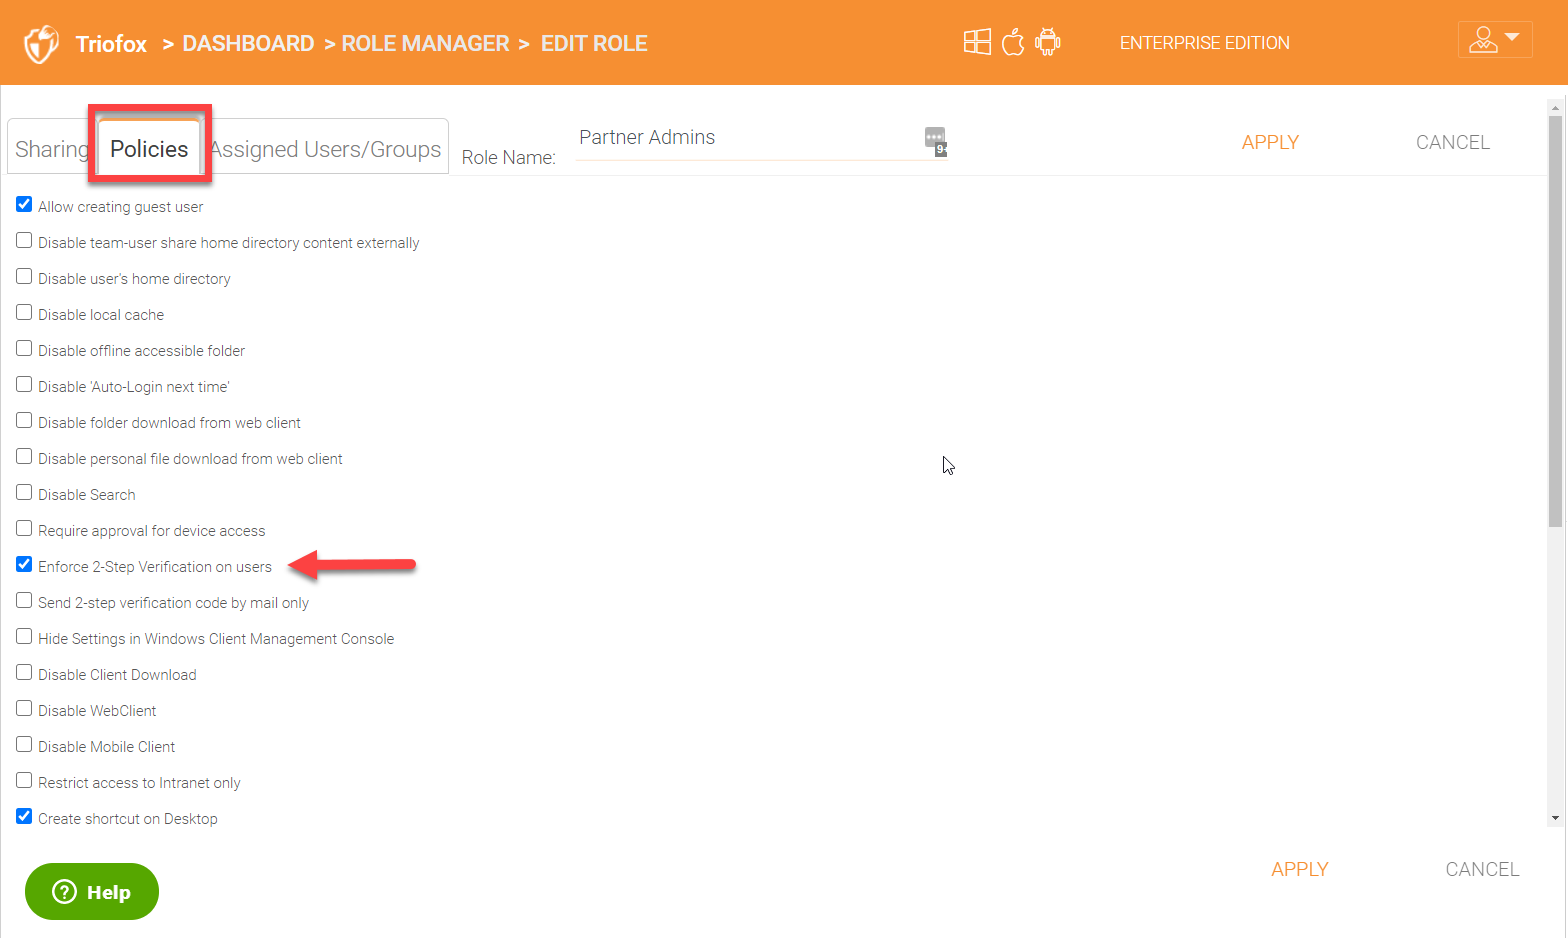
Policies Tab
Polcies tab has a number of settings to lock down the environment. Some of the settings can be used to enforce a feature for specific users or groups, for example, ‘Enforce 2-Step Verification on Users’ which will force all the users to configure their 2-factor authentication.
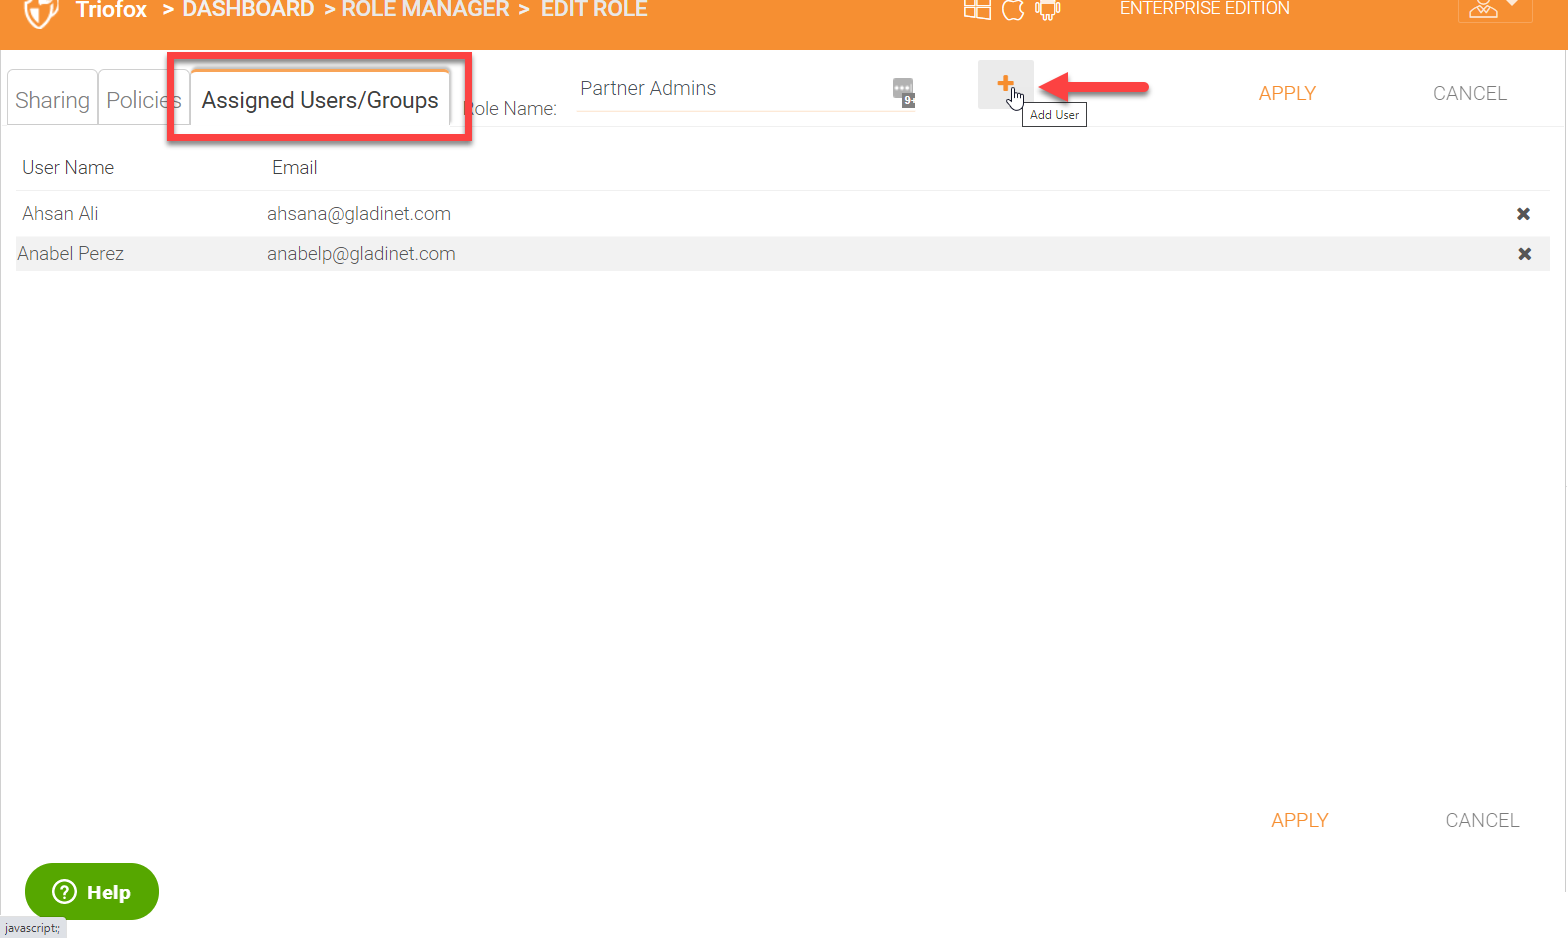
Assigned Users/Groups
You will see the users or groups assigned to the role under the ‘Assigned Users/Groups’ tab.
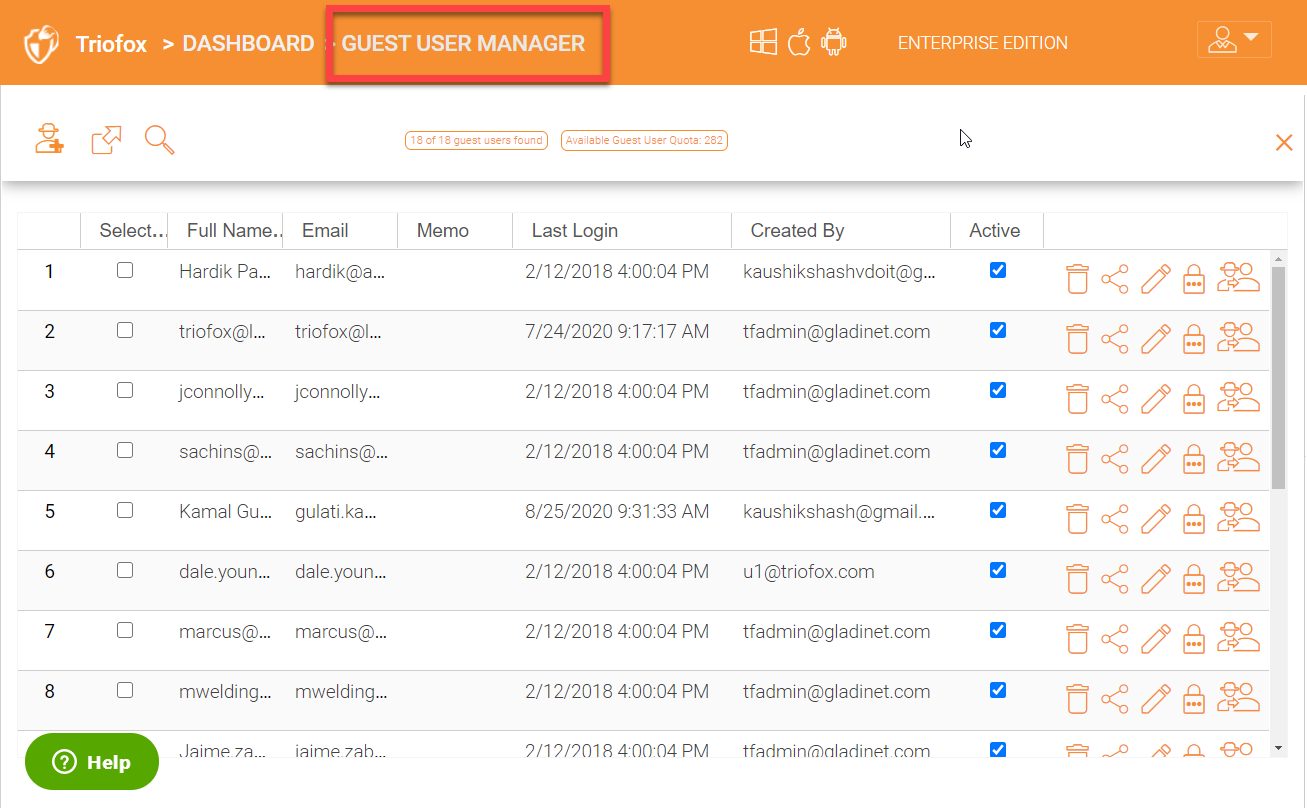
4.6 Guest User Manager
Guest user accounts can be created, deleted, and managed under the ‘Guest User Manager’. Guest users are external users who have read and write permissions on the shares even though they are not company employees. Guest users accounts can be created by the admin or can be automatically created when initiating a share and choosing full read and write permissions for the share.
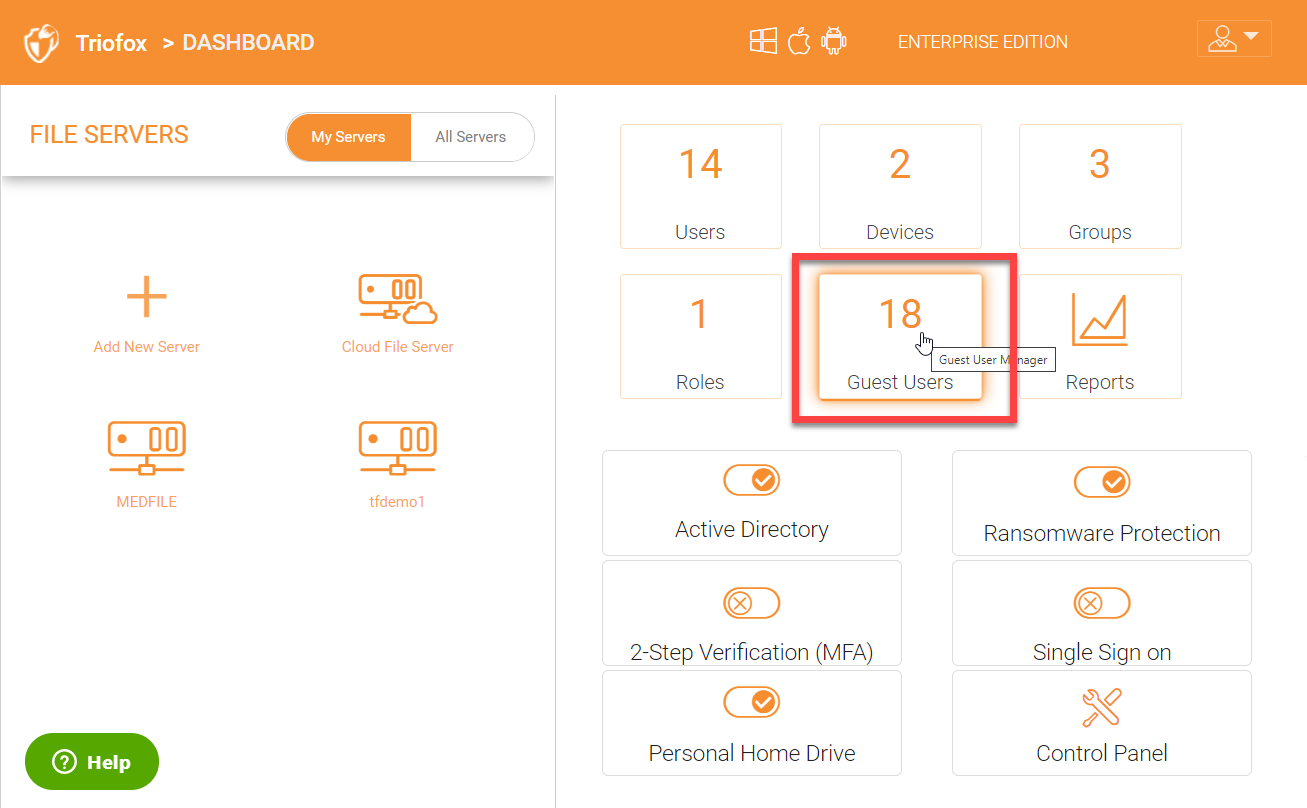
Click on the ‘Guest Users’ plugin in the right panel to get into the ‘Guest User Manager’ administration page.
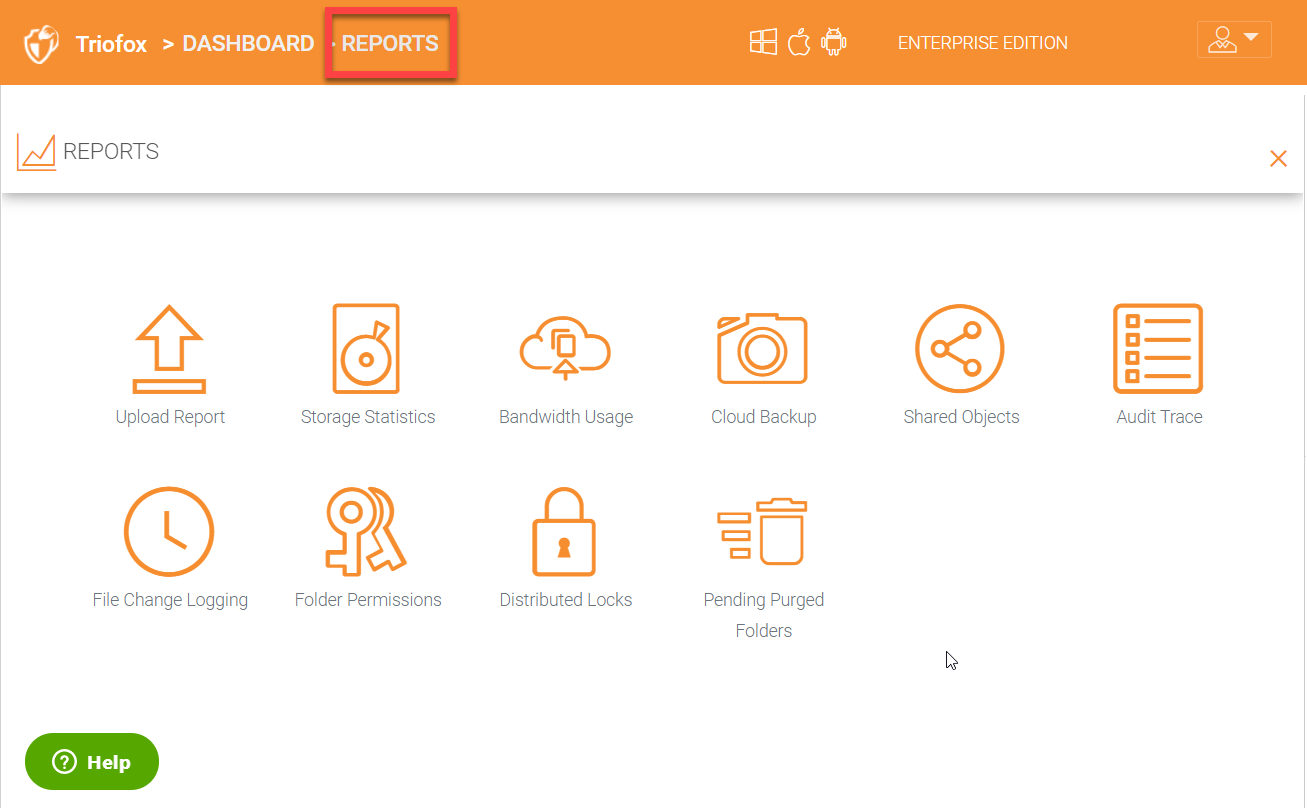
4.7 Reports
Triofox has built-in auditing and reporting built-in. A cluster admin can look at different reports under ‘Reports’.
The cluster administrator can look at the environment specific reports for the entire cluster.
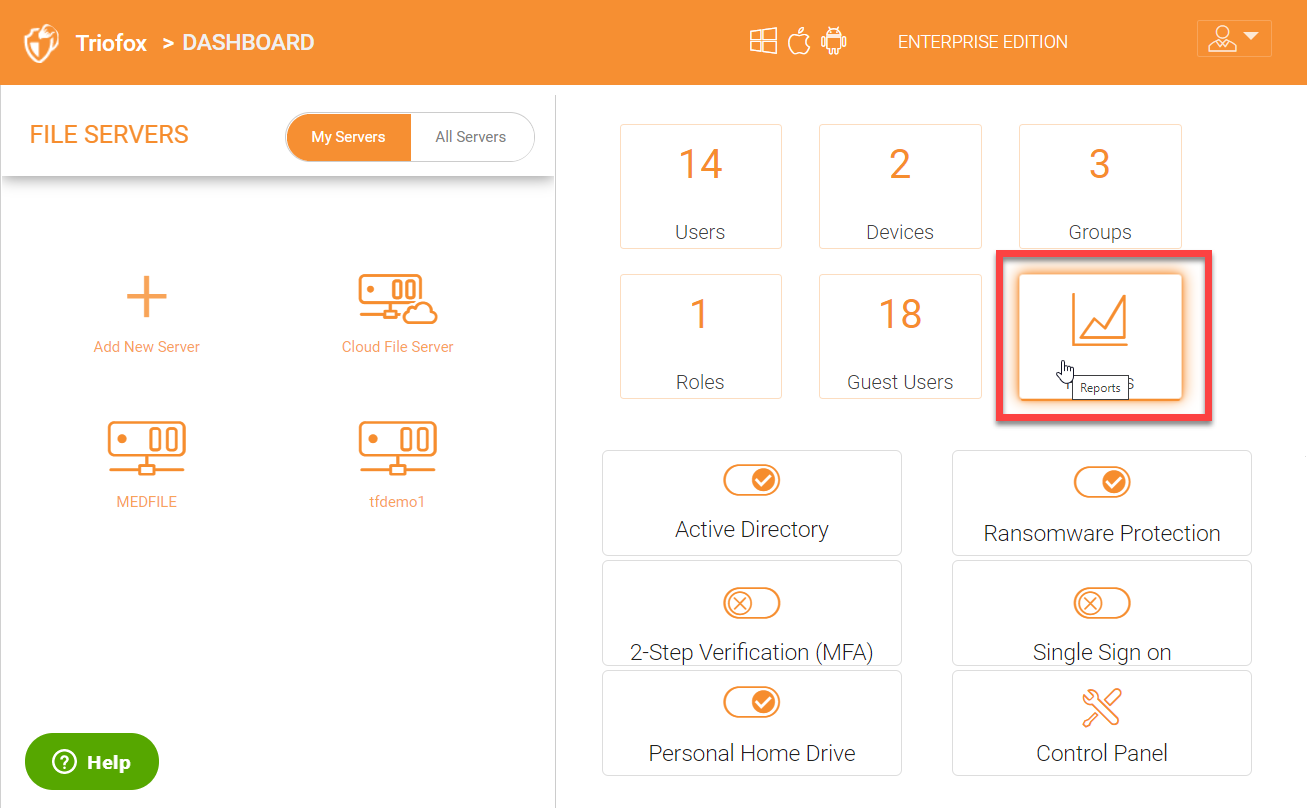
The Reports section has the following sub categories
Upload Report
Storage Statistics
Bandwidth Usage
Cloud Backup
Shared Objects
Audit Trace
File Change Logging
Folder Permissions
Distributed Locks
Pending Purged Folders
4.7.1 Upload Report
Upload report tab shows you graphs for all the uploads that have taken place in the last sixty minutes, 24 hours, 30 days and a whole week.
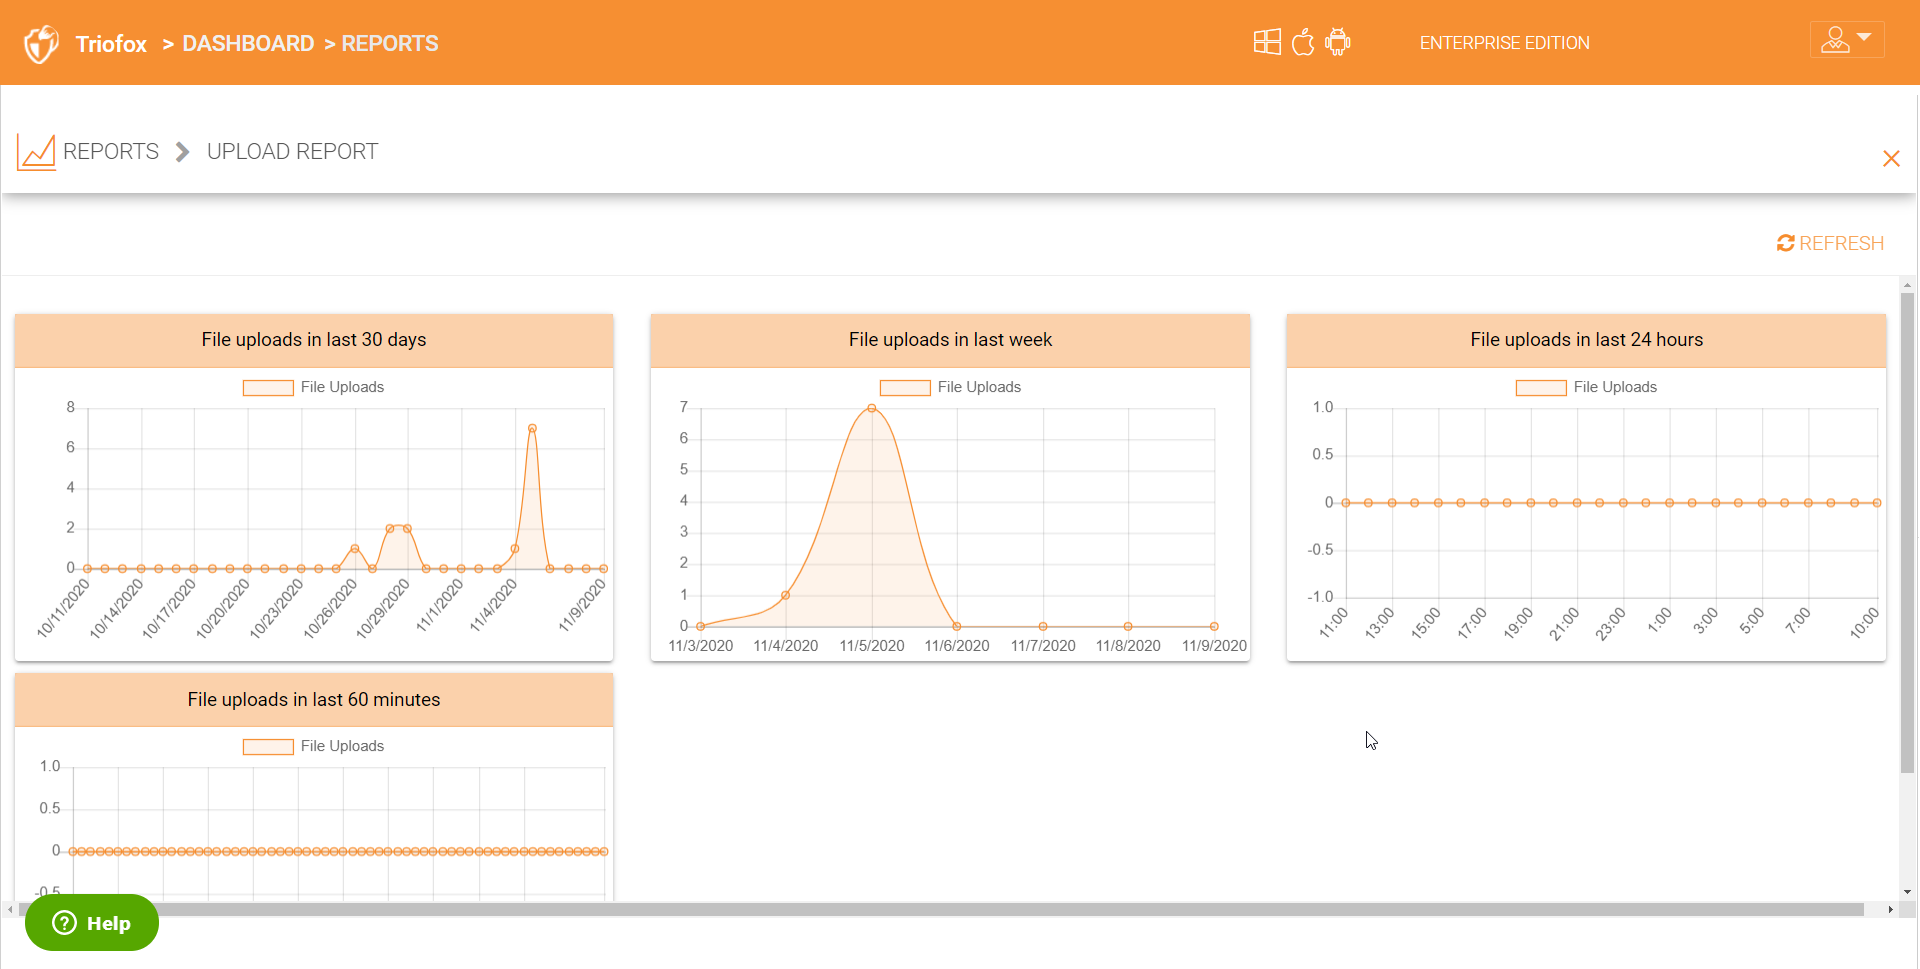
UPLOAD REPORT
4.7.2 Storage Statistics
Under storage statistics, you can see a quick overview of the overall storage statistics, size distribution file type distribution pie charts, and users who have used the most storage so far.
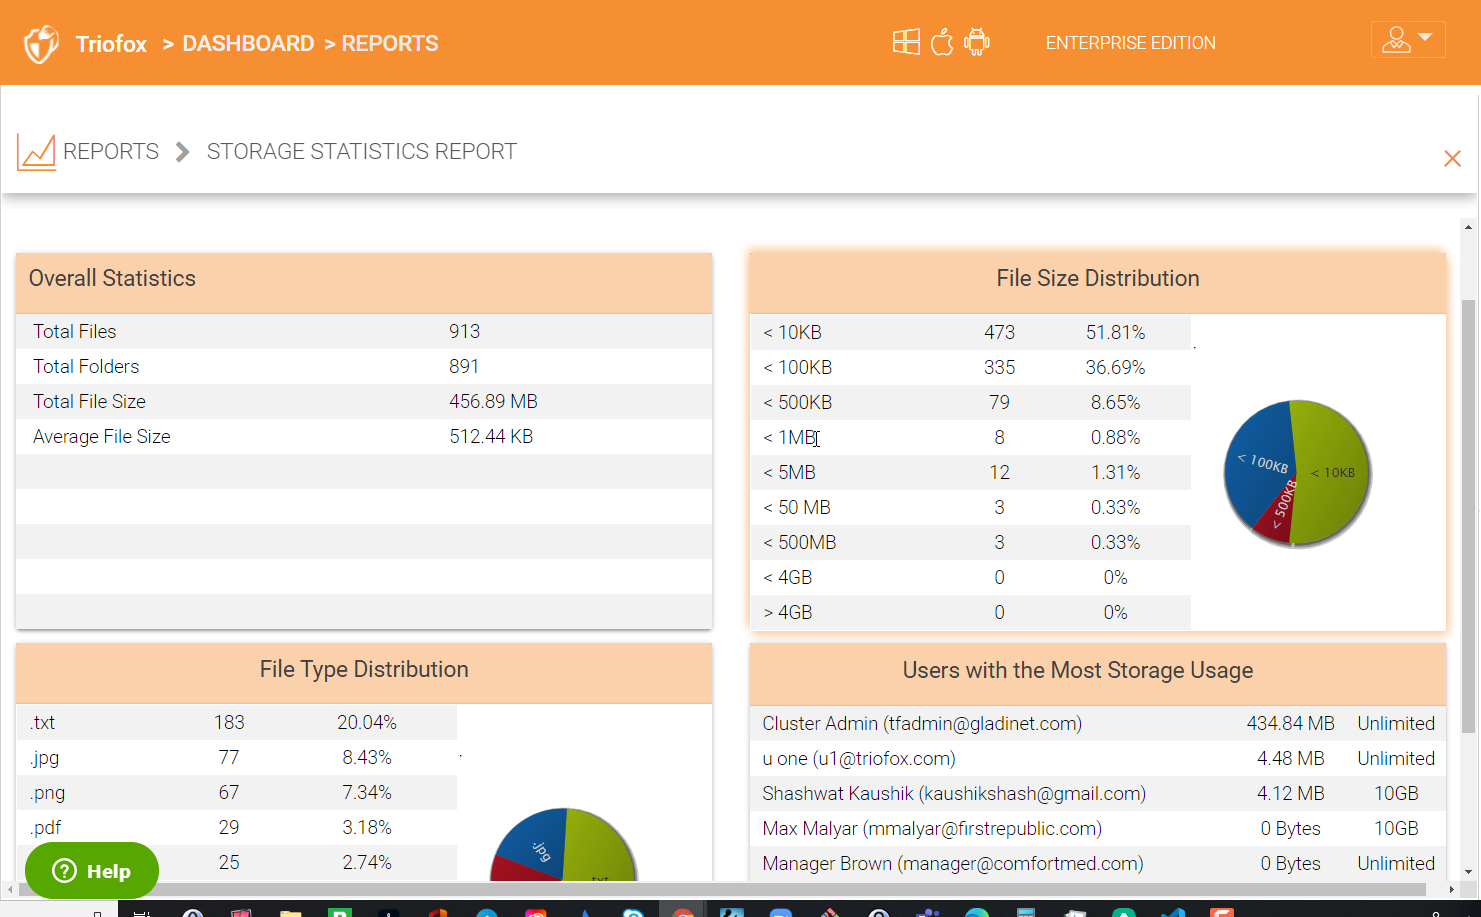
STORAGE STATISTICS REPORT
4.7.3 Bandwidth Usage
This shows the overall bandwidth usage statistics as well as more granular tenant and user level statistics.
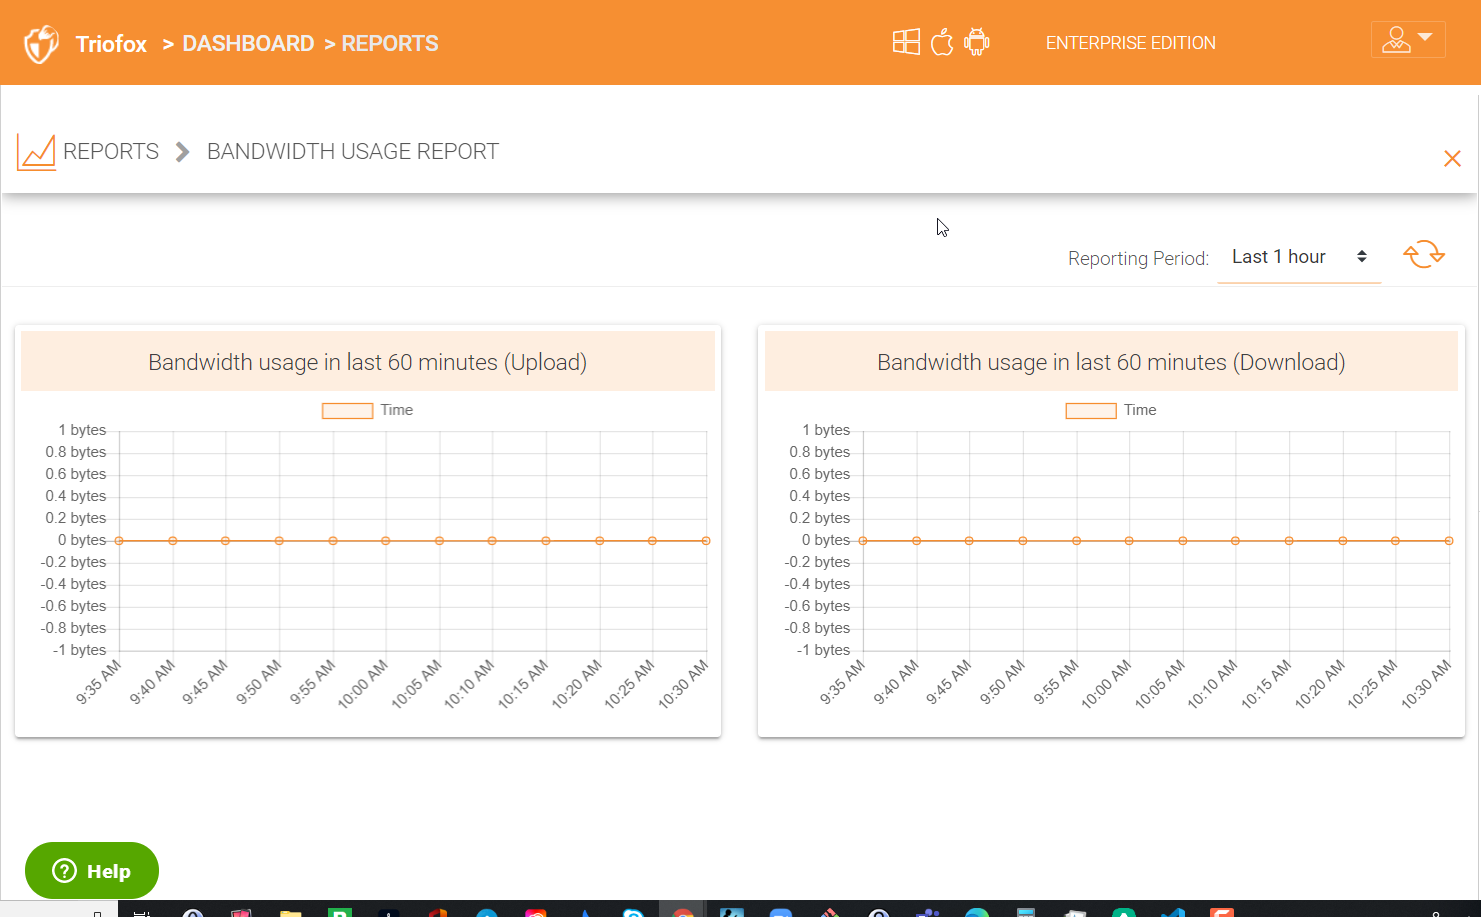
BANDWIDTH USAGE REPORT

4.7.5 Shared Objects
This shows all the files and folders that have been shared so far.

SHARED OBJECTS REPORT
4.7.6 Audit Trace
This is a sample audit trace. Audit trace reports can be generated for an individual user, by the trace content, or by the action. For example, under action an admin can choose actions like ‘Start Sharing’, ‘Delete User’, and many other similar actions.
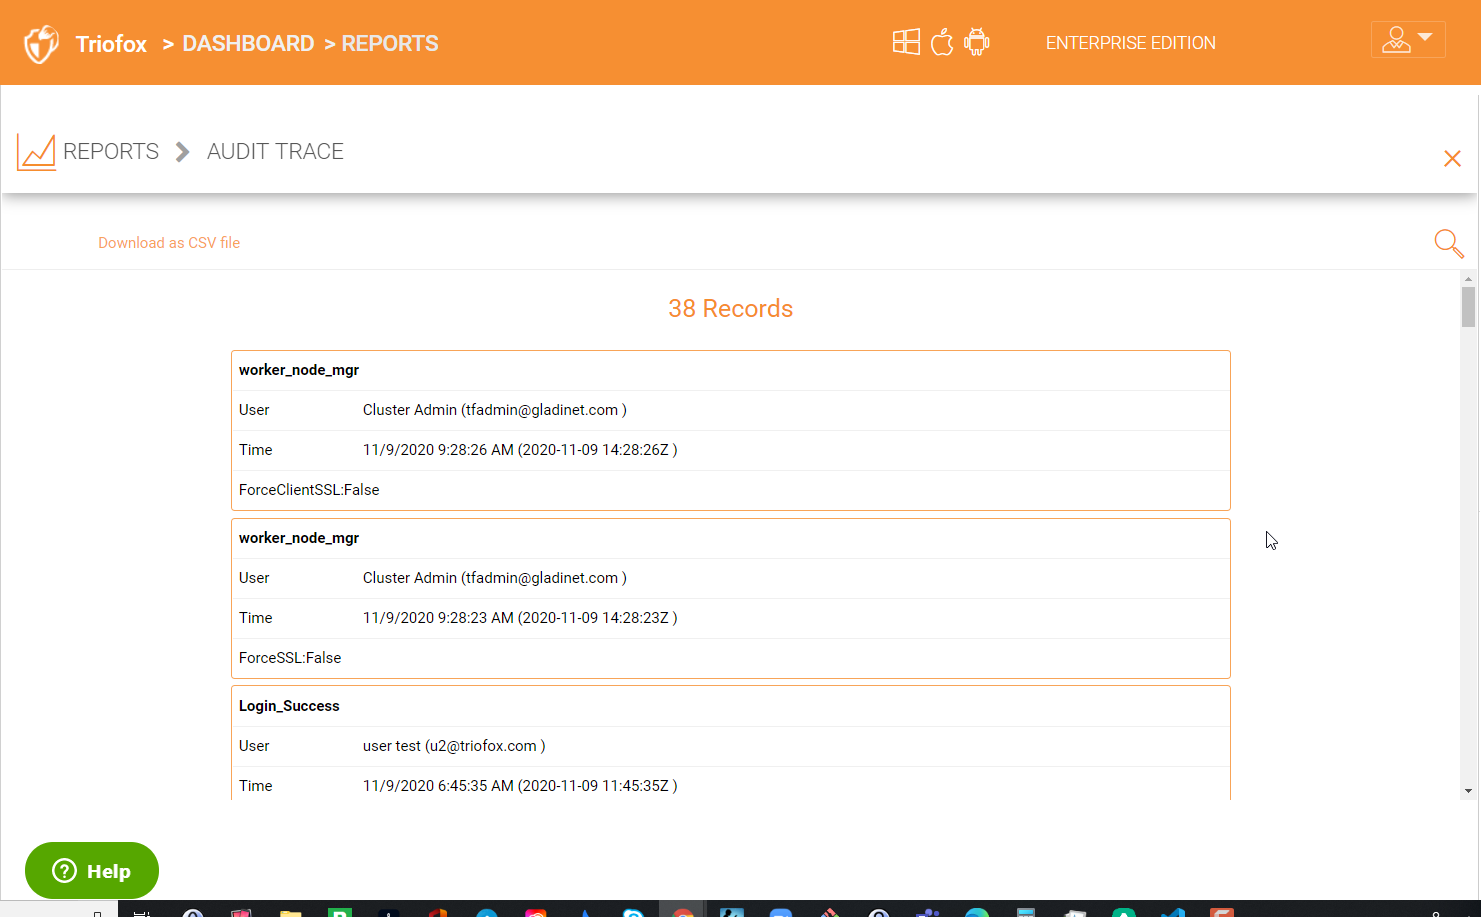
AUDIT TRACE REPORT
4.7.7 File Change Logging
This is a sample file change log report. File change log reports can be generated for an individual user, by the file name, or by the action. For example, under action an admin can choose actions like ‘Add Comments’, ‘Create Folder’, and many other similar actions.
FILE CHANGE LOGGING REPORT
4.7.8 Folder Permissions
This shows all the permissions for all the folders.
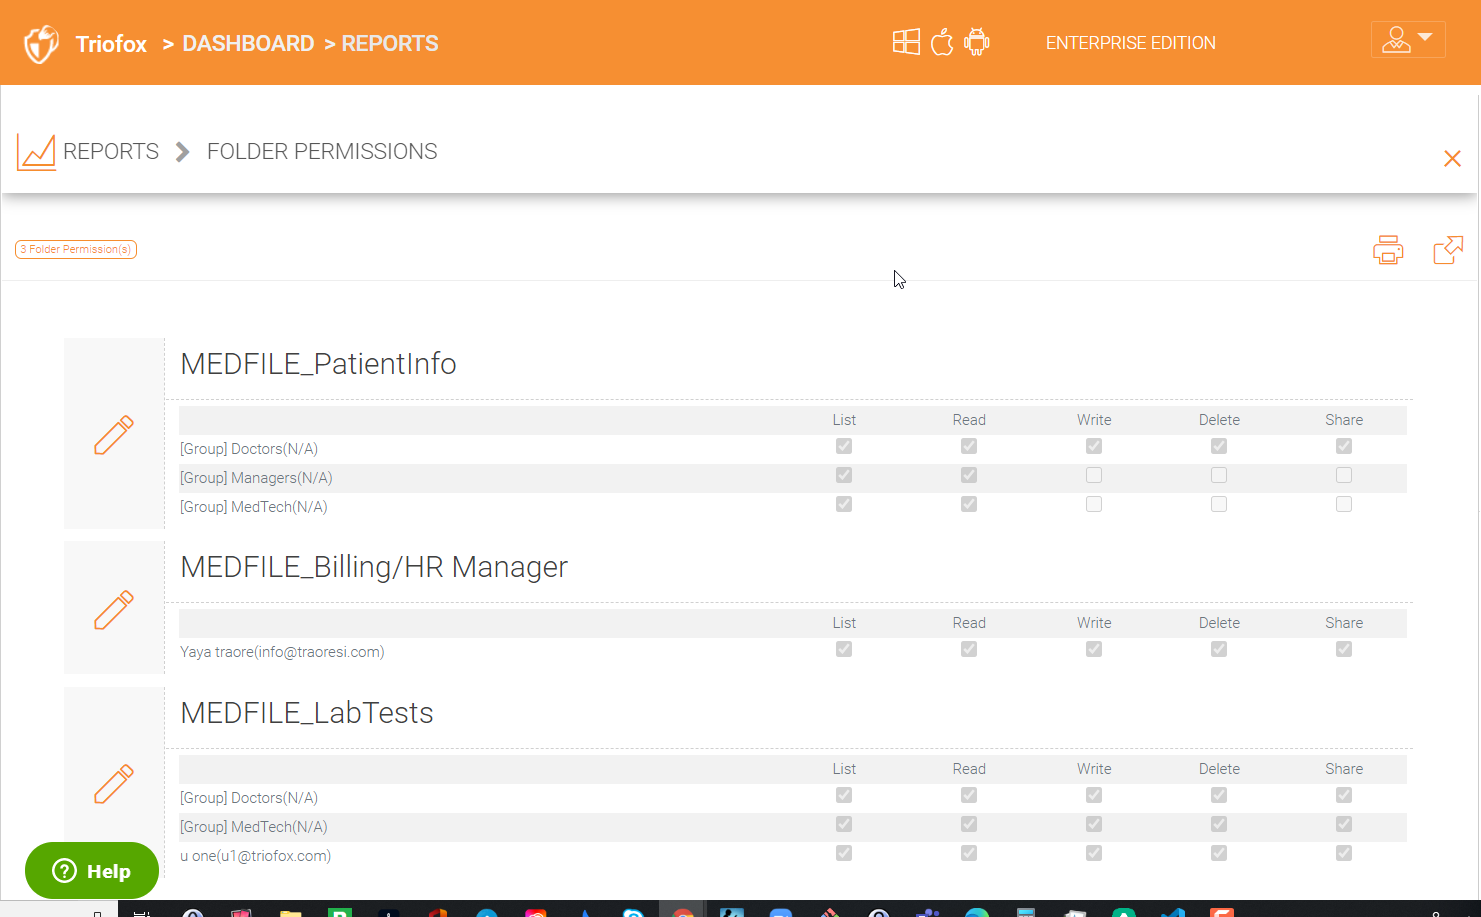
FOLDER PERMISSIONS REPORT


4.8 Active Direcotry Integration
You can integrate your existing Active Directory infrastructure by using the ‘Active Directory’ plugin in the right panel. Active Directory integration saves time by allowing users to automatically login with their existing Active Directory credentials. Triofox also maintains the existing NTFS security permissions on the shares.

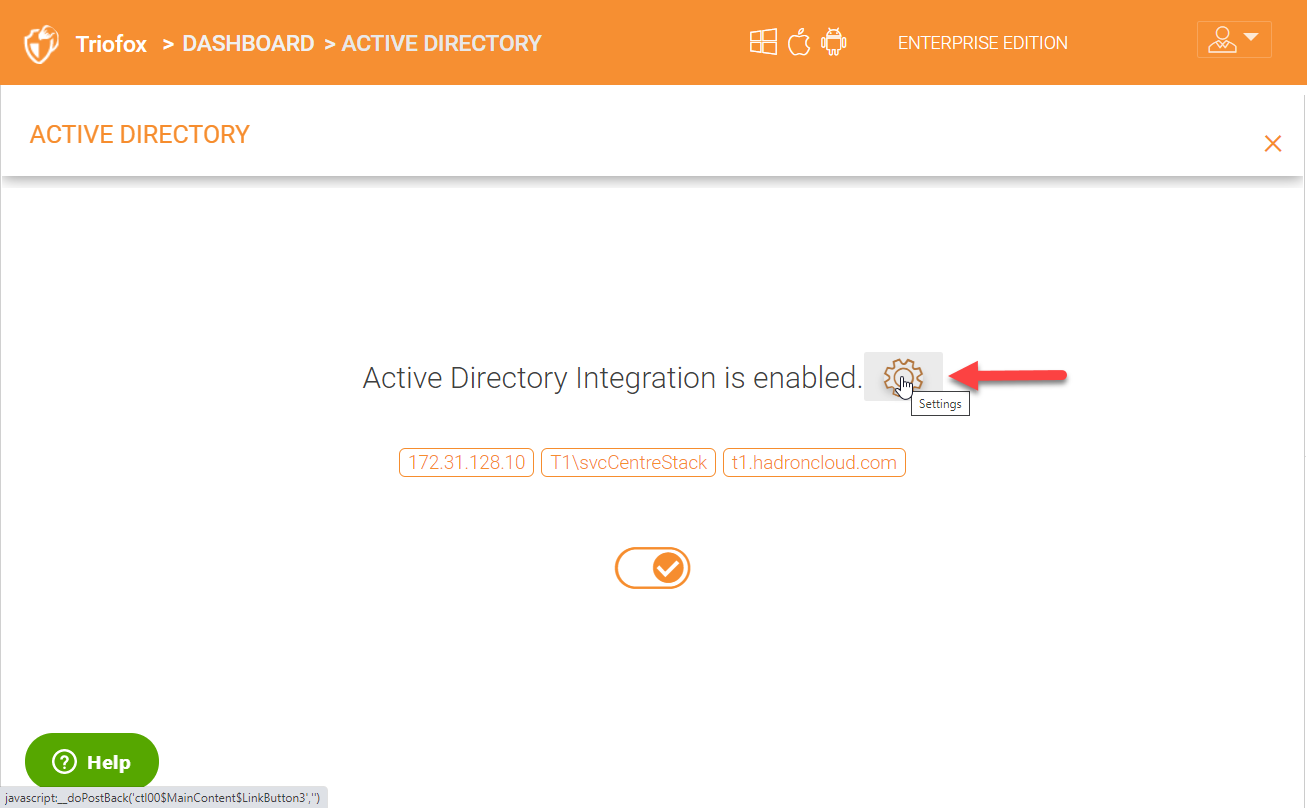
In order to configure or make changes to Active Directory configuration, click the ‘Active Directory’ name to get into the Active Directory configuration page.
You can see the details of your Active Directory environment on the AD configuration page and to make changes click on the settings gear icon.
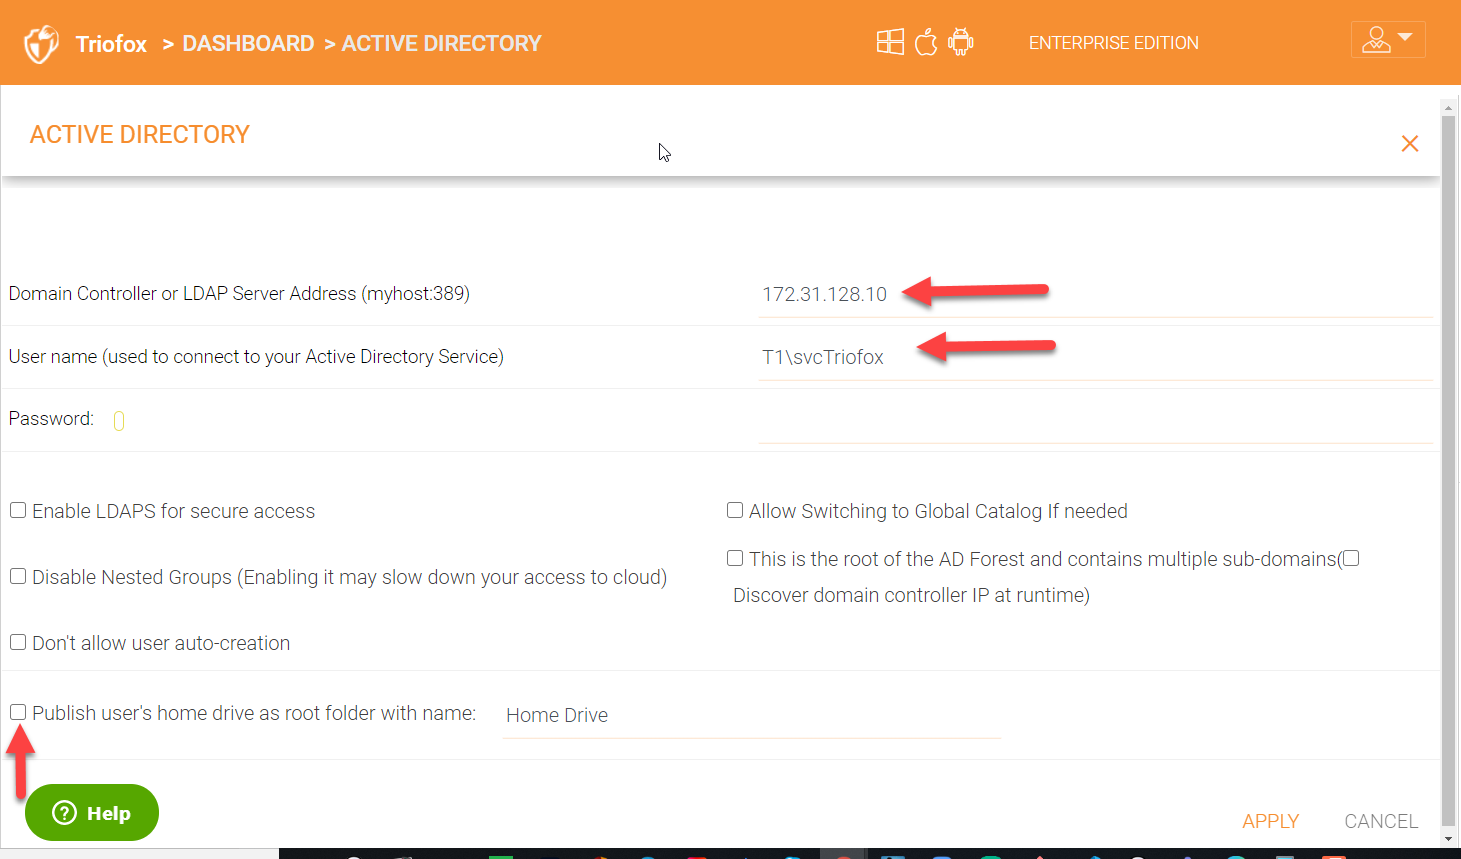
Once inside the settings page, you can change your domain controller server and specify the domain credentials which has access to the AD environment. You also have other settings that you can enable or disable if desired for example, publishing a Active directed user’s home drive.
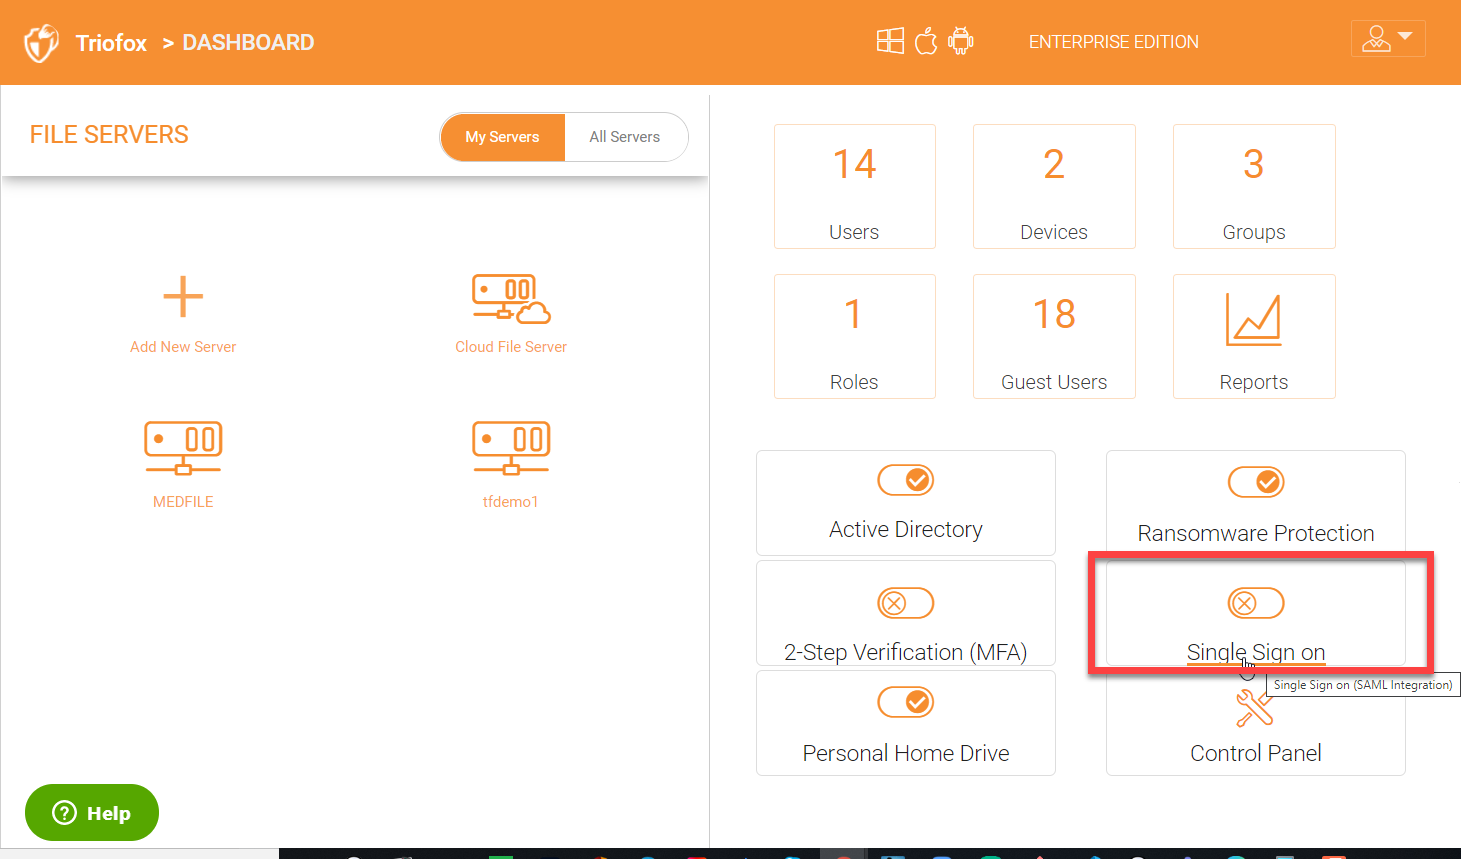
4.9 Single Sign-On
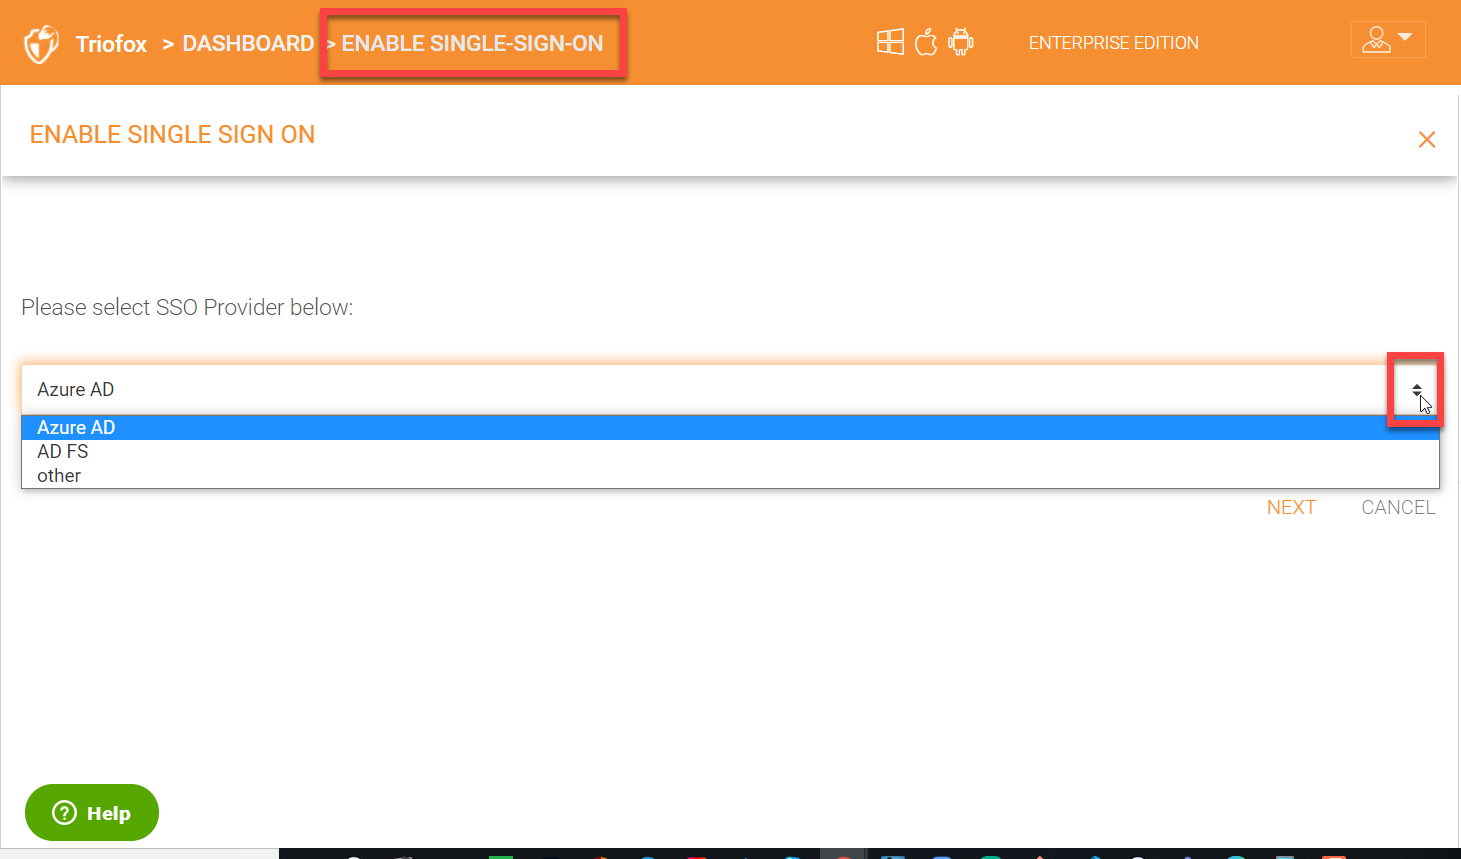
If there is a need to enable single sign-on, you can use the Single Sign On plugin in the right panel.
Triofox supports SAML integration with Azure AD, AD FS or other identity providers like Okta, OneLogin, Ping Federate etc.
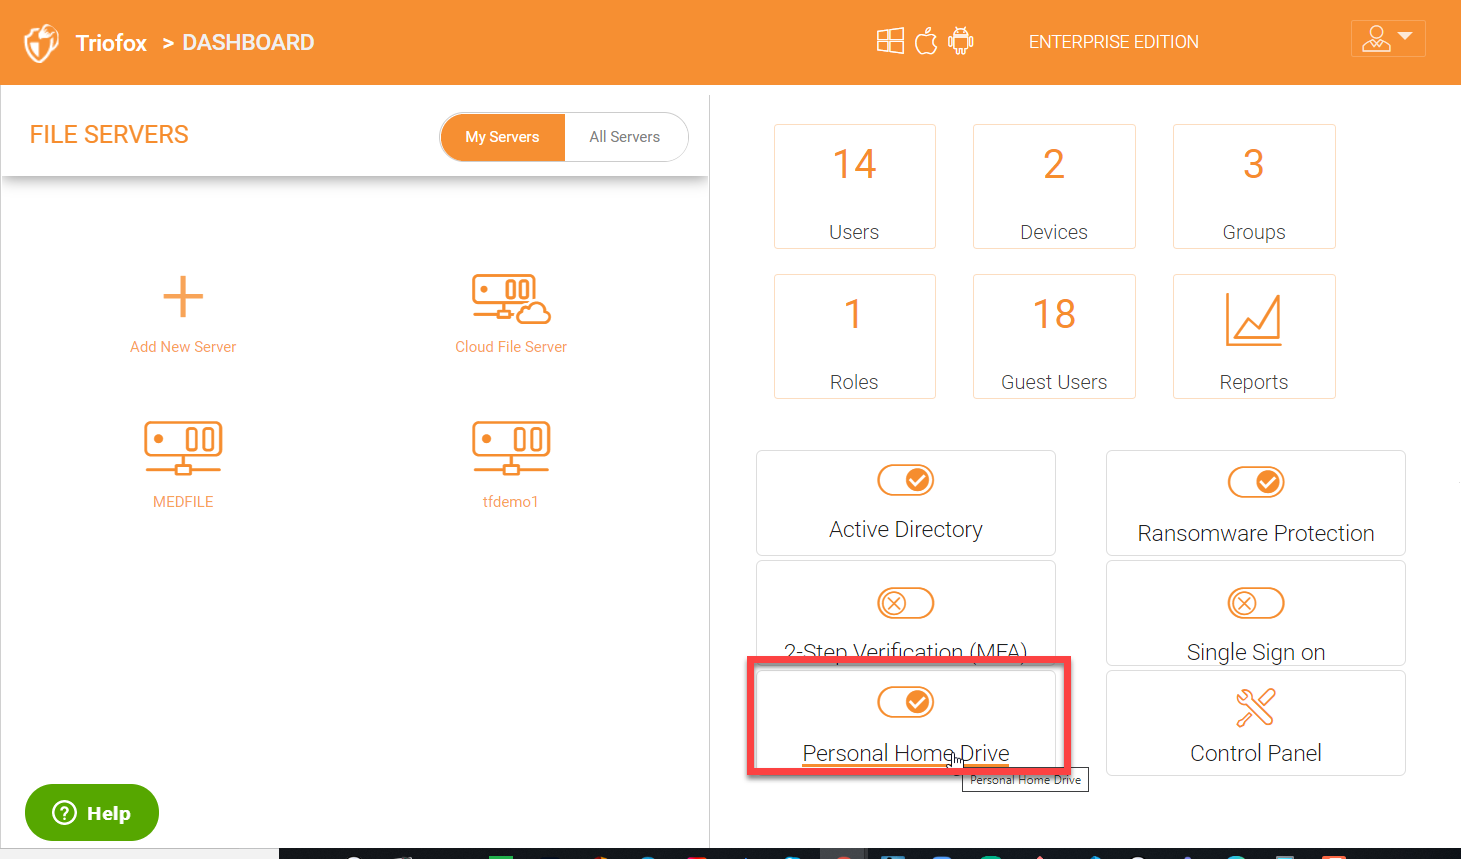
You can also enable ‘Personal Home Drive’ for users so they can create folders and add content in their Triofox personal drive. This is different than the Active Directory Home Drive.
4.10 Ransomware Protection
Triofox adds ransomware protection and alerts to your file server. It will monitor the Triofox clients and automatically shuts them down if it sees a possible attack. It also sends an alert to the administrator when it detects the threat from the server-side and adds versioning and offsite or cloud backup of your file server, allowing you to recover from any attacks or accidental deletions.
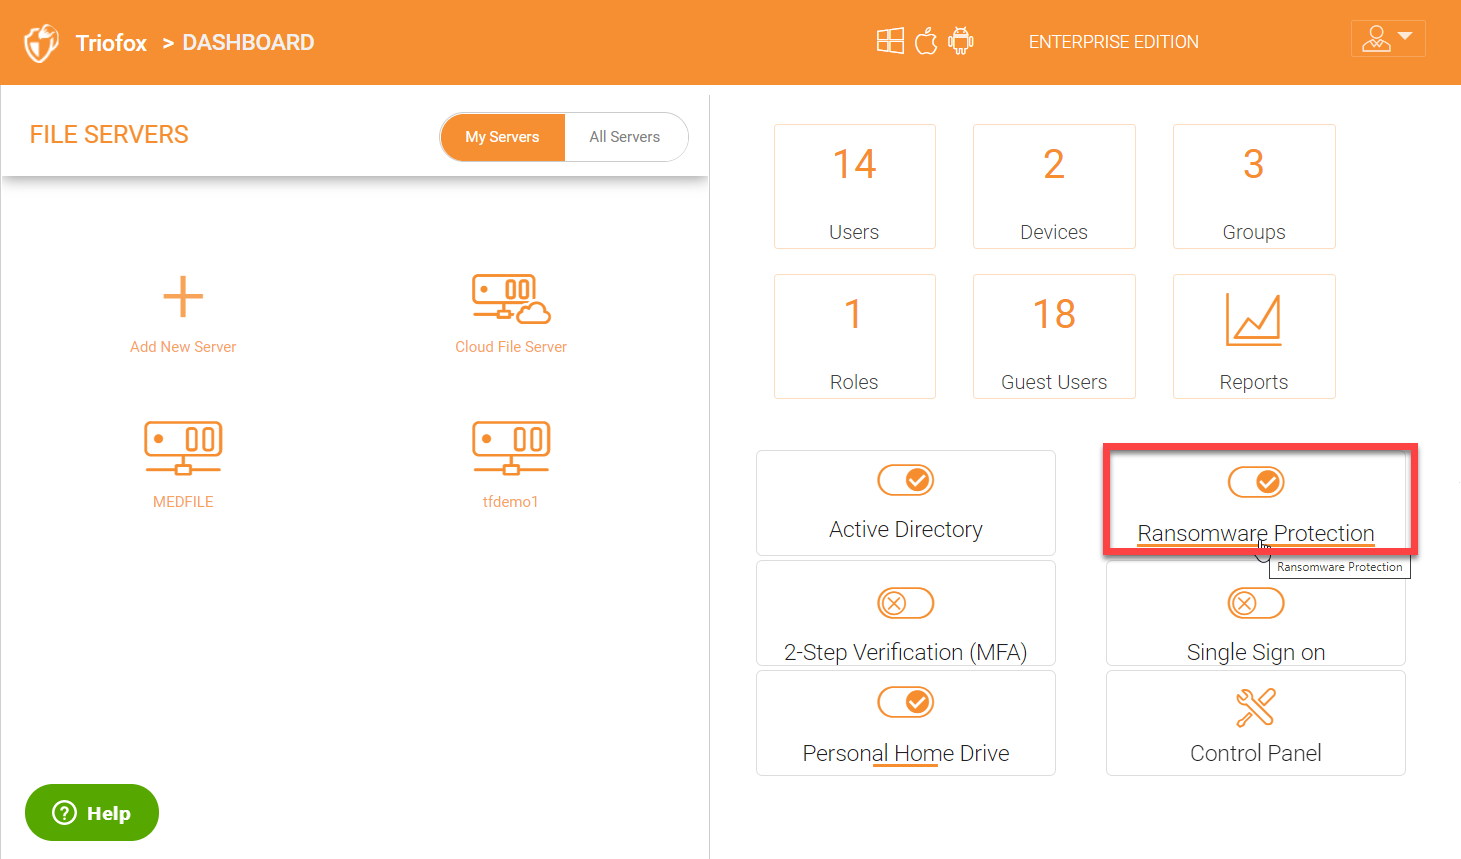
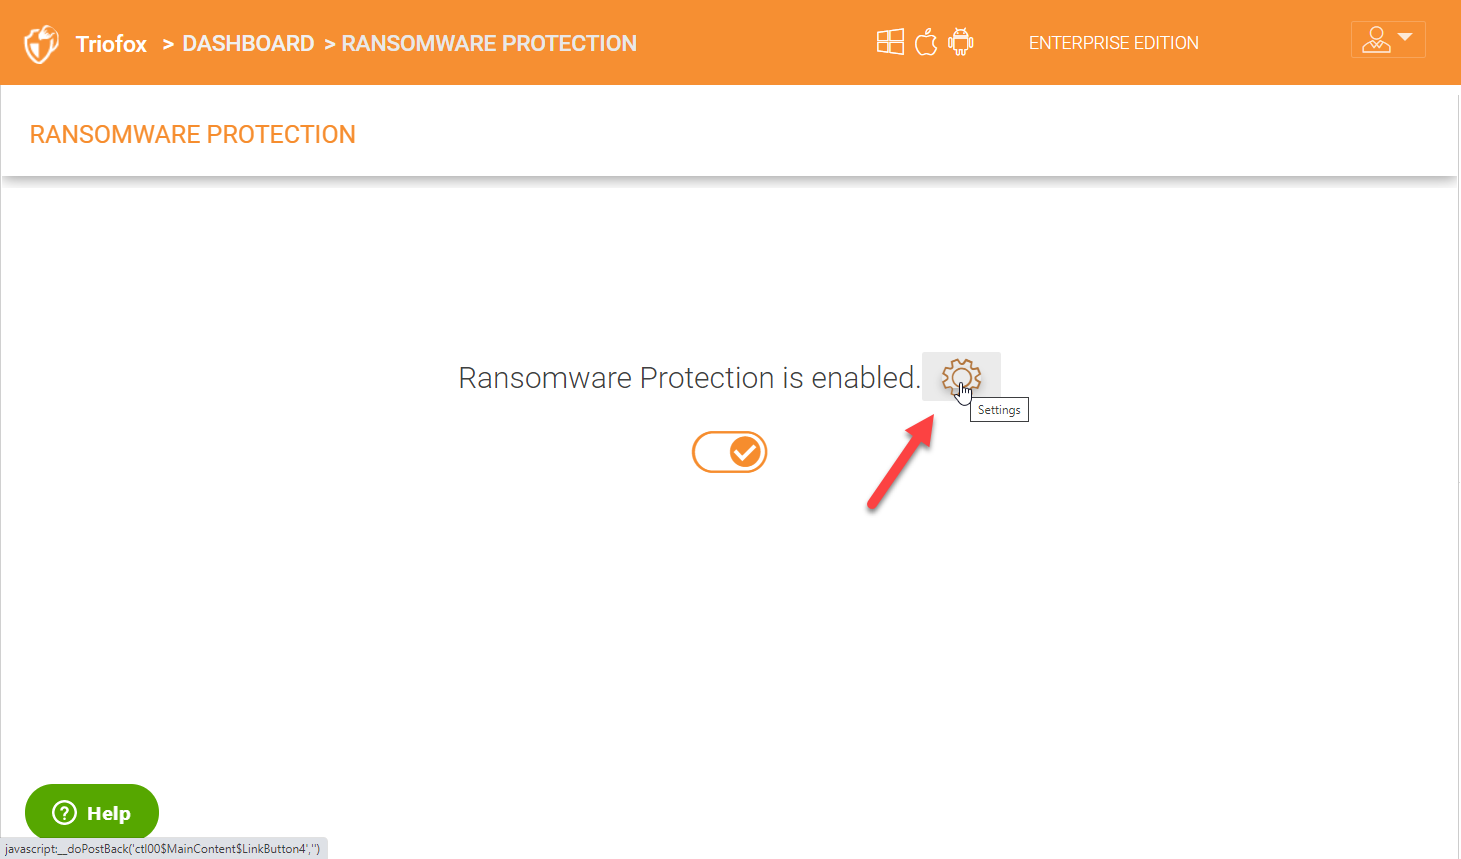
You can enable ransomware protection by enabling it in the right panel.
Once ransomware protection is enabled, click the settings icon to see more options.
Below is a list of all the additional ransomware settings that you can enable.
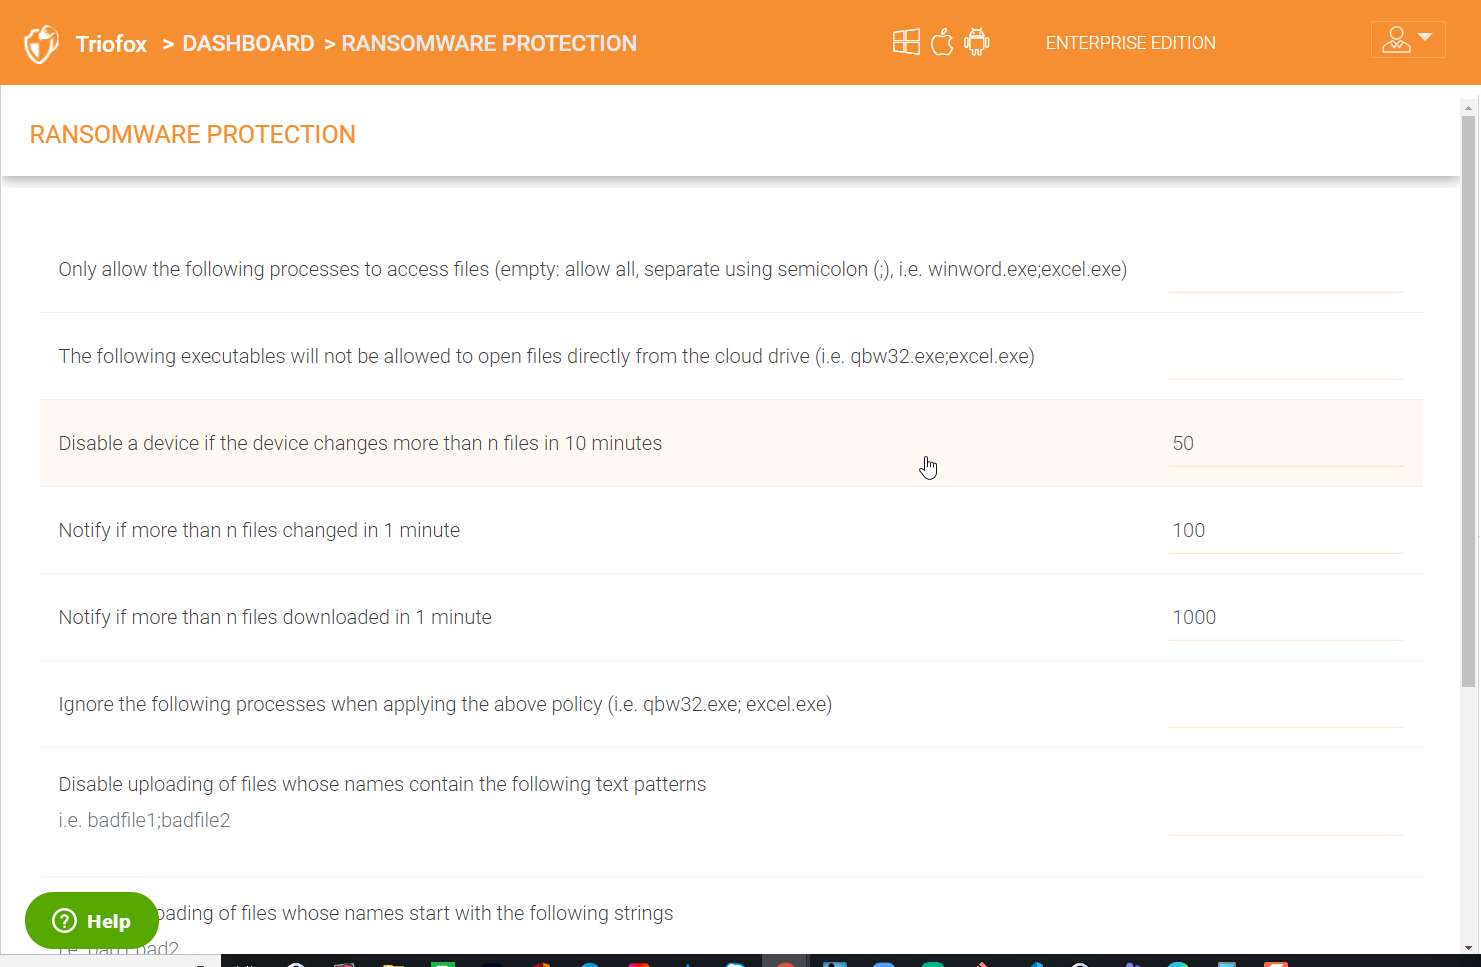
“Only allow the following processes to access files (empty: allow all, separate using semicolon (;), i.e. winword.exe;excel.exe)”
If you want to only allow specific processes that users can access, you can specify them here. If left empty, all file types will be allowed.
“The following executables will not be allowed to open files directly from the cloud drive (i.e. qbw32.exe;excel.exe)”
If there are certain .exes that should not be allowed to open from the Triofox drive, you can add them here.
“Disable a device if the device changes more than n files in 10 minutes”
Specify the limit for the number of file changes from any device in this field. The default is 50. If any device tries to change more than 50 files in a period of 10 minutes, Triofox server will “Automatically take action and disable that device.
“Notify if more than n files changed in 1 minute”
You can specify how many files can be changed in one minute before an alert will automatically be sent to the cluster admin. The default is 100.
“Notify if more than n files are downloaded in 1 minute”
Specify a number in this for the amount of downloads before an alert should be sent to the administrator. The default is 1000.
“Ignore the following processes when applying the above policy (i.e. qbw32.exe; excel.exe)”
Input the processes where the above ransomware settings configured above should not apply.
“Disable uploading of files whose names contain the following text patterns i.e. badfile1;badfile2”
Add the files which contains certain file patterns which should be allowed to upload in this field.
“Disable uploading of files whose names start with the following strings i.e. bad1;bad2”
Specify the names of files which start with certain strings which should be disabled automatically from uploads.
“Disable uploading of files whose names end with the following strings i.e. bad1;bad2”
Input the filenames with certain ending strings which should be allowed to upload here.
“Disable client when upload is disabled”
When this setting is enabled, it will automatically disable the client.
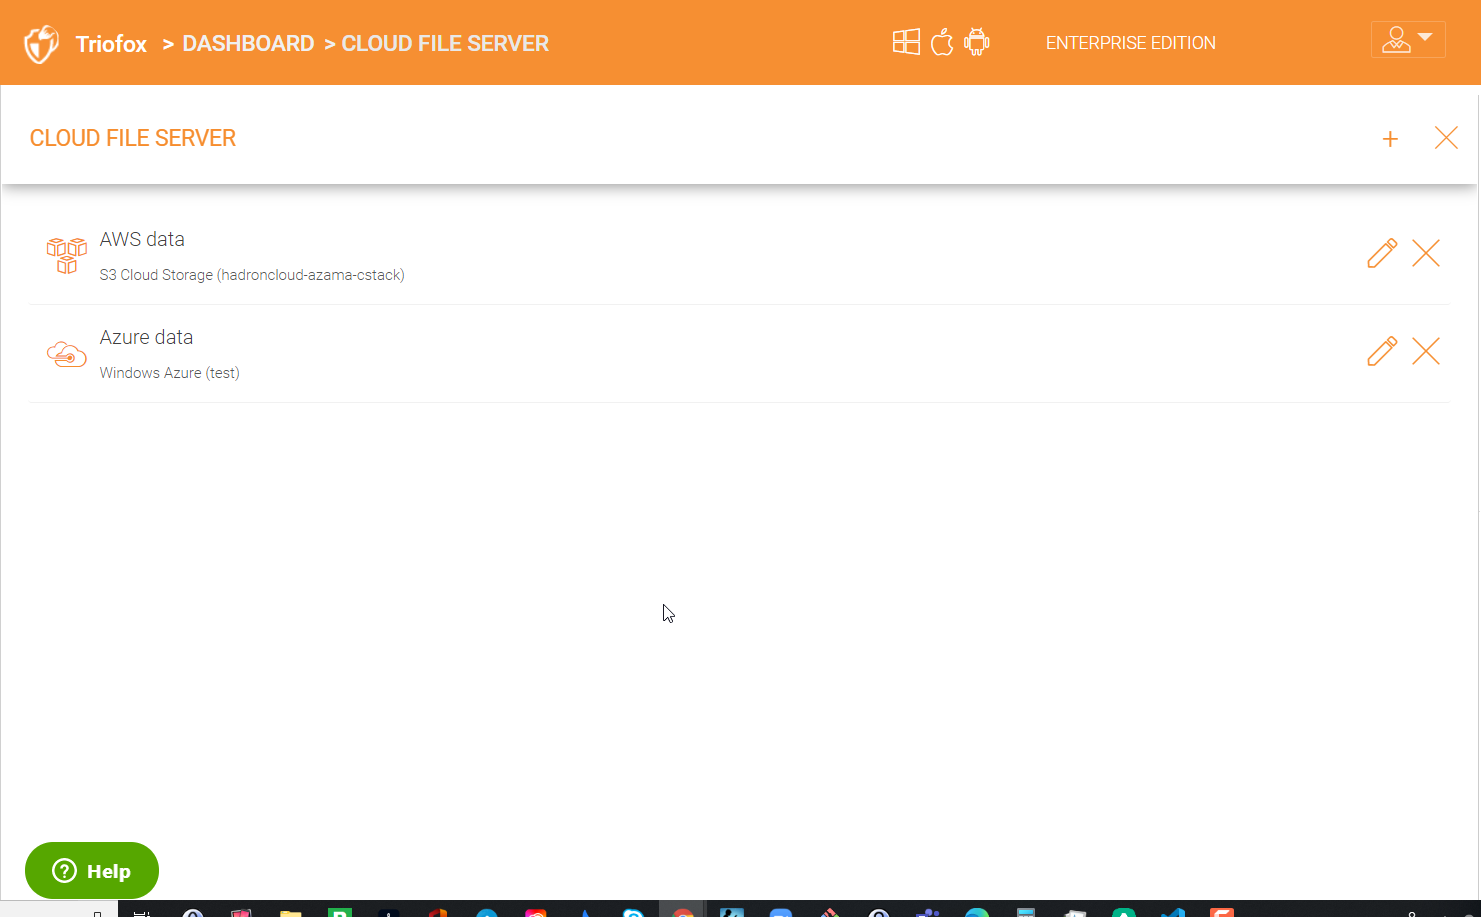
4.11 Cloud File Server
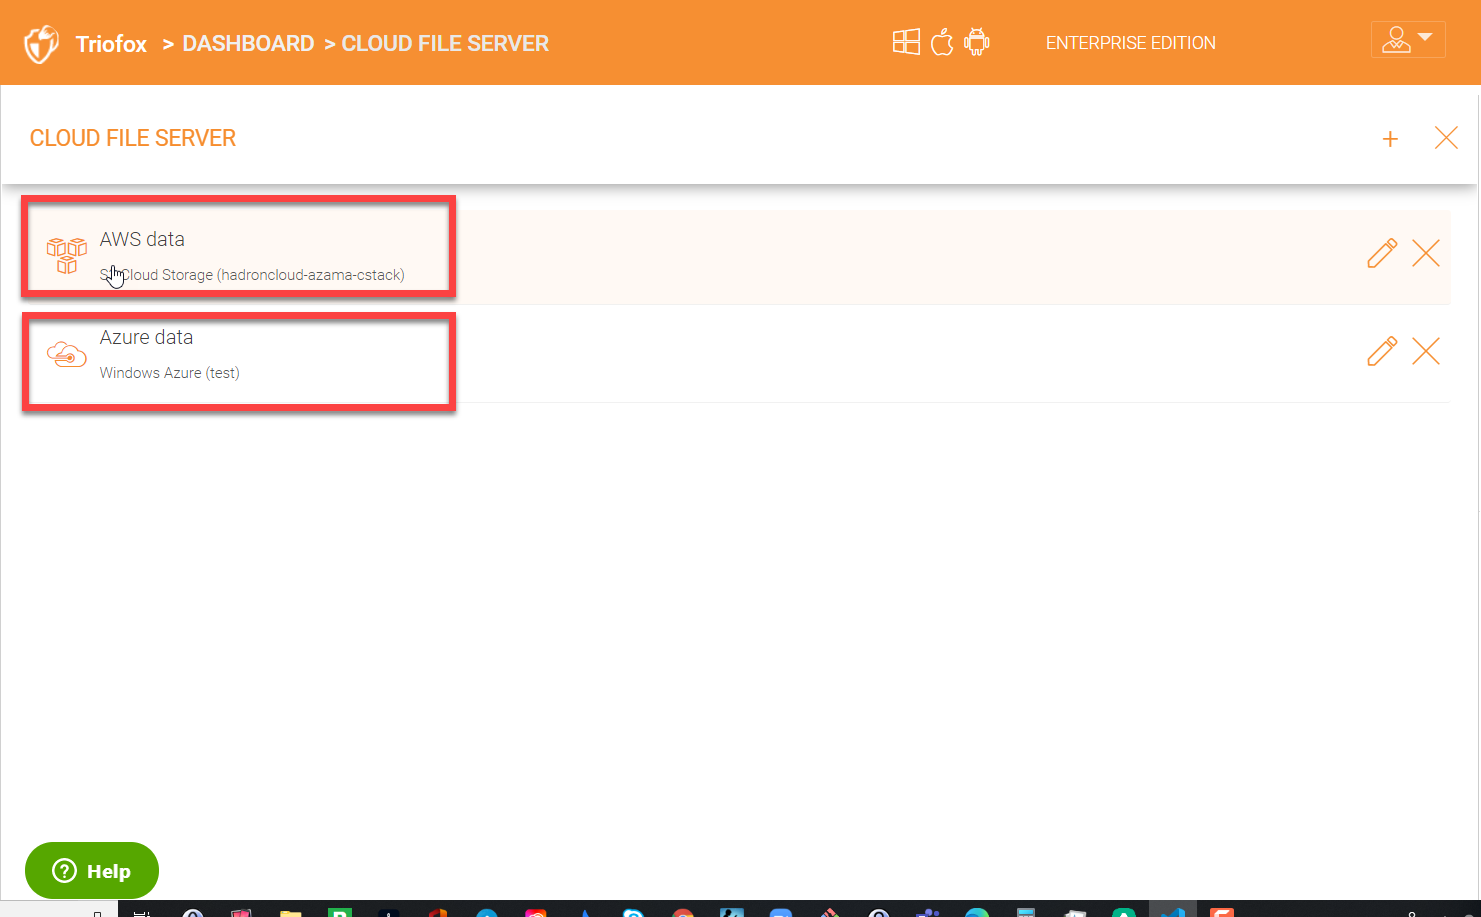
Cloud file server enables organizations to connect to data that is already in the cloud and present that data to users in a mapped drive on their desktops or on their mobile platforms. You can connect to many cloud storage services like AWS S3, Azure blob, Azure file shares, Wasabi, and many others.
In the screenshot below, you can see this environment has already attached data in AWS S3 and Azure blob.
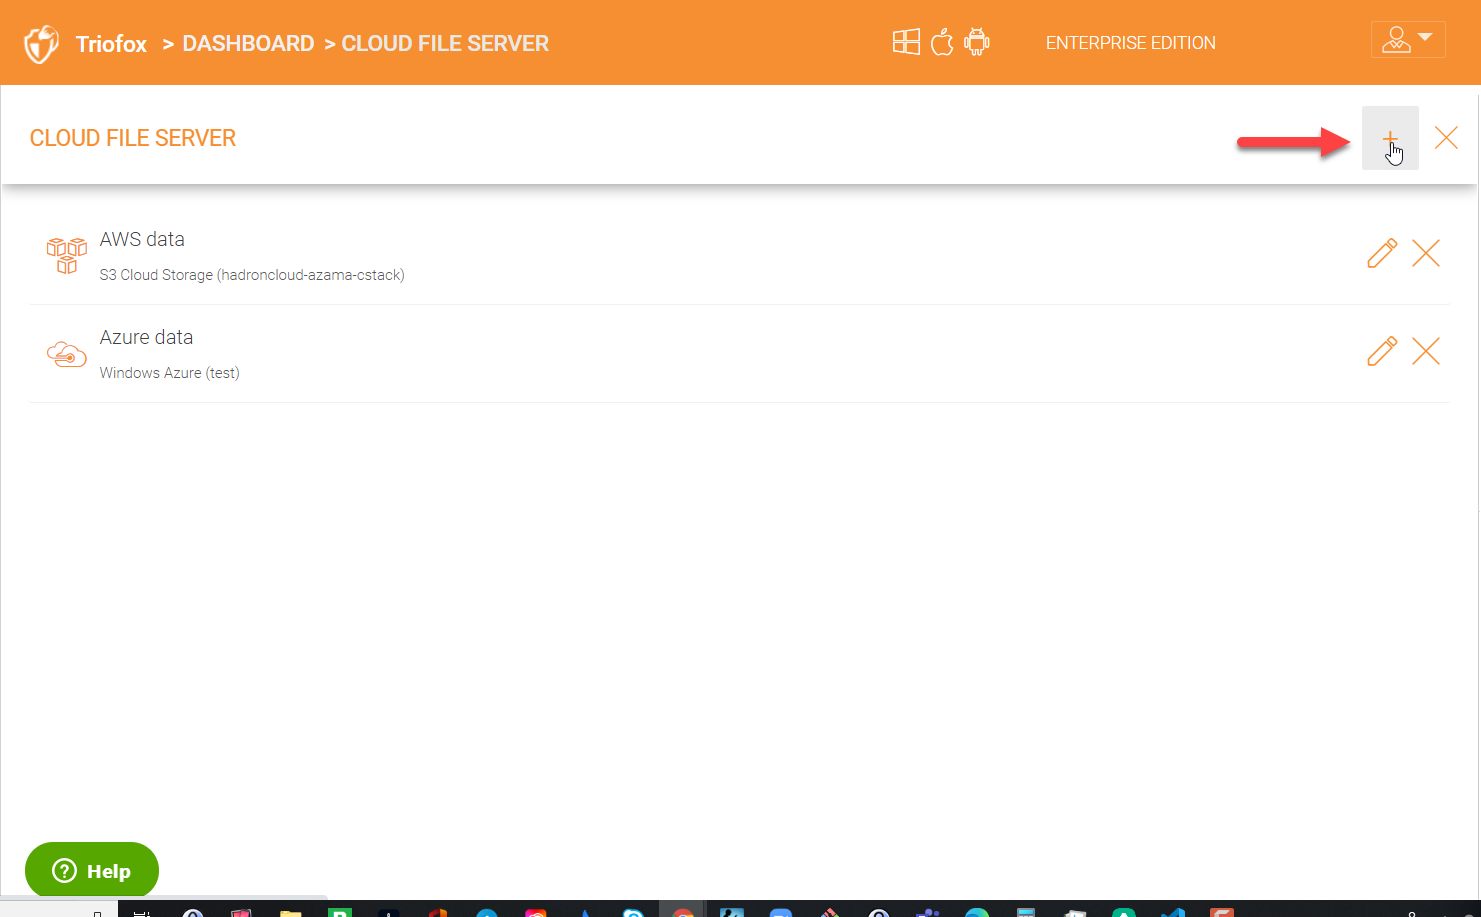
In order to add a new cloud storage account, click the ‘+’ icon in the upper right.
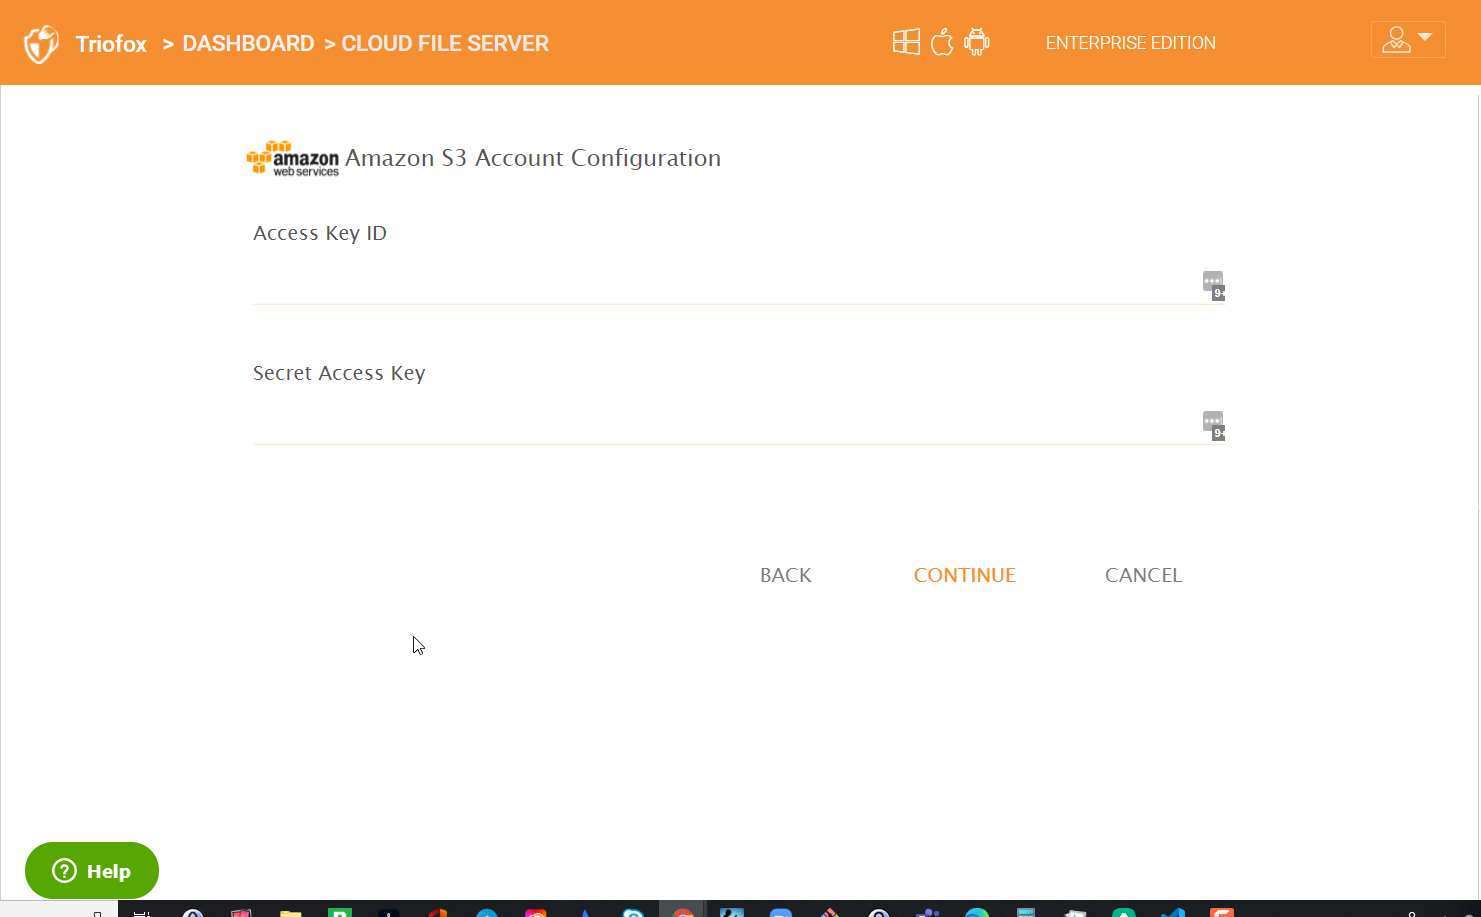
In the next panel, choose the cloud storage service that you would like to connect.
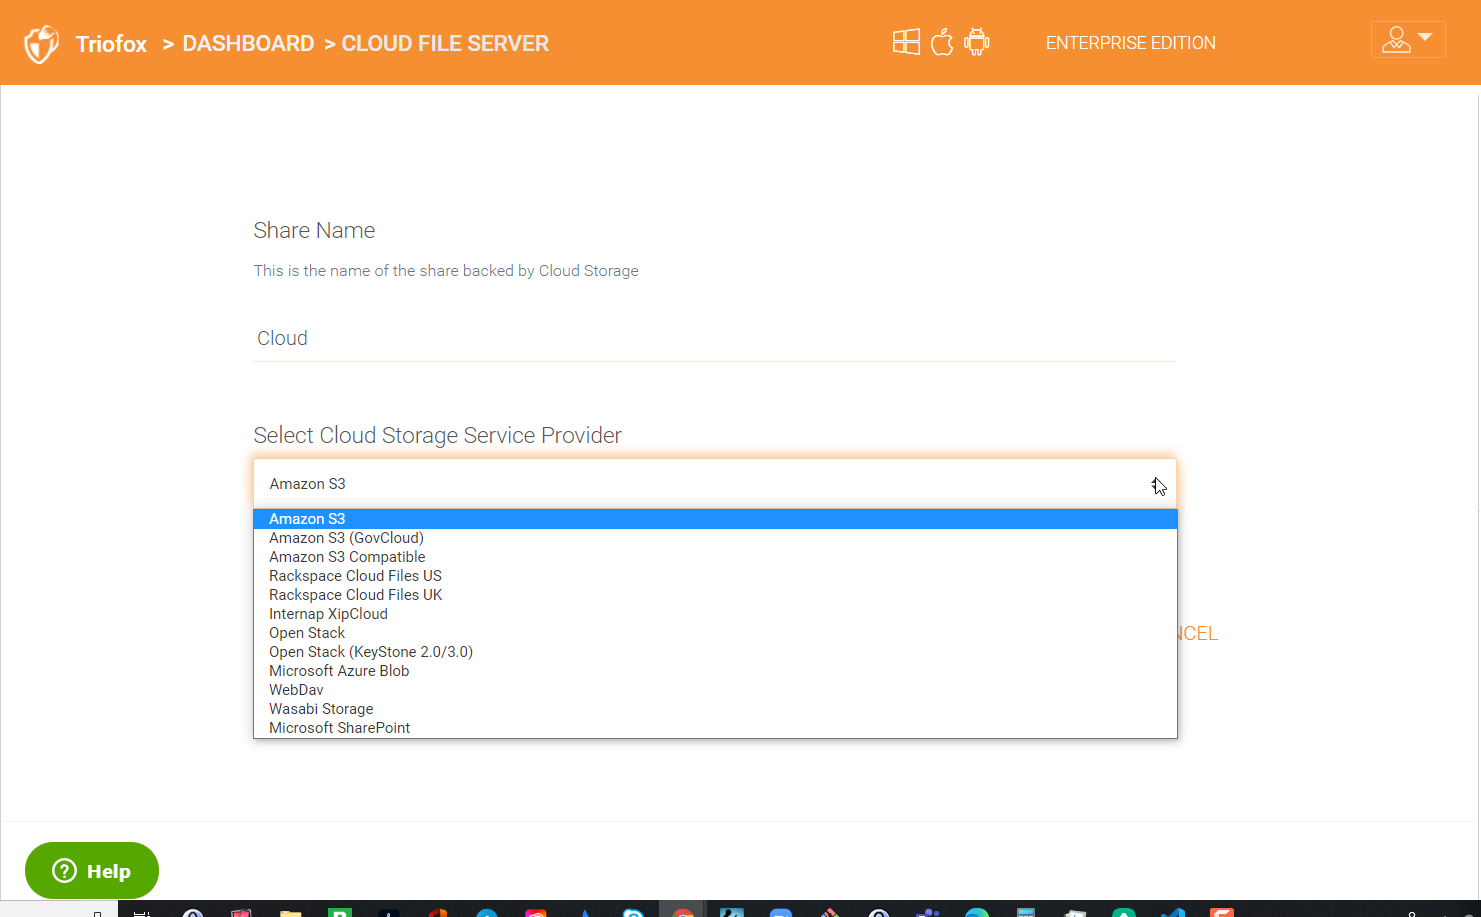
Then provide the Access keys and other details required to connect to the storage service. After that users who are given the access, will see the cloud data folders when they login.
In order to assign users to the cloud folders, click on the cloud folders.
Then you can go to the ‘Access Control’ tab and hit the ‘+’ icon to add users. You can also define further restrictive granular permissions under ‘Folder Permissions’.